
How to Train a LoRA
The Best Solution for Consistent Styles & Characters

Update 28/07/2025: Since writing this article I have moved to using Pinokio to containerise some of my environments, for Flux Gym, which has a pre-built Pinokio Flux Gym container, this has fixed the issues I was having with dependency conflicts and means I now tend to use Flux Gym over Flux LoRA Trainer.
Face swappers and IP Adapters go some way to creating consistent styles and characters in ComfyUI workflows but the real solution is to create your own LoRAs. It may not seem the easiest of processes but after the initial effort of getting a working flow and some patience whilst they train, the process becomes relatively straightforward.
This post does not cover in detail the actual installation and specifics of the different trainers as both of the trainers listed have their own detailed installation instructions. This post focuses on some of the key points to achieve good results.
Overview of Process
To create a LoRA you are going to need:
Suitable source images - poor input will lead to poor output.
A relatively powerful graphics card, 8GB VRAM minimum, 16GB or 24GB is much better.
A training environment - several options exist, all can require a bit of tinkering
Patience
Creating an Environment
Many approaches for creating a Flux or SD LoRA utilise the kohya-ss/sd-scripts. With some knowledge these scripts can be used directly and are very powerful but they are not the easiest to use. Thankfully there are a few of options to use these scripts via a much more friendly GUI wrapper, two of which I will cover here:
Flux LoRA Trainer, which works within ComfyUI
Flux Gym, a standalone trainer.
I have used both of these solutions with good results but I am tending towards Flux LoRA Trainer for two main reasons. Firstly Flux LoRA Trainer works within ComfyUI with a familiar looking workflow with nodes to adjust all the key parameters. It also provides some feedback as it runs and allows you to queue training runs so you can batch up several for a long overnight run.
My second reason for a slight preference for Flux LoRA Trainer over Flux Gym is that Flux Gym runs in its own virtual environment but uses Python. Unless you are very careful in ensuring the environment is entirely separate from ComfyUI and its Python instance then you can easily create problems with mismatched dependencies between ComfyUI and Flux Gym which can be a real pain to fix.
Flux Gym does use a GUI based on Gradio but the feedback when running is limited. It also doesn’t have a good way of saving a LoRA training template as you can with Flux LoRA Trainer, which uses a normal JSON file and therefore makes it very easy to re-run a LoRA training workflow.
Both solutions can access the key settings for the Kohya scripts, Flux Gym uses a long list of parameters in the GUI whereas Flux LoRA Trainer exposes the settings through the custom nodes.
In the end, provided you can keep Flux Gym away from your ComfyUI install, they are both good solutions so it is likely to come down to personal preference.
Flux Gym
Flux Gym is a GitHub project by CocktailPeanut/FluxGym, the project contains detailed instructions on how to install and run it. Some knowledge of Python environments is helpful as it requires a few command lines to set-up and initialise.
As mentioned earlier you have to be very careful around the environment, especially relating to Torch versions as you can easily break your ComfyUI instance. If you are installing Flux Gym on the same computer as your ComfyUI instance then obviously do not try and run both of them at the same time.

Note: Flux Gym will by default download a model, clip and VAE into a models directory within its own file structure. To save disk space you can use symbolic links using the mklink command to create a pointer to your existing files. For example:
mklink /d models d:\comfyui_windows_portable\comfyui\modelsFlux LoRA Trainer
Flux LoRA Trainer is also available on GitHub (Flux Trainer) and can be installed manually using git clone, followed by installing the dependencies as detailed in the instructions on GitHub. However, it can also be directly installed via the ComfyUI Manager listed as ComfyUI-FluxTrainer in the custom nodes directory.
As Flux LoRA Trainer operates within ComfyUI it uses the existing components such as models, Clips and VAE available to ComfyUI.

Image Preparation
There are three main factors for the images used for the LoRA training - the number of images, the quality & size and the composition.
Number of Images
Guidance for the number of images varies, from just a few to as many as possible. There might not be a hard rule but there are certain points which are clear:
Fewer quality images will be better than a large number of poor quality images
You can train a character LoRA on as few as 10 images
Style LoRAs generally need more images than a character LoRA
The number of source images directly impacts the training time as each image is likely to be scanned around 10 times on each pass.
Size and Quality
It’s no surprise that low quality images will produce poor results, try to avoid images which are blurry, dark, heavily pixelated, have low contrast, or are badly under/over exposed. Most LoRA trainers will offer an option for different source resolutions - typically 512, 768 or 1024 pixels as square images.
Some of the LoRA trainers will resize as part of their flow but to ensure the best result I find it is better to make sure the images are at least the correct aspect ratio and preferably the right size beforehand.
Bigger source images require longer processing time and have higher memory requirements. All three resolutions can produce good results but I do find moving to at least 768 is better and if I have the time will tend to use 1024.
Composition
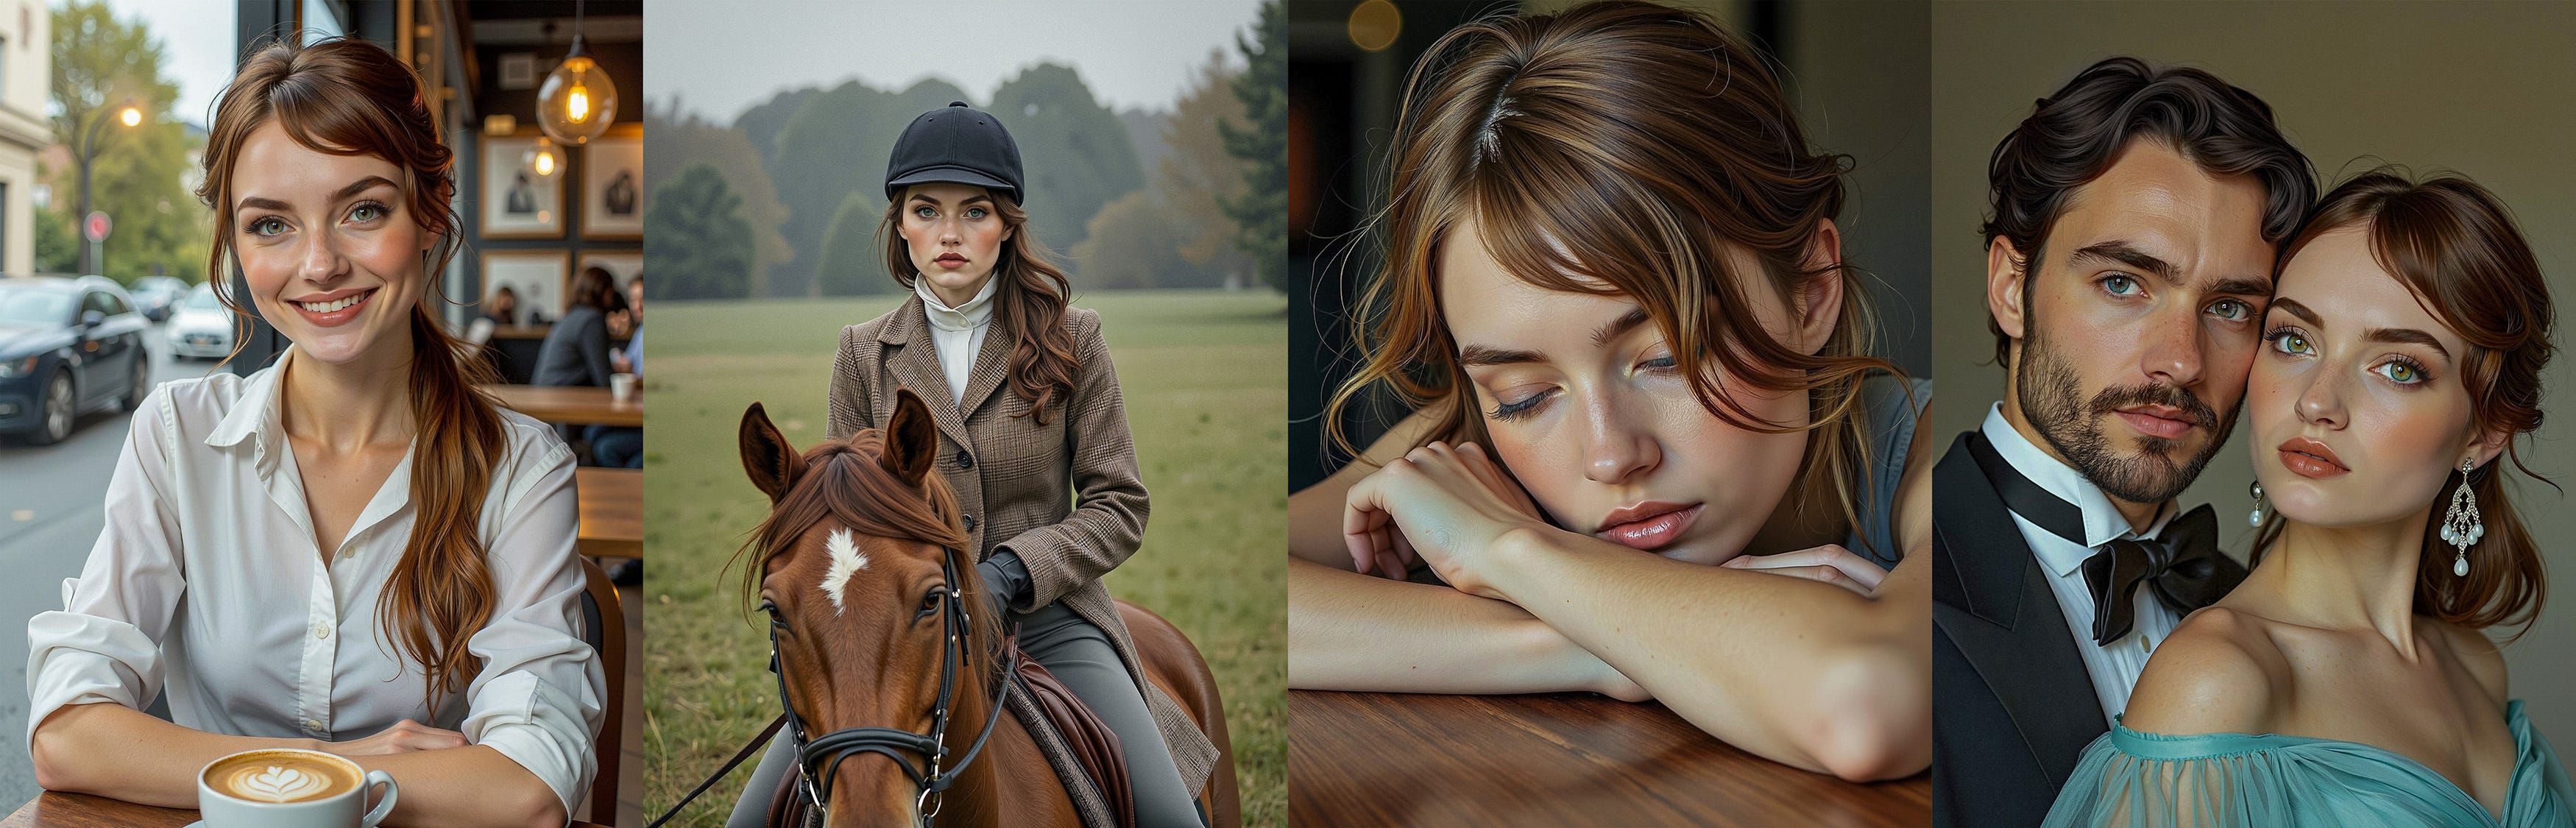
For style LoRAs you would want a range of images with a consistent style which the trainer can learn from, in this case it makes sense to have different composition and content provided the style remains consistent so that the trainer can learn a broad range.
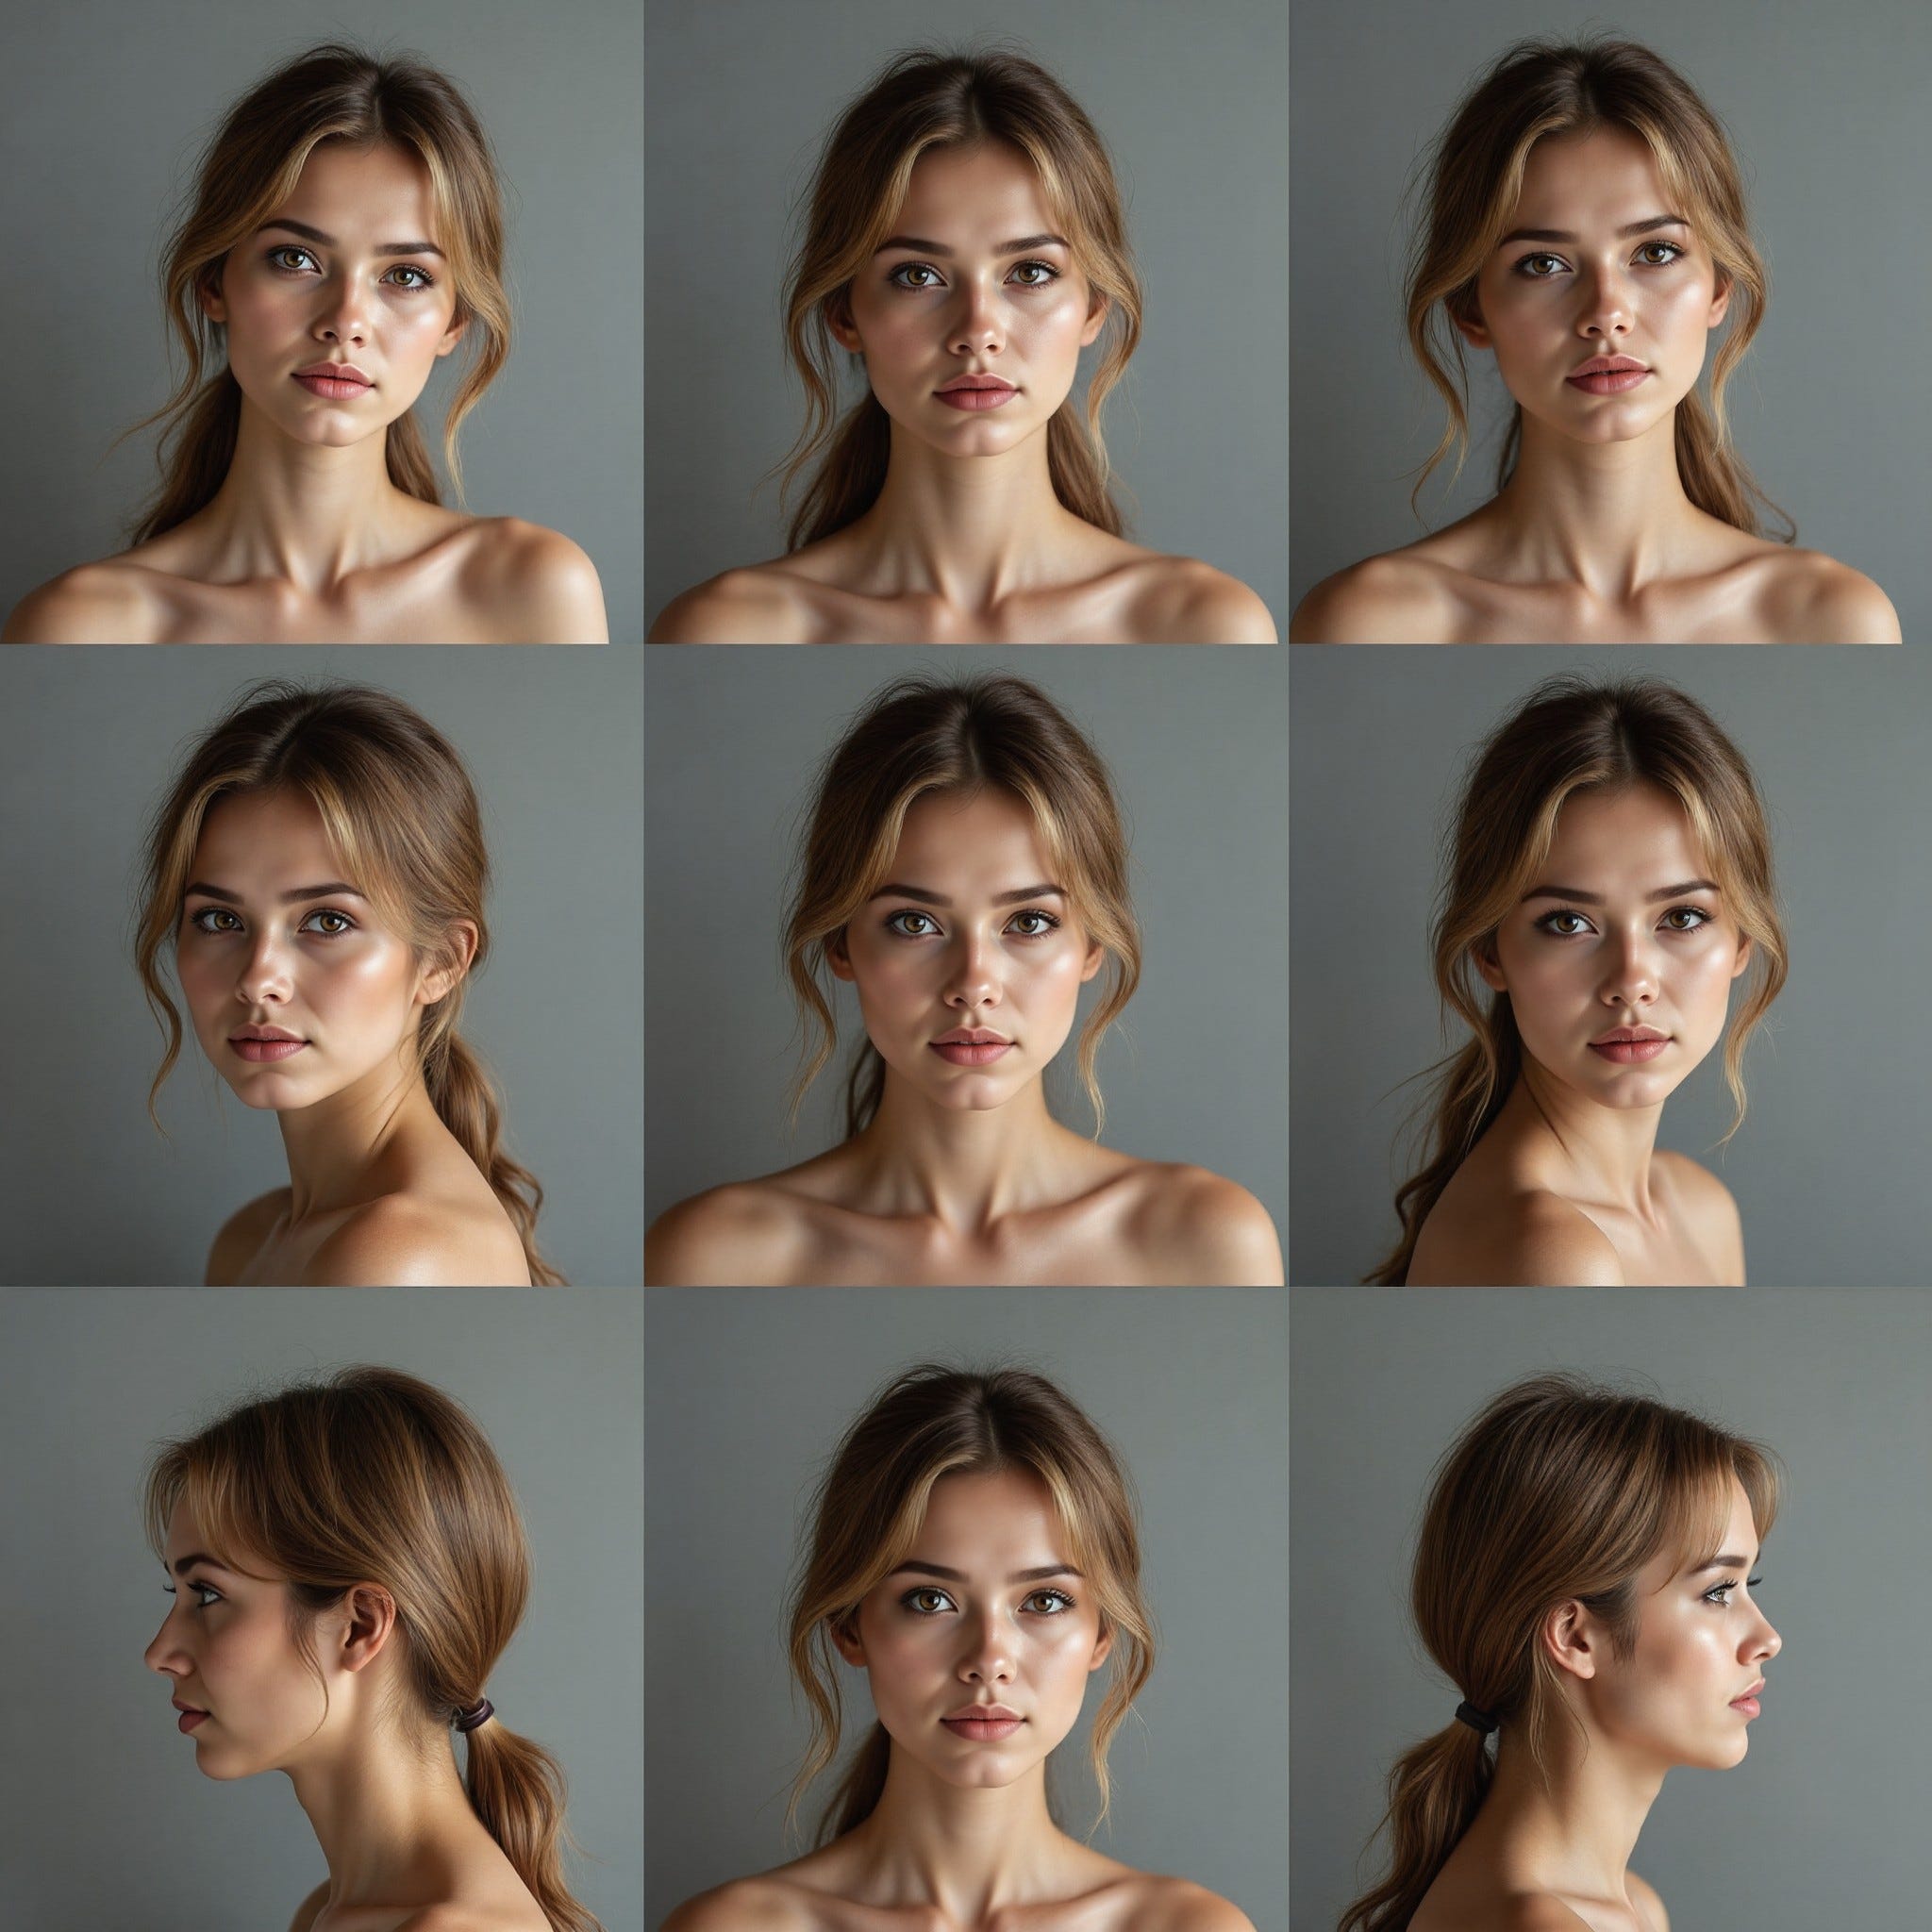
Character LoRAs are more focused, especially if you are mainly concerned with the head and face. It is best to have images which are close-ups cutting out most of the surroundings. You will want a range of angles, poses and facial expressions to create the best LoRA.
Although you can have the odd image with say sunglasses, on the whole you want to have images without items that cover up features. Some variety in hairstyle, makeup, facial hair, etc. is generally fine as the trainer can use this to create a wider learning profile.
Captioning
There is a lot of discussion around the captioning of images used in LoRA training without a clear agreed best approach. Captioning is a basic reverse-prompt which describes the source image, the idea being that the captions help the trainer identify things which do not need to be learnt.
My reading is that Flux is better at understanding the variations across images so the captioning is perhaps less significant. Flux Gym uses Florence2 within the interface to caption whereas Flux Trainer does not caption.
With captioning anything you describe as being in the image (outside of the trigger) is excluded from the LoRA so for example if you have an image of a woman wearing a hat and you caption it ‘a woman wearing a red hat’ then the red hat will not be trained into the LoRA. The risk being that without the caption the LoRA will learn to put a red hat on the image every time the LoRA is used. There is also a reverse issue as well in that if you over caption the LoRA may lose flexibility and always try and create the same image, so it is a balance.
With a good selection of images I have not found a great difference between captioning and not-captioning with Flux, however, your experience may differ depending on your source images and what you are trying to achieve so it is best to experiment.
Creating Images
If you do not have existing images to train your LoRA on then there are ways of creating some for a character using a consistent character sheet workflow such as:
Both of these workflows can be used to create and array of images with the same face which can be separated out into individual images for the LoRA trainer. The Think Diffusion workflow also produces several full body images.
As the consistent character sheets are large the workflows are computationally intensive and can cause issues for graphics cards with less than 24GB of VRAM so you may have to adjust some settings, such as the model weight, to get them to run.
Training Model
LoRAs need to be trained against the model they will be used with i.e. Flux.1 Dev or SDXL. They can also be trained against a refined model. I have found that a LoRA trained with a base model but then used with a refined model created from the same base model will in general work but I have had some exceptions.
Trigger Word
LoRAs normally require a trigger word to activate them, this is a special word which does not relate to anything else in the image and is just used for the sole purpose of triggering the LoRA in the text prompt during image generation. You can create LoRAs without a trigger word which means they will always take effect when loaded.
You can use any word you like, I tend to keep them relatively short. You can reuse the same word on multiple LoRAs, which is useful if you are creating multiple versions of a LoRA.
For more advanced use you can use multiple trigger words which tie into the captioning such that the different trigger words cause the LoRA to behave in a different way.
Settings
The Kohya scripts provide for a wide range of configuration settings, the vast majority of which can be left at their default values to start with. There are some settings which require more attention.
Total Number of Training Steps
The total number of training steps is the factor of:
number of images x number of repeats x number of epochsThe number of repeats is the number of times the same image is analysed on each pass and the number of epochs is the number of times the entire set of images is sampled.
There are no hard and fast rules on what the ideal total number of training steps should be. For character LoRAs a number in the range of 1,500-2,000 is often quoted but this will vary based on the number of images you have. It is probably better to say that you will typically need at least 1,000 steps. More steps correlates to more time so the aim is to get a good result with the least number of steps.
Network Dim
The Network Dimension relates to how much information is extracted from the images by changing the trainable parameters. Higher network dims are typically used for a style LoRA and lower values for a character LoRA. A value of 128 may be appropriate for a style LoRA, with character LoRAs more likely to be 32 or 16. The higher the network dim the larger the resulting file.
Network Alpha
The network alpha is a scaling factor which adjusts the learning rate, influencing the the LoRAs weights during the training. This means that a lower network alpha will give the LoRA more flexibility when it is used and can reduce overfitting.
There is much discussion as to appropriate settings for the network alpha, partly because it is related to the network dim and therefore the ratio between them can be as important as the actual values.
To provide reasonable flexibility for a character LoRA it is common to use a network alpha of 1/2 or 1/4 of the network dim value. The default is likely to be with the network alpha set to be the same as the network dim, this may work for style LoRAs but is likely to be too restricting for character LoRAs.
Save Every n Epochs
By default Flux Trainer saves three intermediate LoRA files based on how the number of steps are split. For Flux Gym you need to change the setting Save Every n Epochs to ensure intermediate LoRA files are saved.
There are a couple of good reasons for saving the intermediate LoRAs, firstly if you run into a problem during training it means you may still get something useable but more importantly it can be the case the final LoRA created is not the best and an earlier one created with less steps produces better results.
Sample Images
Whilst the LoRA training process is running you can get the process to create sample images at points along the way. This is useful to monitor progress and also a good reference point if you tie the sample images to the point at which intermediate LoRAs are saved.
The sample images are created from a text prompt which should include the trigger word and a description of the image you want to generate.
Generating the LoRA
Once you have created your environment, prepared your images and confirmed your settings you are ready to train. Press run or train but before you go off and do something else for a few hours just check the trainer gets through its initial preparation and into the sampling as this initial phase is where is it most likely to fail if it is going to.
Depending on the number of training steps selected and the speed of your graphics card training can take anything from one to six hours.
Eventually you should end up with several safetensors files, one for each of the intermediate points in the training process and some sample images. A check of the sample images should give you an idea of which LoRA looks to be the best one. It isn’t necessarily the final one as you may have set the number of steps too high and created a LoRA which is overtrained.
Overtraining creates a LoRA which is too strong and inflexible meaning it will over power other settings and always generate a very similar image. You may be able to reduce this effect by lowering the strength of the LoRA when using it but sometimes it is better to use a LoRA from earlier in the training process or just try again with different settings such as a lower network alpha.
You’ll need to test the LoRA with a variety of prompts to see how well it works. I have created character LoRAs which work really well in most images but produce something odd in specific cases - on investigation I think this was because one image in my training set was out of line with the rest so I needed to go back and replace that image and rerun.
The LoRA safetensors files created can be moved to your LoRAs directory in CompyUI and loaded using any of the standard LoRA loaders. When creating a prompt don’t forget to include the trigger. You can experiment with the strength and weight of the LoRA until you get the best result. I have some LoRAs which require a strength of 1.5 and others which need to be kept below 0.5. Every training run differs!


Summary
LoRA training requires some investment of time to get an environment and workflow ready but once this is done you can create LoRAs relatively easily.
The main factor in good or bad results is the quality and selection of training images.
Adjust network alpha to a ratio or 1/2 or 1/4 of the network dim for character LoRAs.
Aim for around 1,500 training steps
Don’t worry too much about captioning
Test with a smaller set of images and steps, then increase if needed.
Don’t watch it while it is training - it can take hours!
I hope this provides some useful insights, I’m always looking for feedback.
Fascinating!
A bit of a learning curve for me so I'll need to carve out a couple of weeks to go there.
So glad captioning isn't a necessity.
I know Flux Gym now takes precedence for you as Pinokio keeps it in its own container, which is also good for me as the more I get to know Pinokio the more I see it's benefits.
Appreciate your research, Chris. You write with clarity too and that is priceless.