
Qwen Image ControlNets
Introduction to extending the power of Qwen Image with ControlNets

Good ControlNets are fantastic tools for guiding image generation with additional conditions drawn from a separate image source. ControlNets can extract aspects such as pose, depth and edges and apply that information to the new image.
ControlNets have to be designed to work with individual models, with a variety of them having been released over time for Flux.1 models. Now we have ControlNets for Qwen Image, adding more strength to an already impressive model.
There are currently three different ControlNets for Qwen and the situation is confusing as not all of them are true ControlNets, with each of them working in a slightly different way. Each of these ControlNets support different types of image structure control from depth and pose to lineart and softedge.
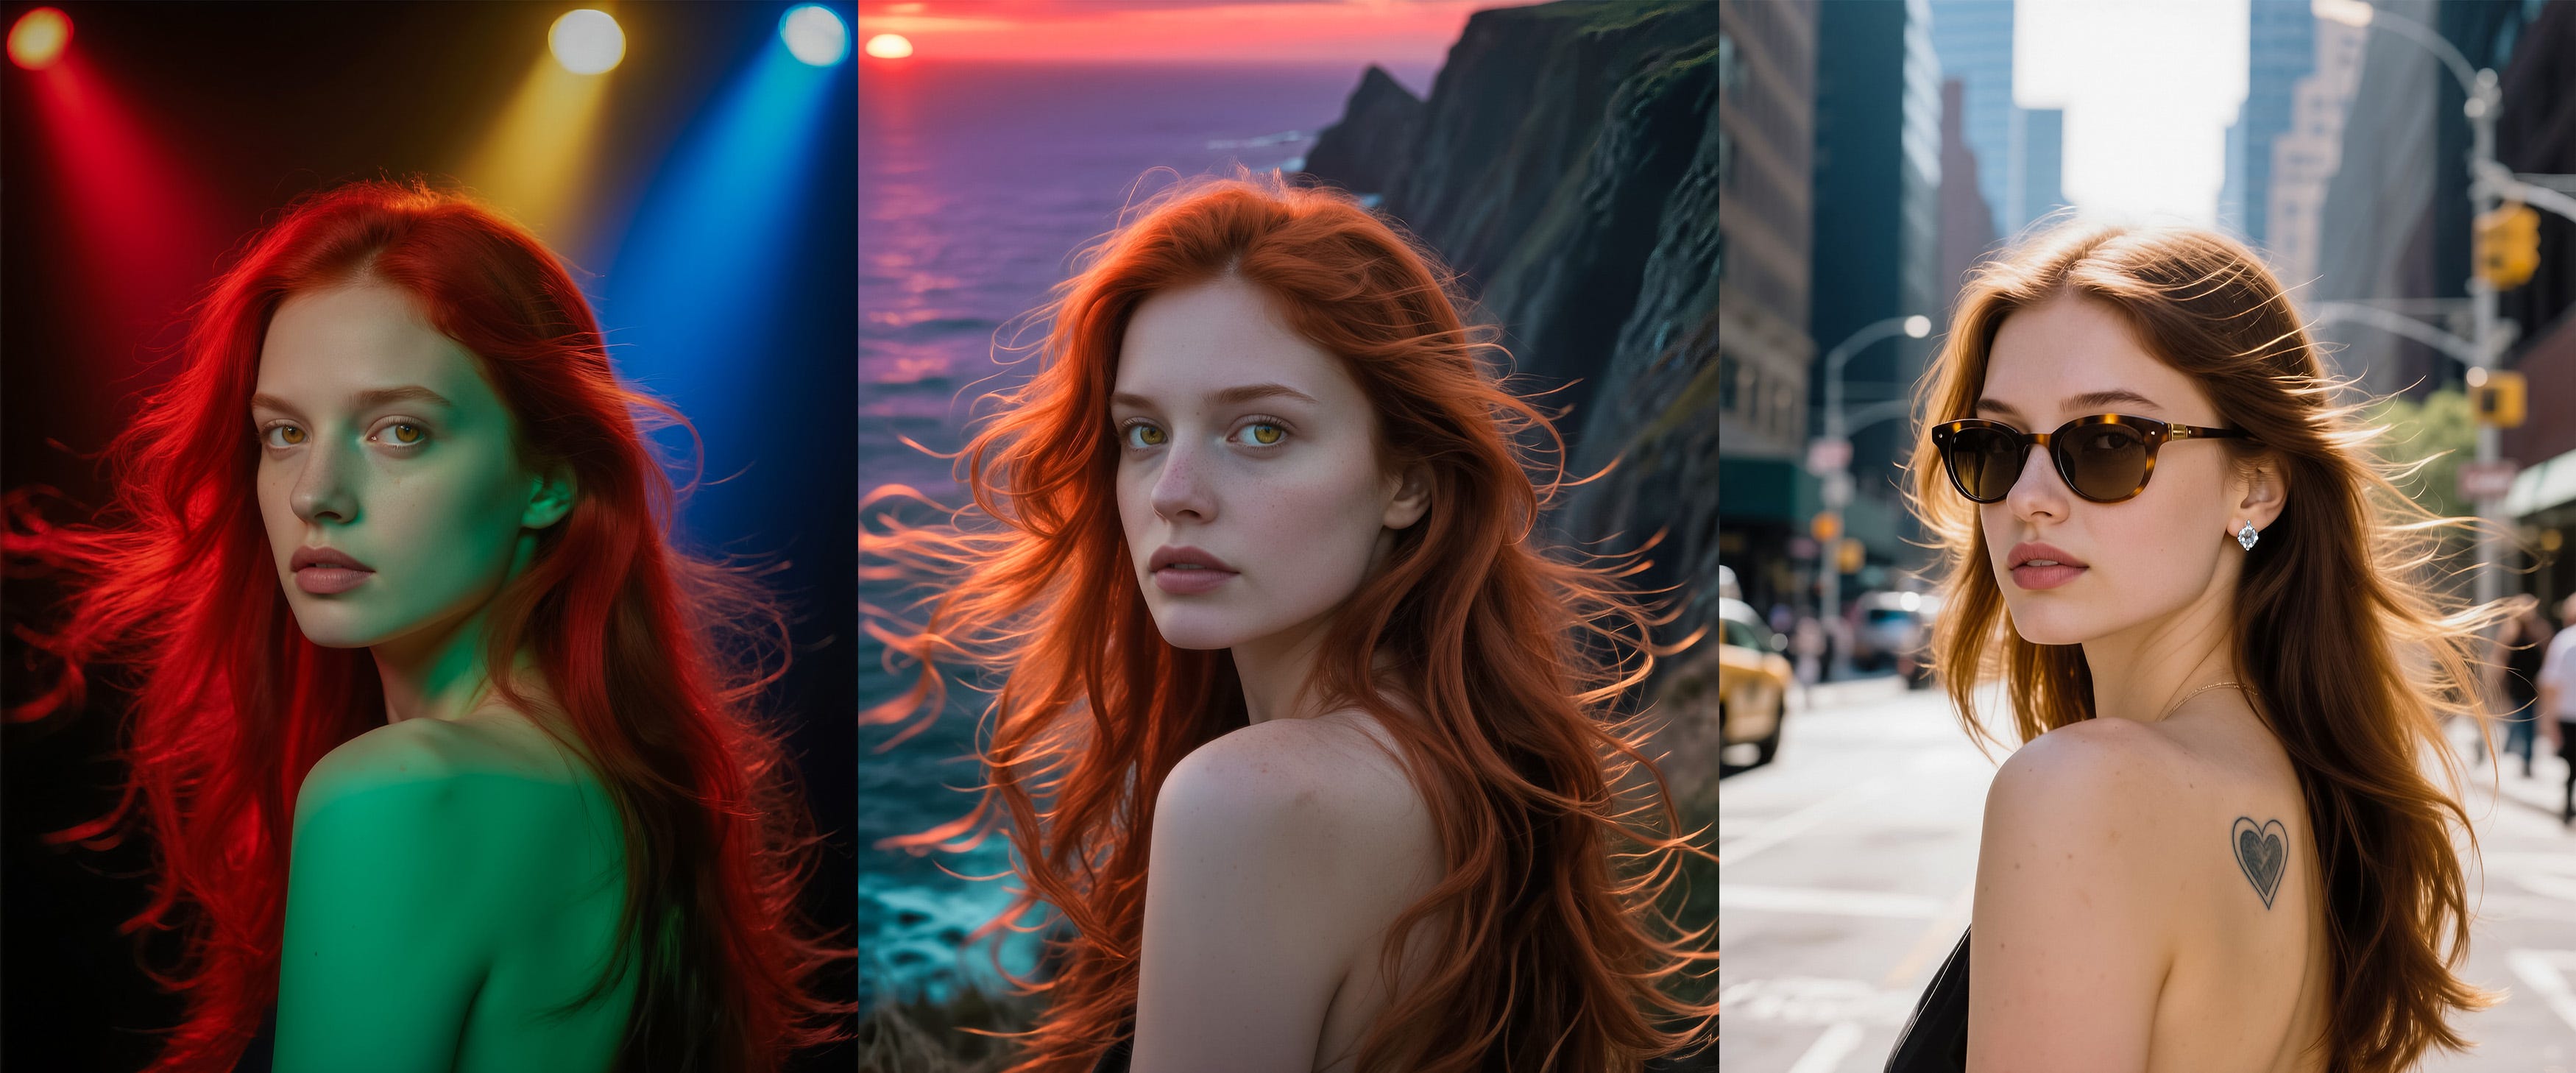
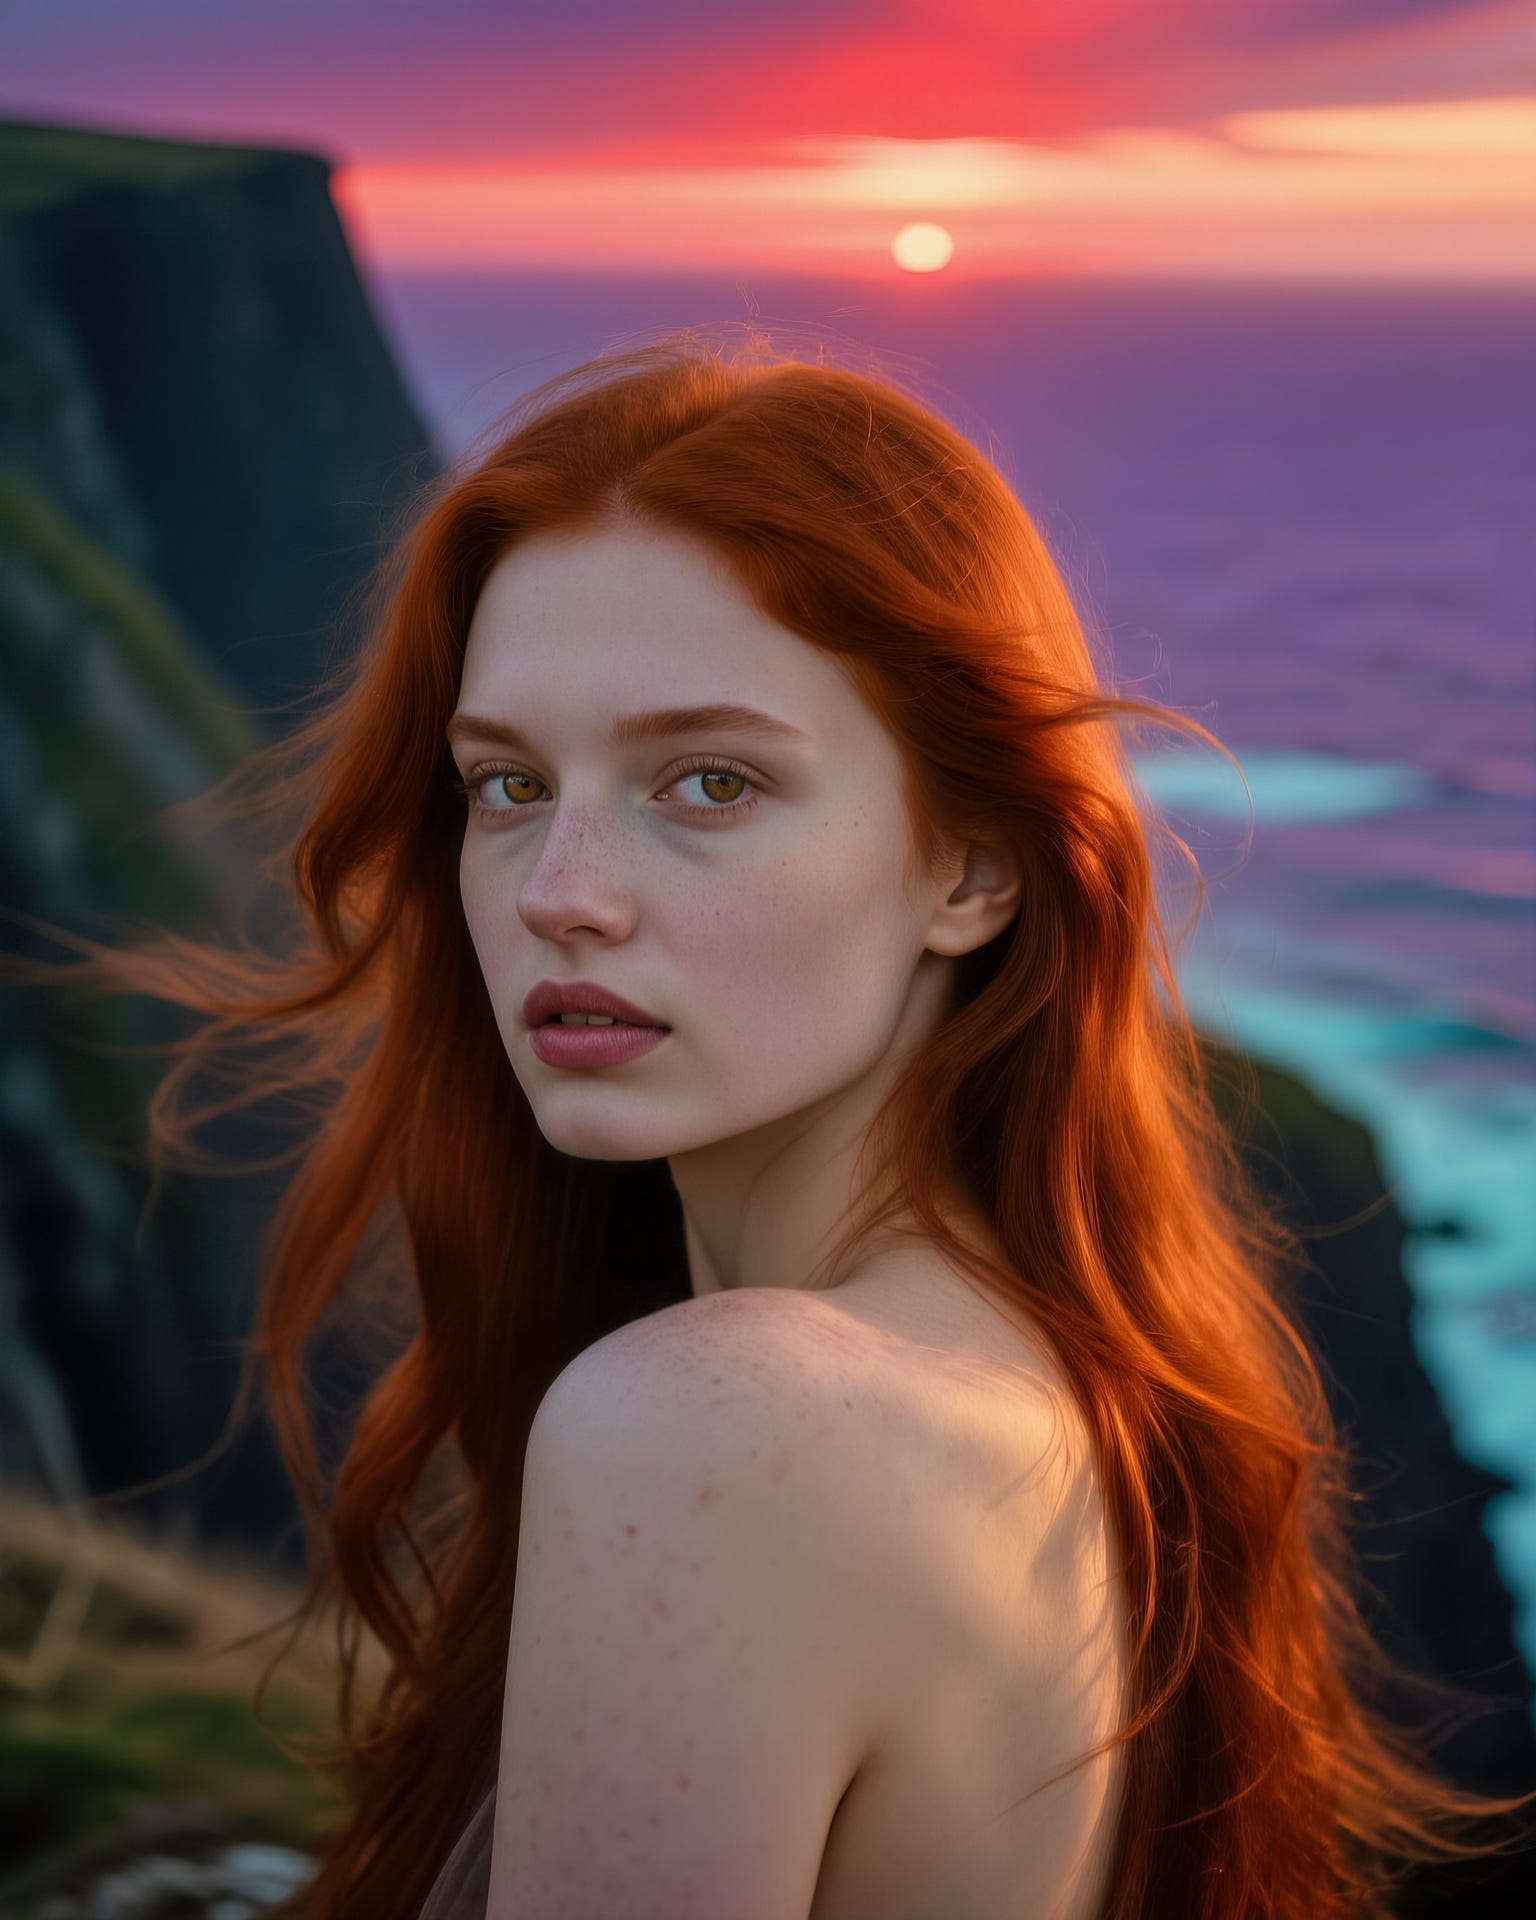
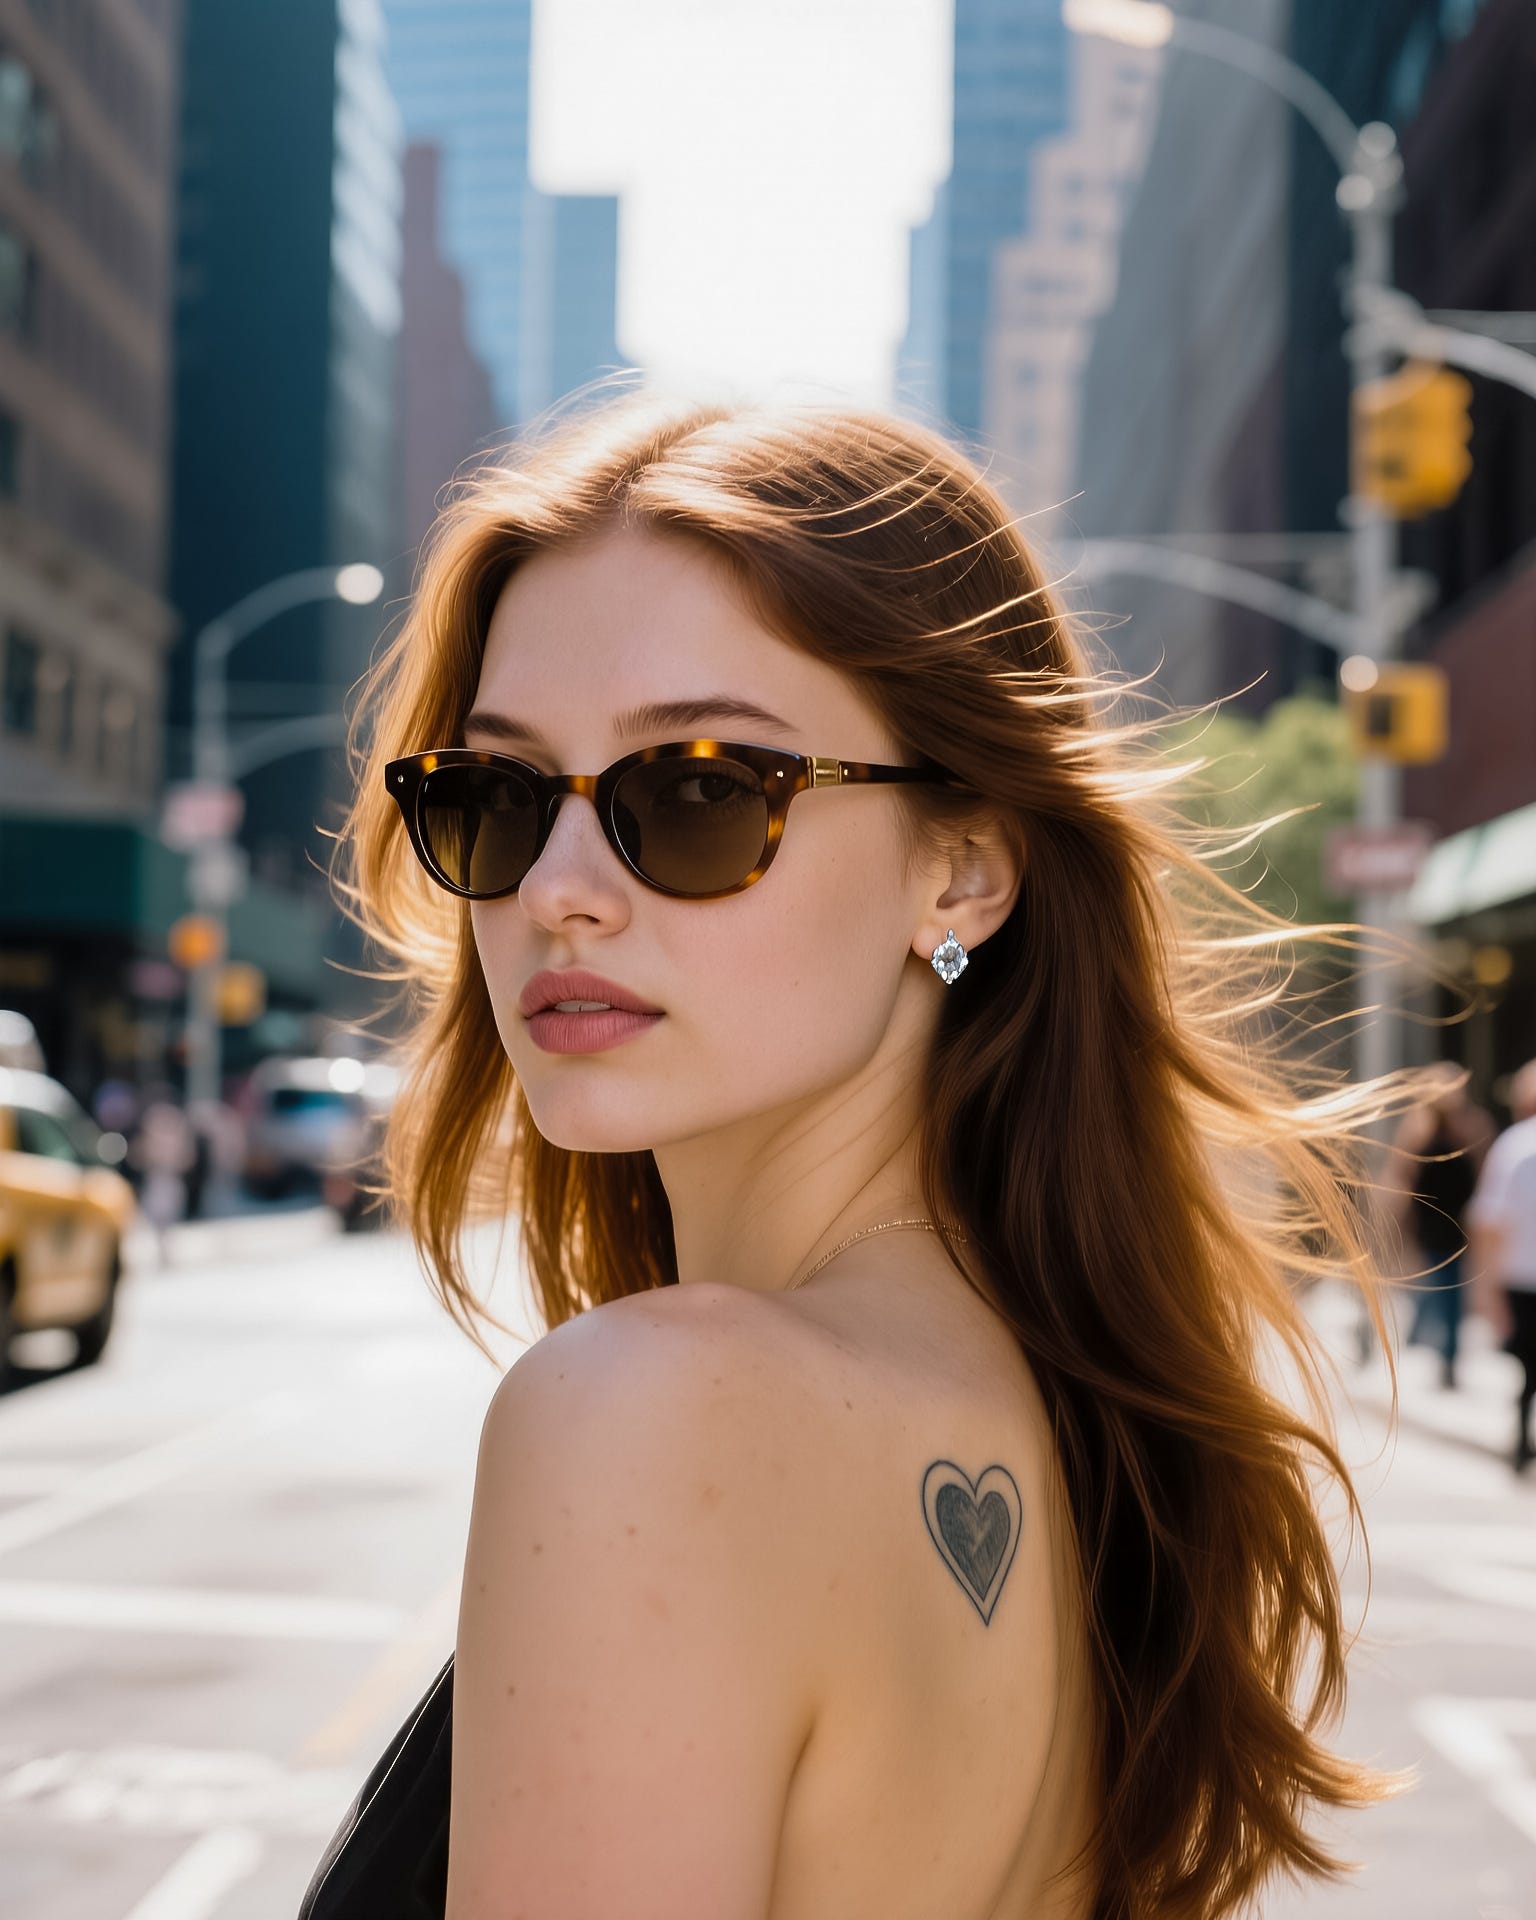
The Comfy.org tutorial for Qwen has all the relevant information for the ControlNet model downloads and some basic workflows so I won’t repeat it here. I am going to use a simple portrait image as the input, shown below. This was created using Qwen Image from a standard text prompt.

InstantX ControlNet
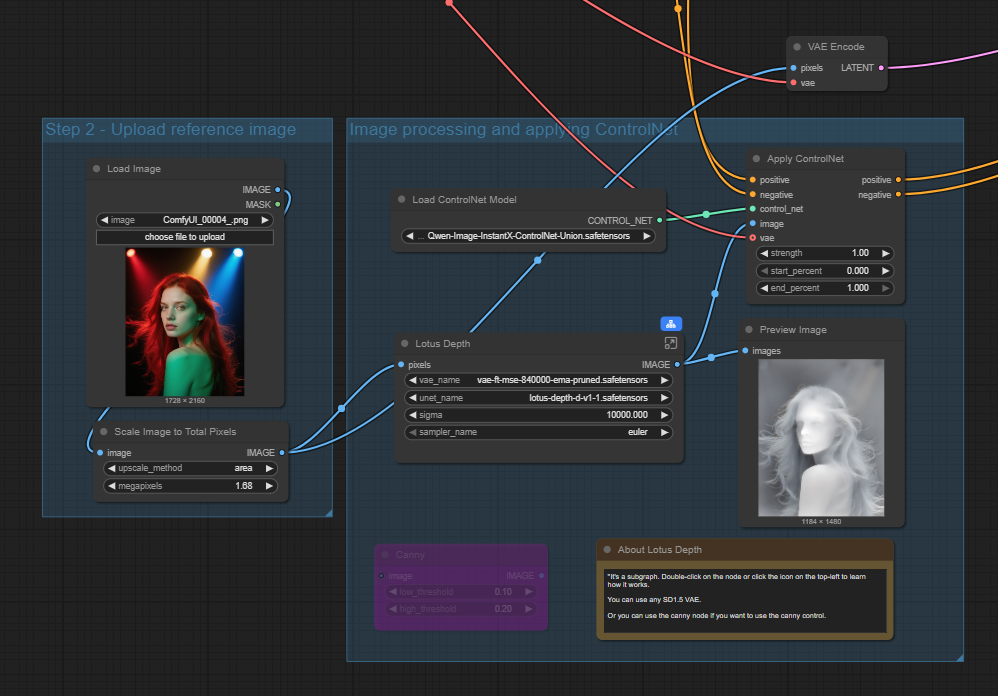
First up is the InstantX ControlNet, this is a true ControlNet model so works in the standard way in a workflow influencing the conditioning via the Apply ControlNet node. Currently it has Lotus depth and Canny node options for control.
The main node sits in the conditioning flow between the text prompts and the sampler and in this case the existing image is also fed into the sampler as the latent image.
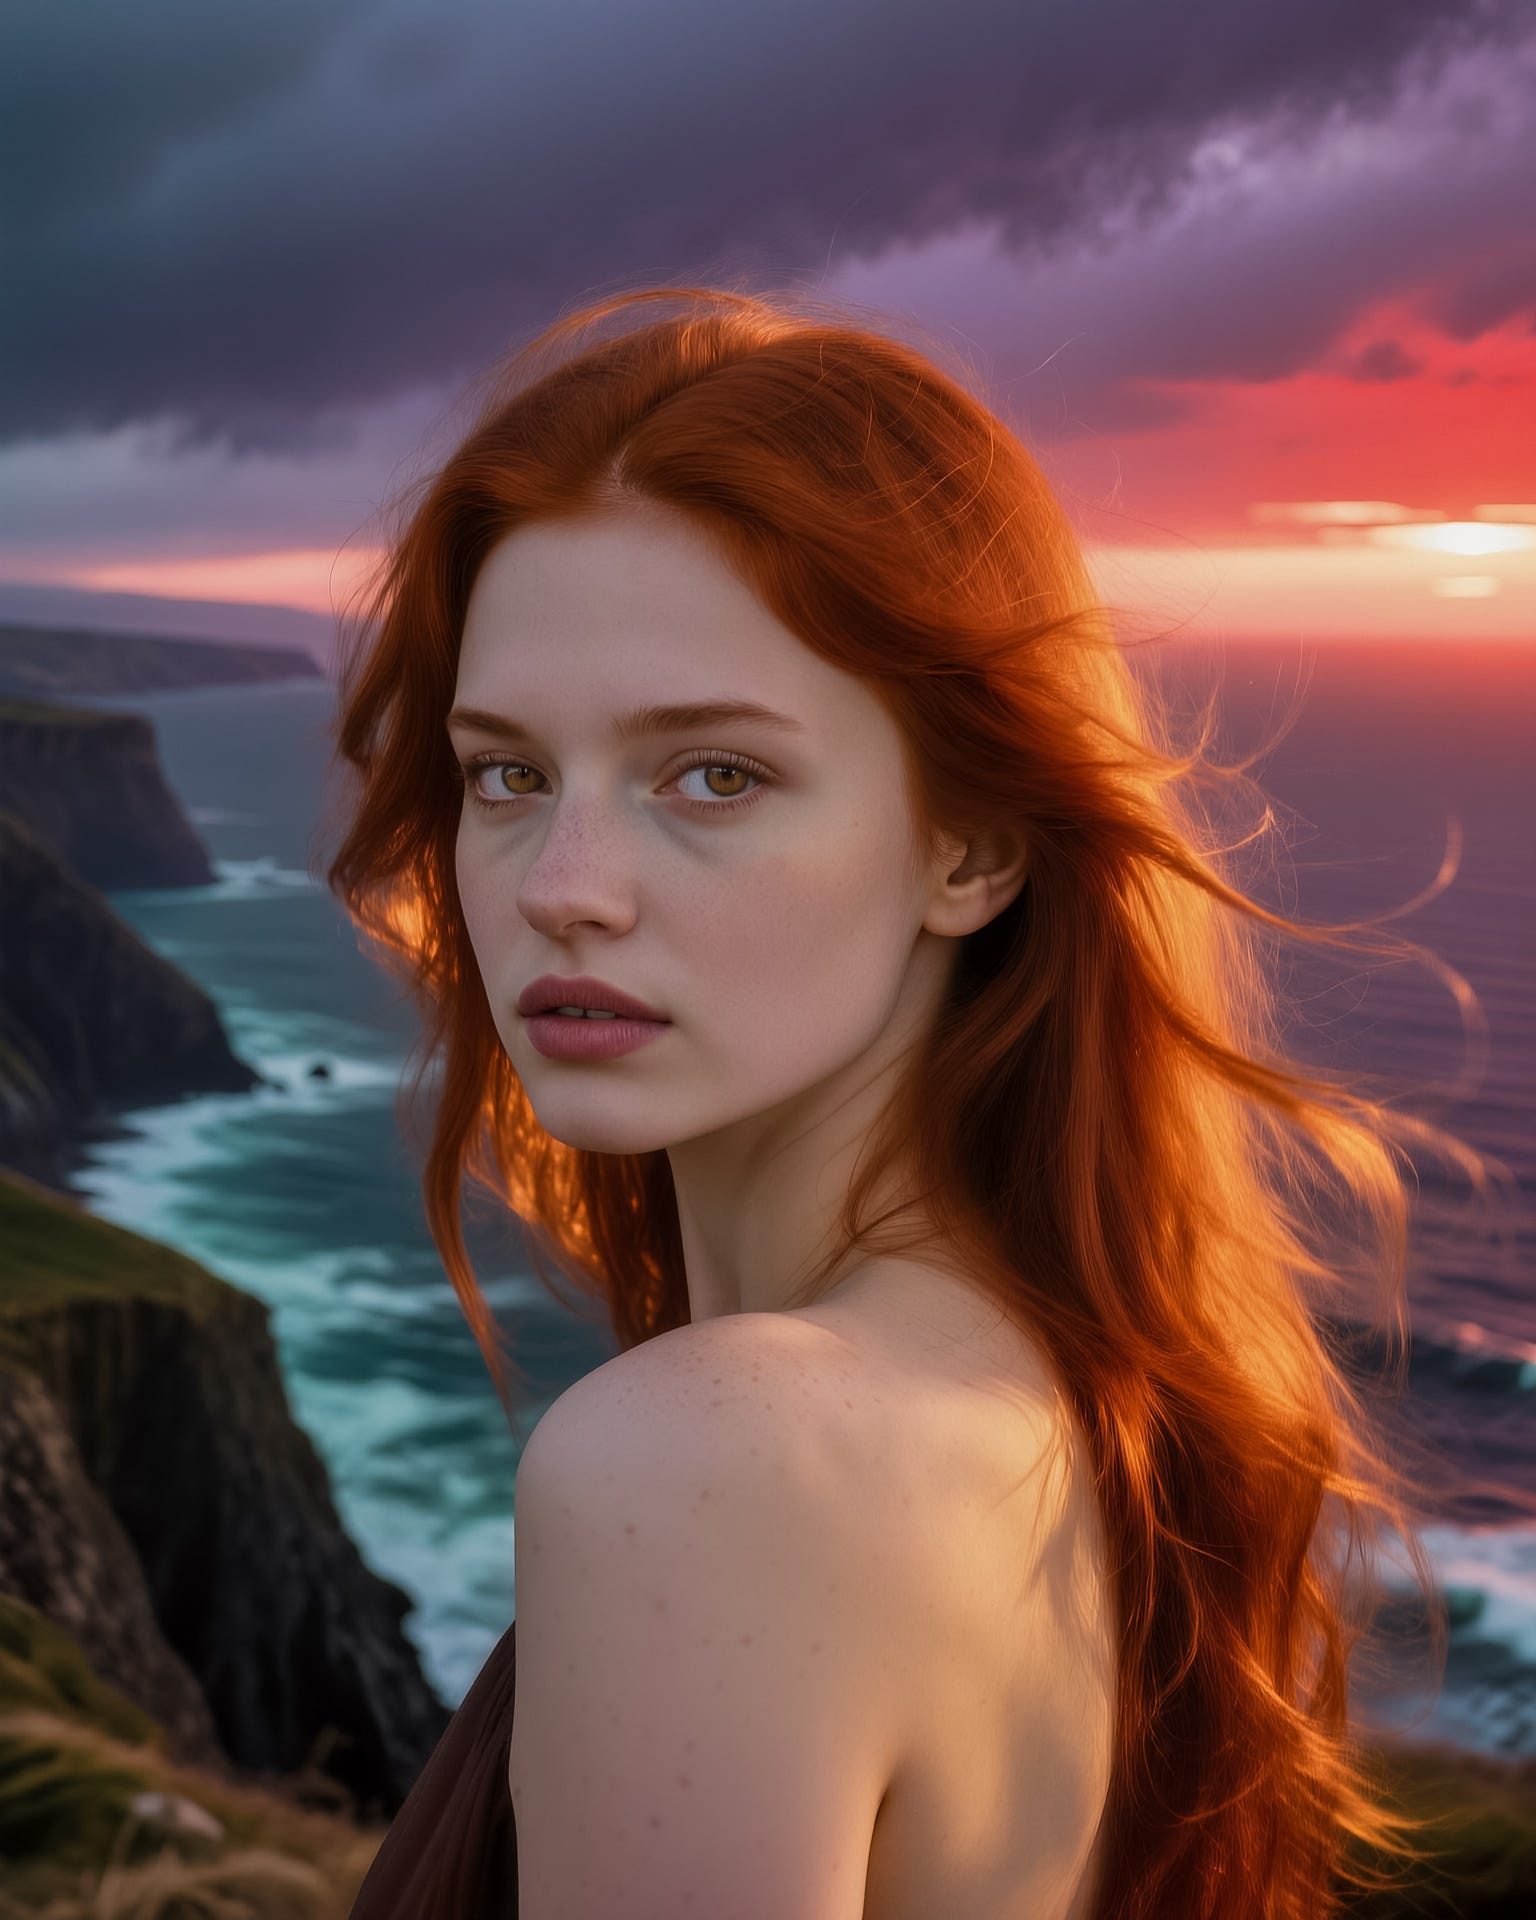
The output using this input with a text prompt changing the background to a cliff-top with a sunset behind is shown below.
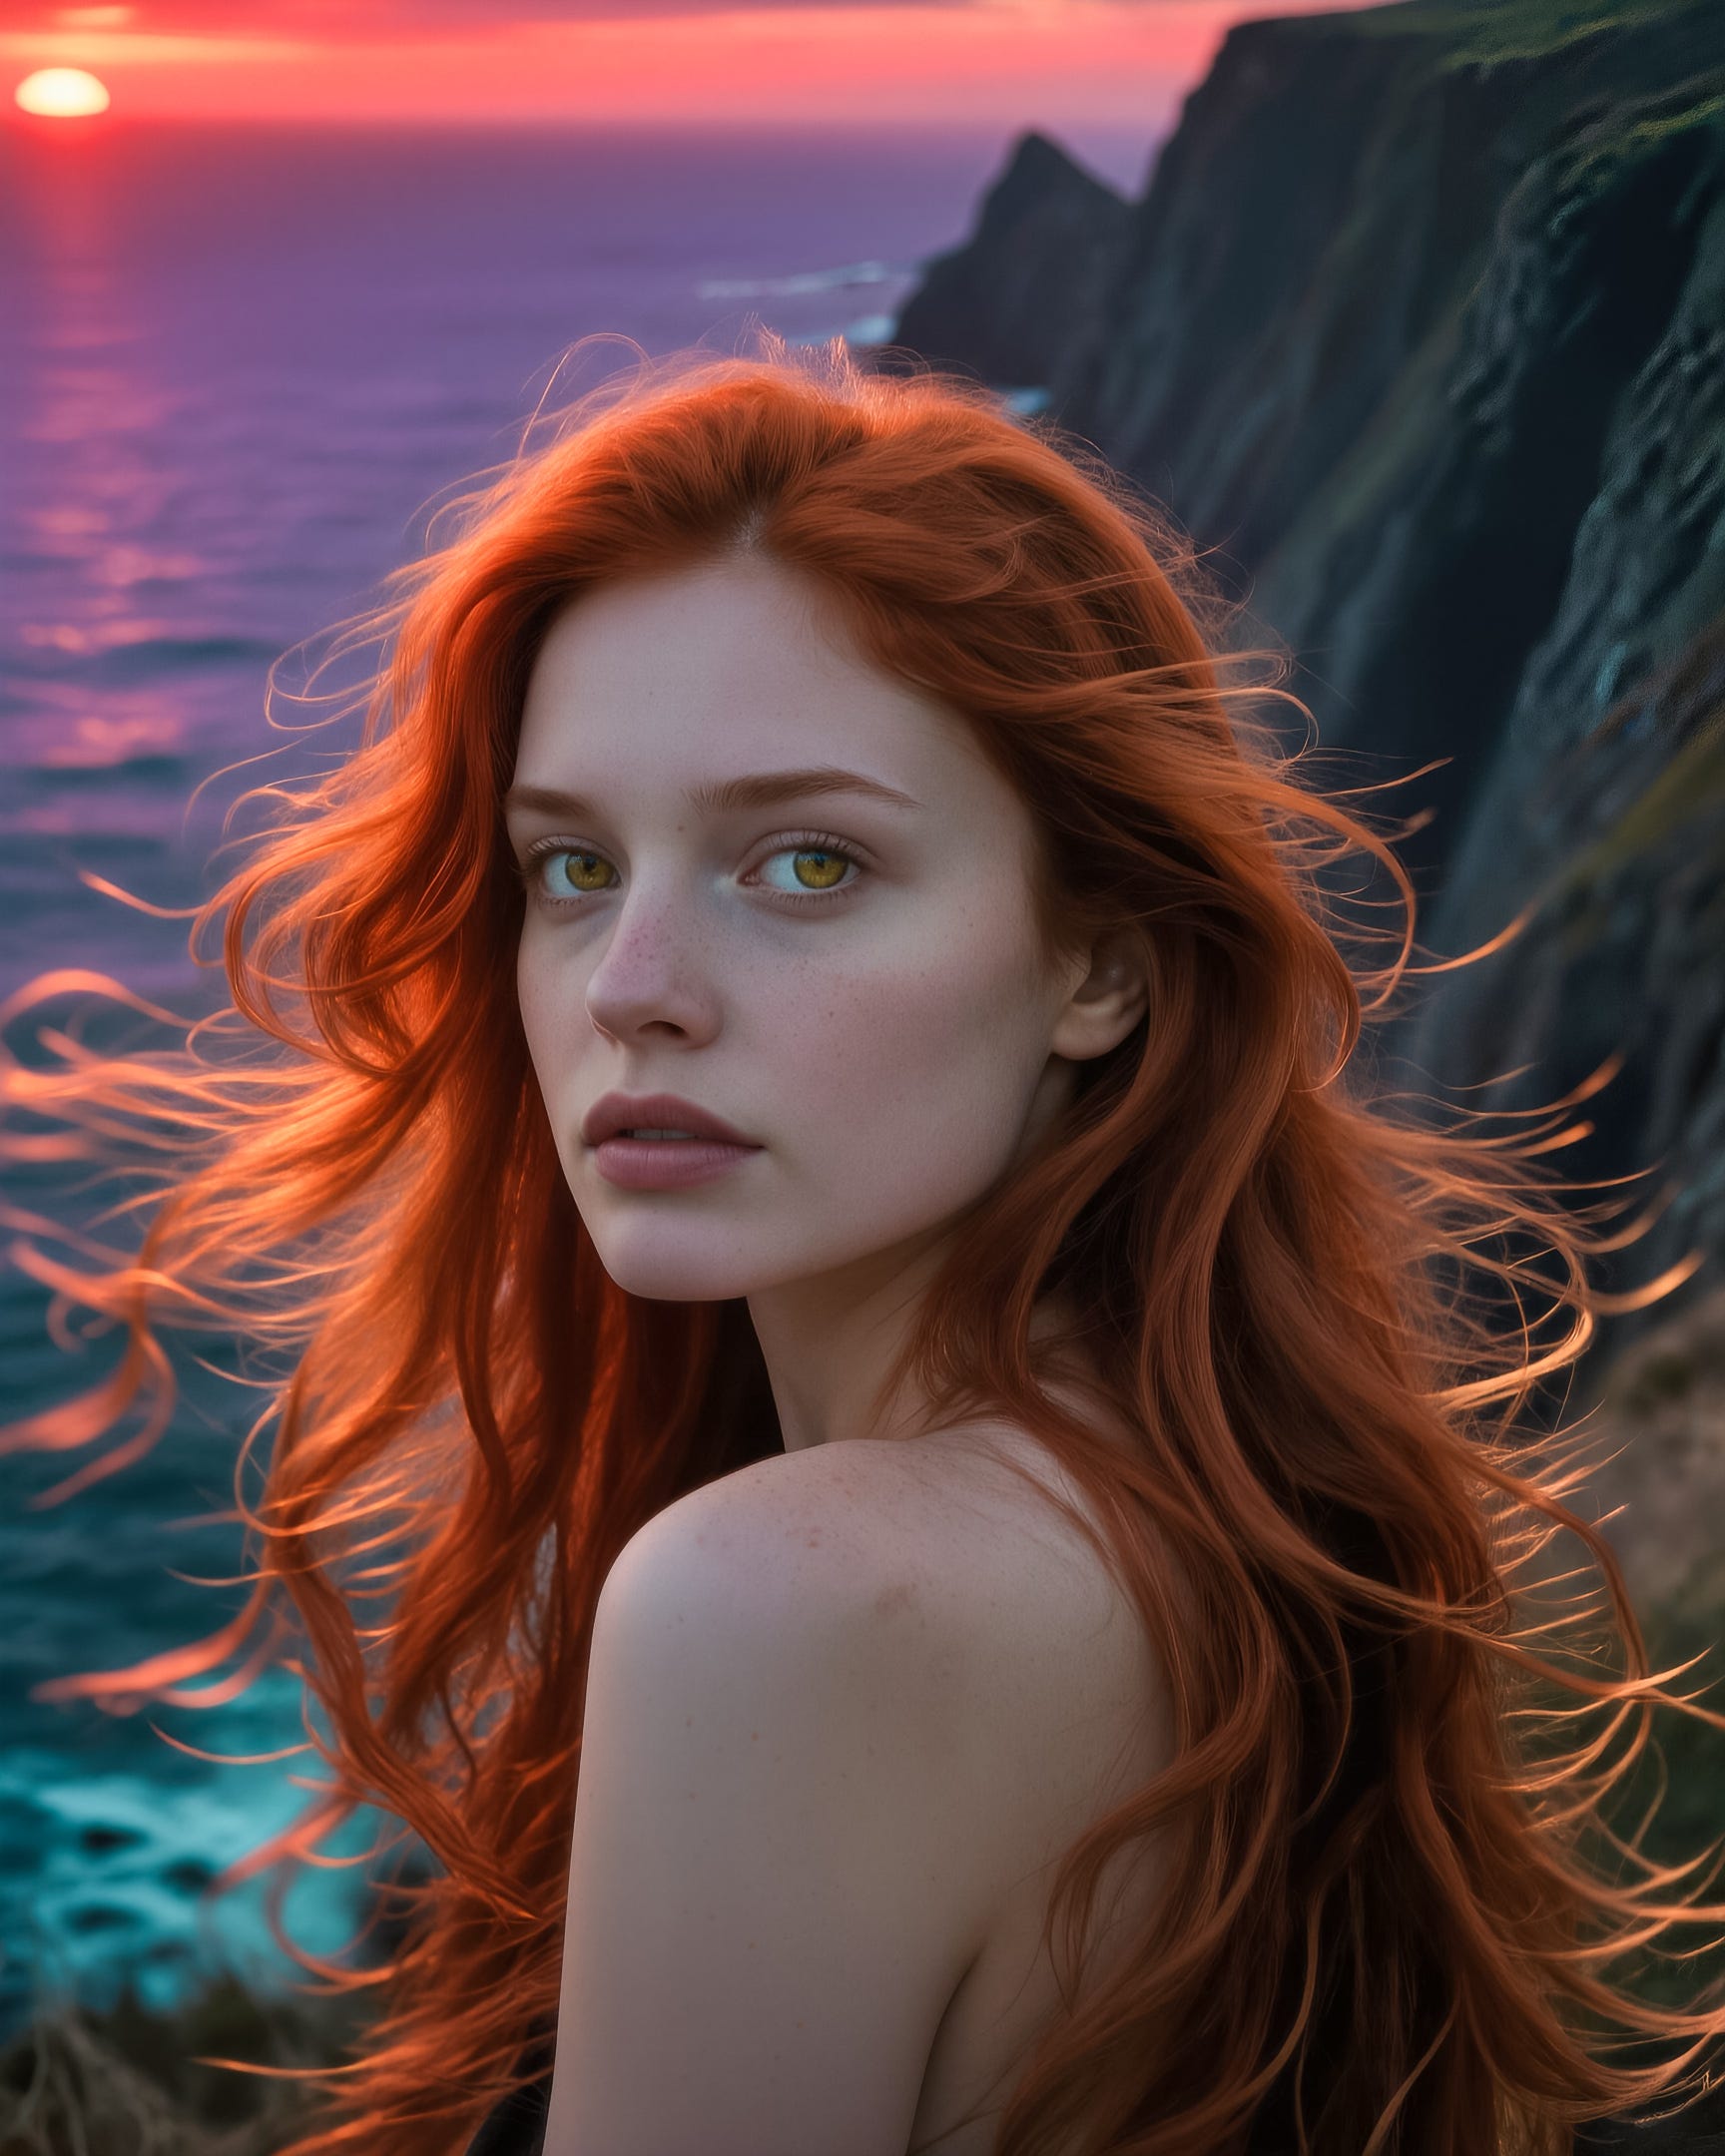
The depth ControlNet has kept the woman’s pose and facial structure very similar with just minor variances to the hair detail and mouth. Using a depth ControlNet generally keeps the most consistent face and body compared to canny and pose options as we will see later.
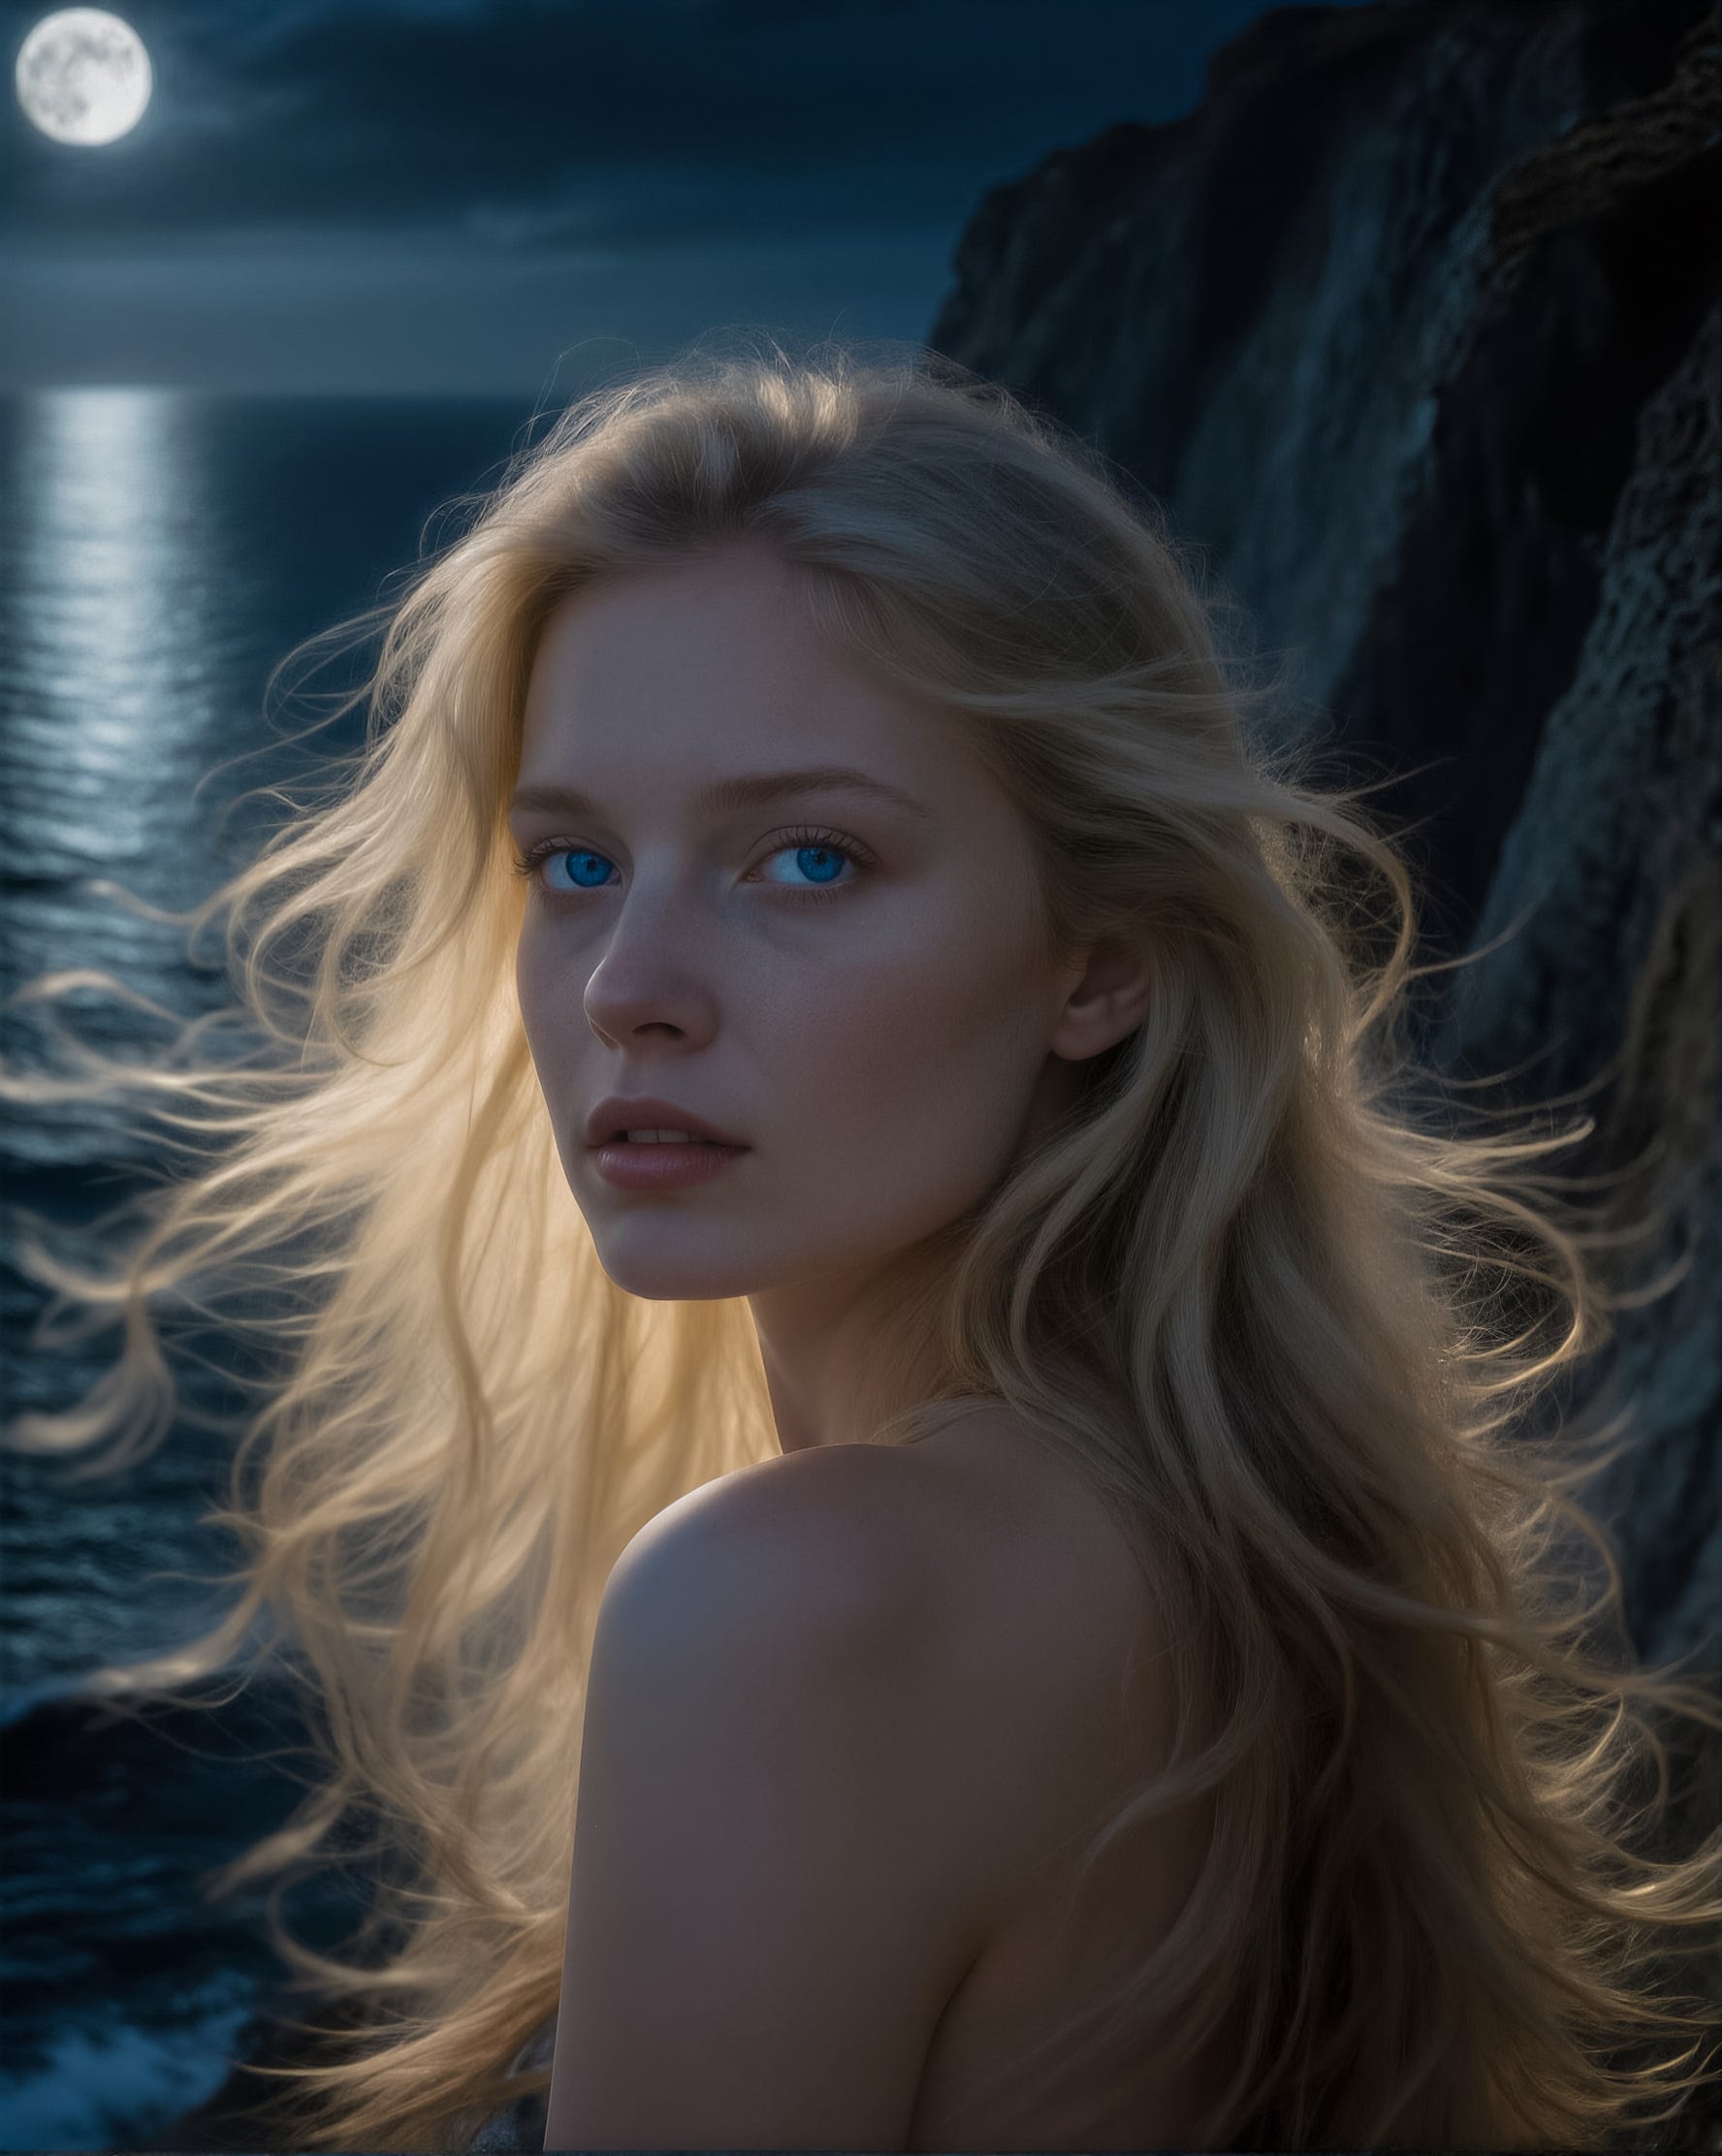
Using a depth ControlNet like this makes it easy to change aspects of the image, so for example, in the second version below the image is now set at night, changing the woman’s hair to blonde and her eyes to blue (maybe a little bit too blue!). It is important to note these changes do not impact the depth structure so they work well.
DiffSynth Model Patch ControlNet
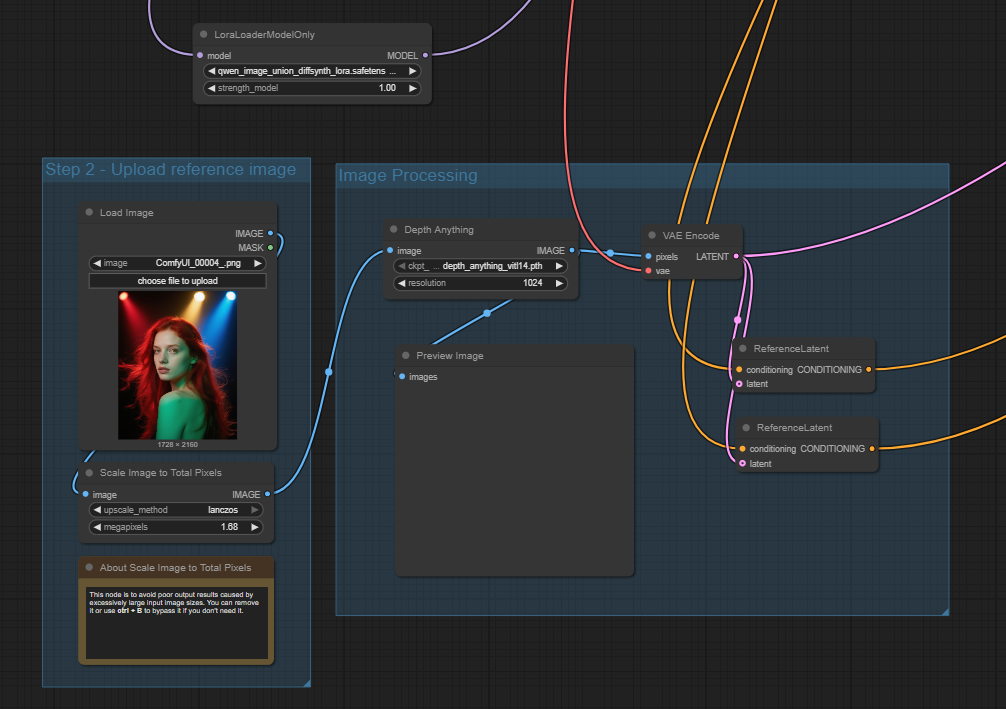
The Diffsynth option is not an true ControlNet, but a model patch which supports three different control modes: canny, depth, and inpaint. In this case the QwenImageDiffsynthControlNet node is inserted into the model flow before the sampler as shown below. The original image is also fed in via the latent input of the sampler.
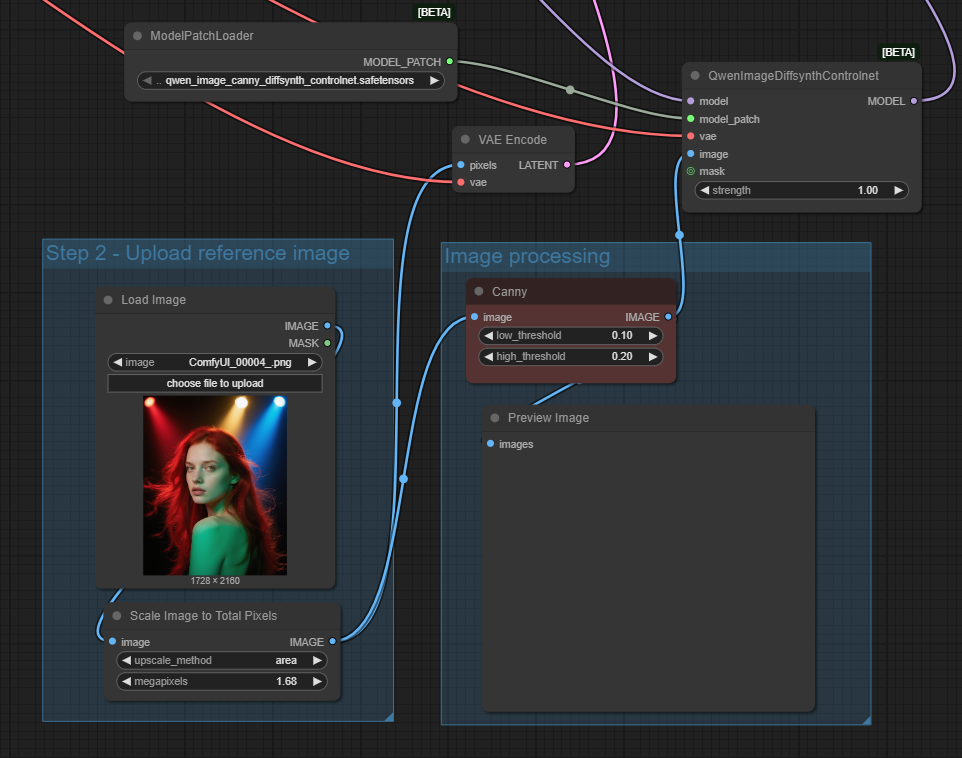
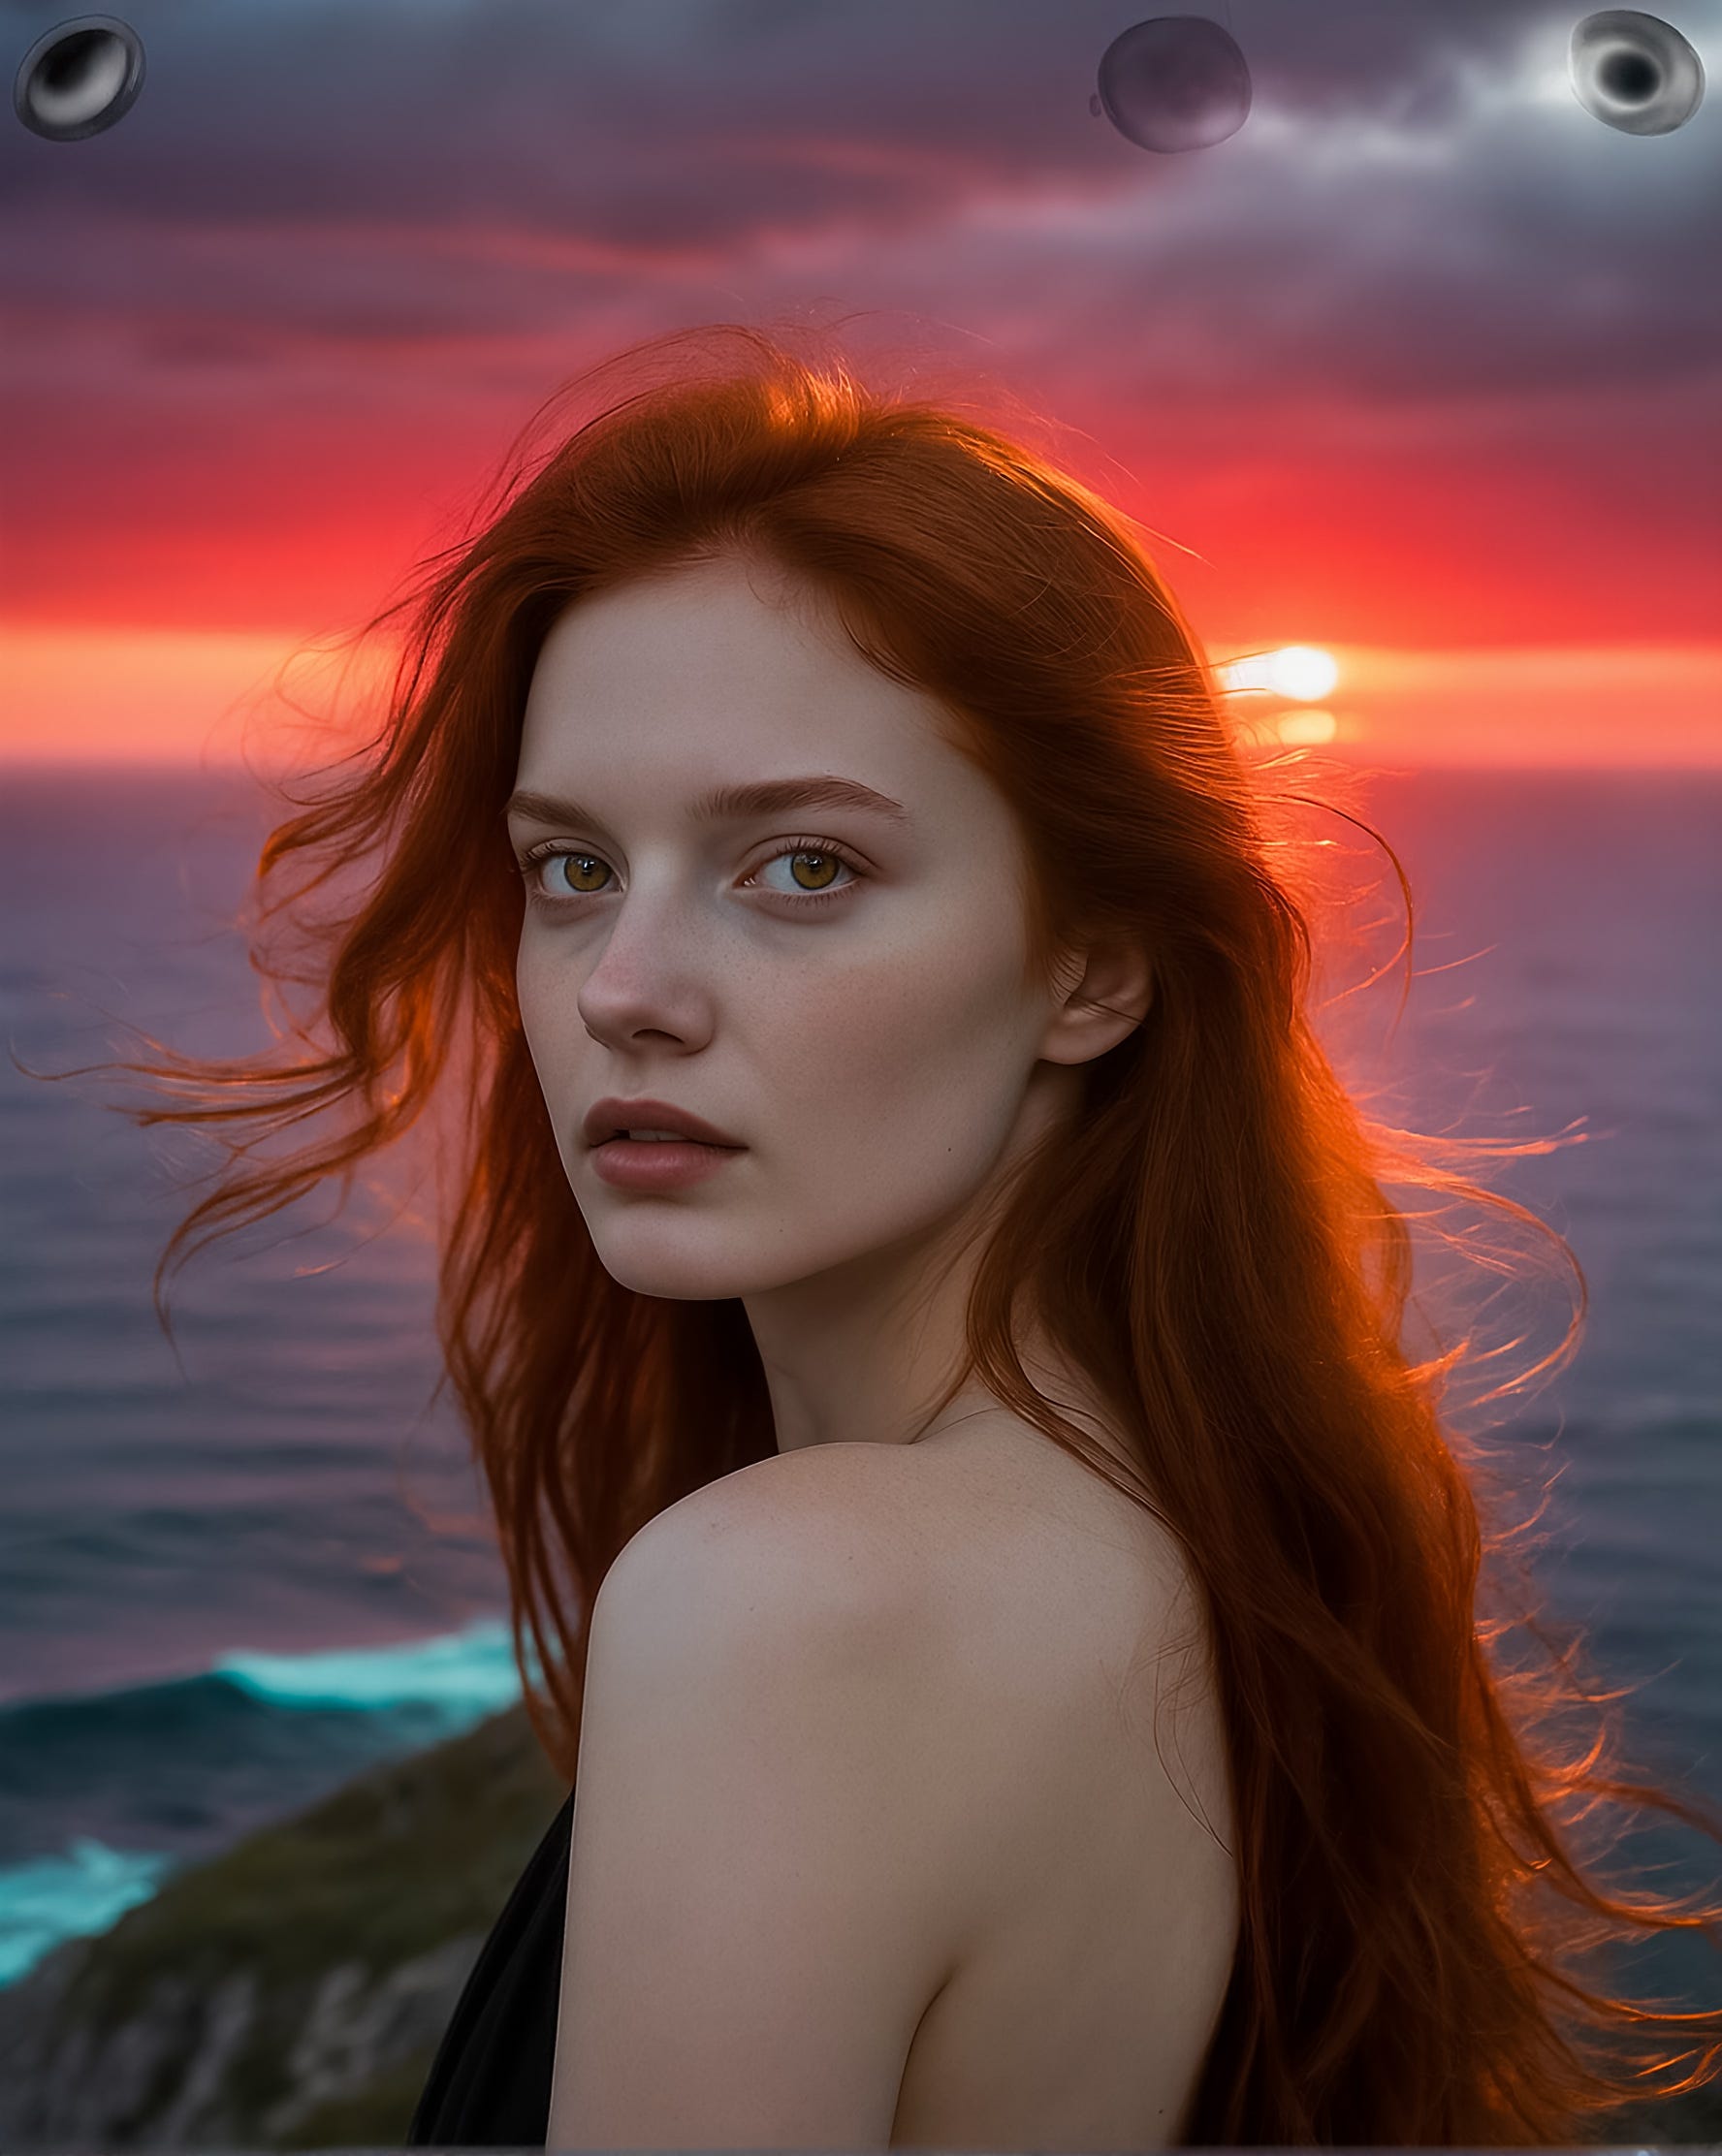
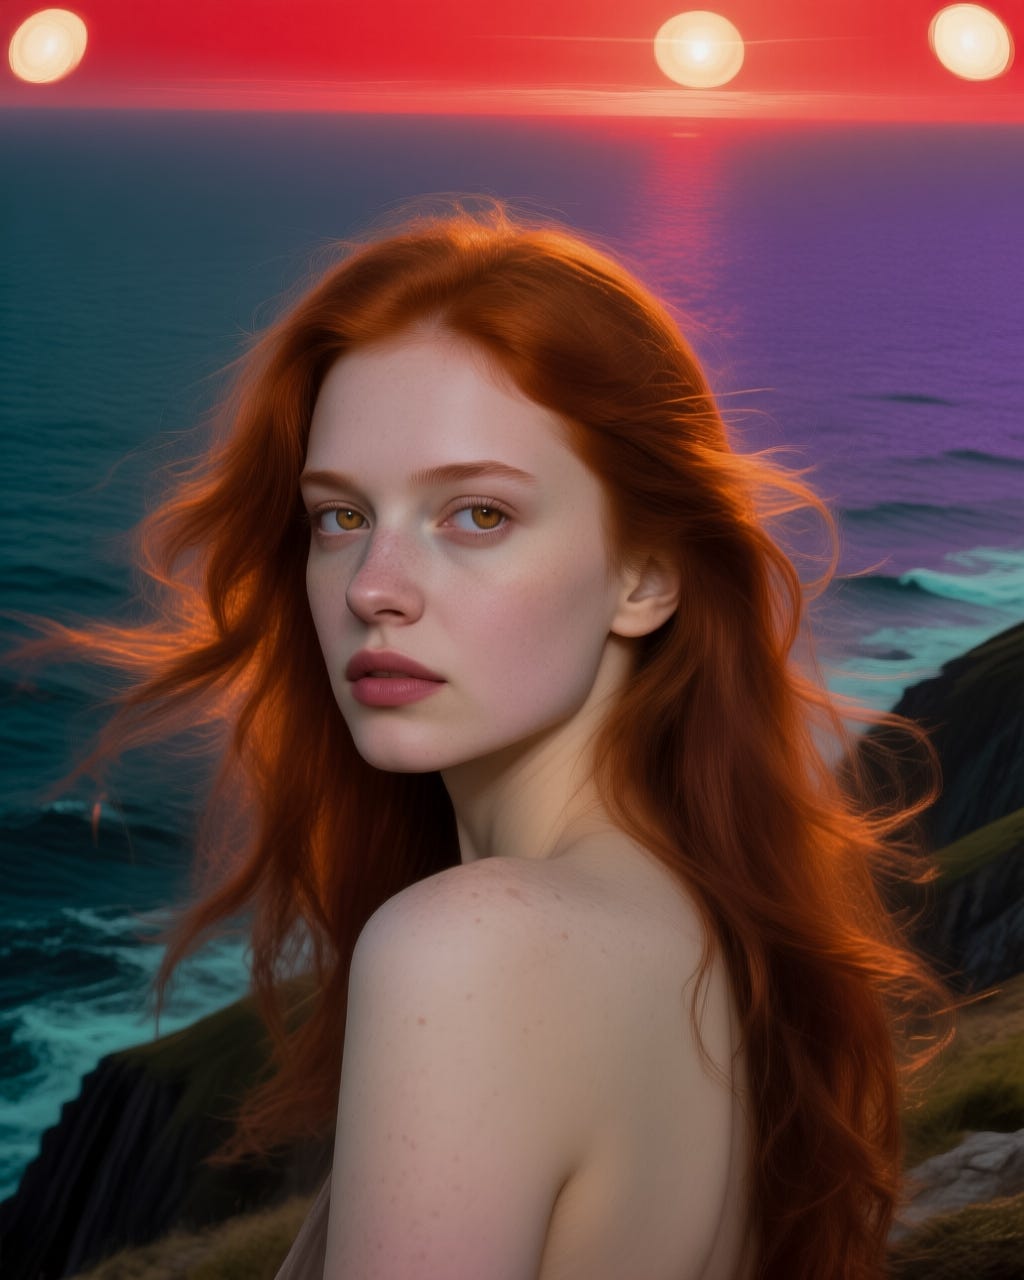
Using the canny version produces the output below and as it is a canny/edge model it has pulled through the outlines of the lights in the original image so it is not a good model to use in this case, however, the rest of the image has worked well.
Let’s move to the depth version which should give a better result. For this workflow I have switched out the Canny node for a DepthAnythingV2 node but I think others should work too as it is just creating the mask.
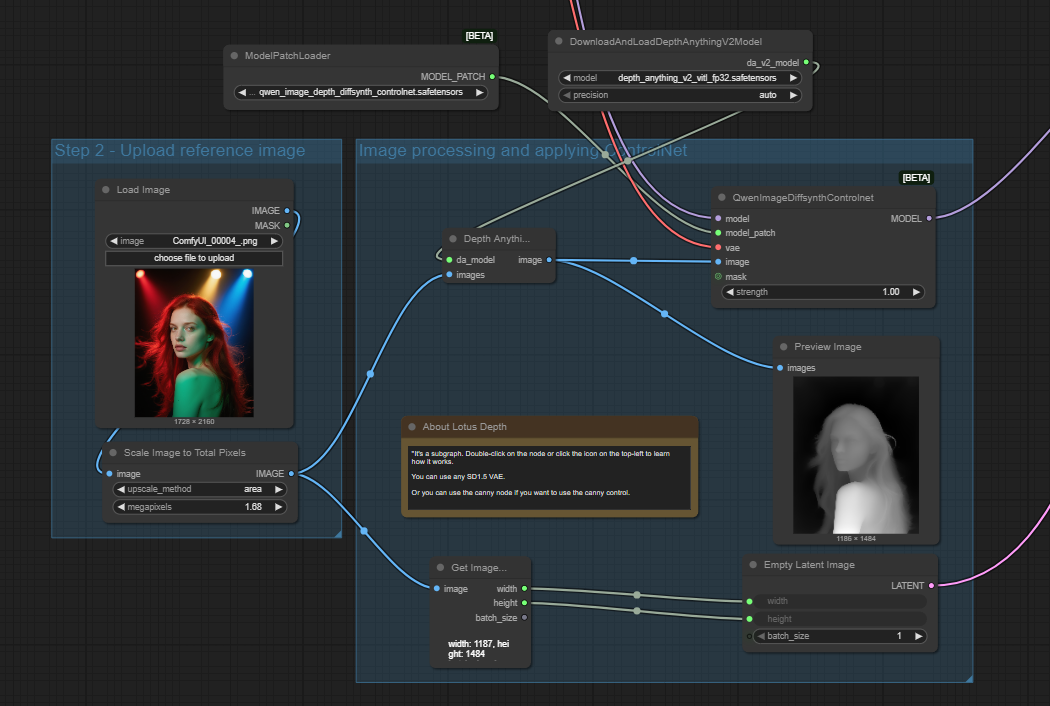
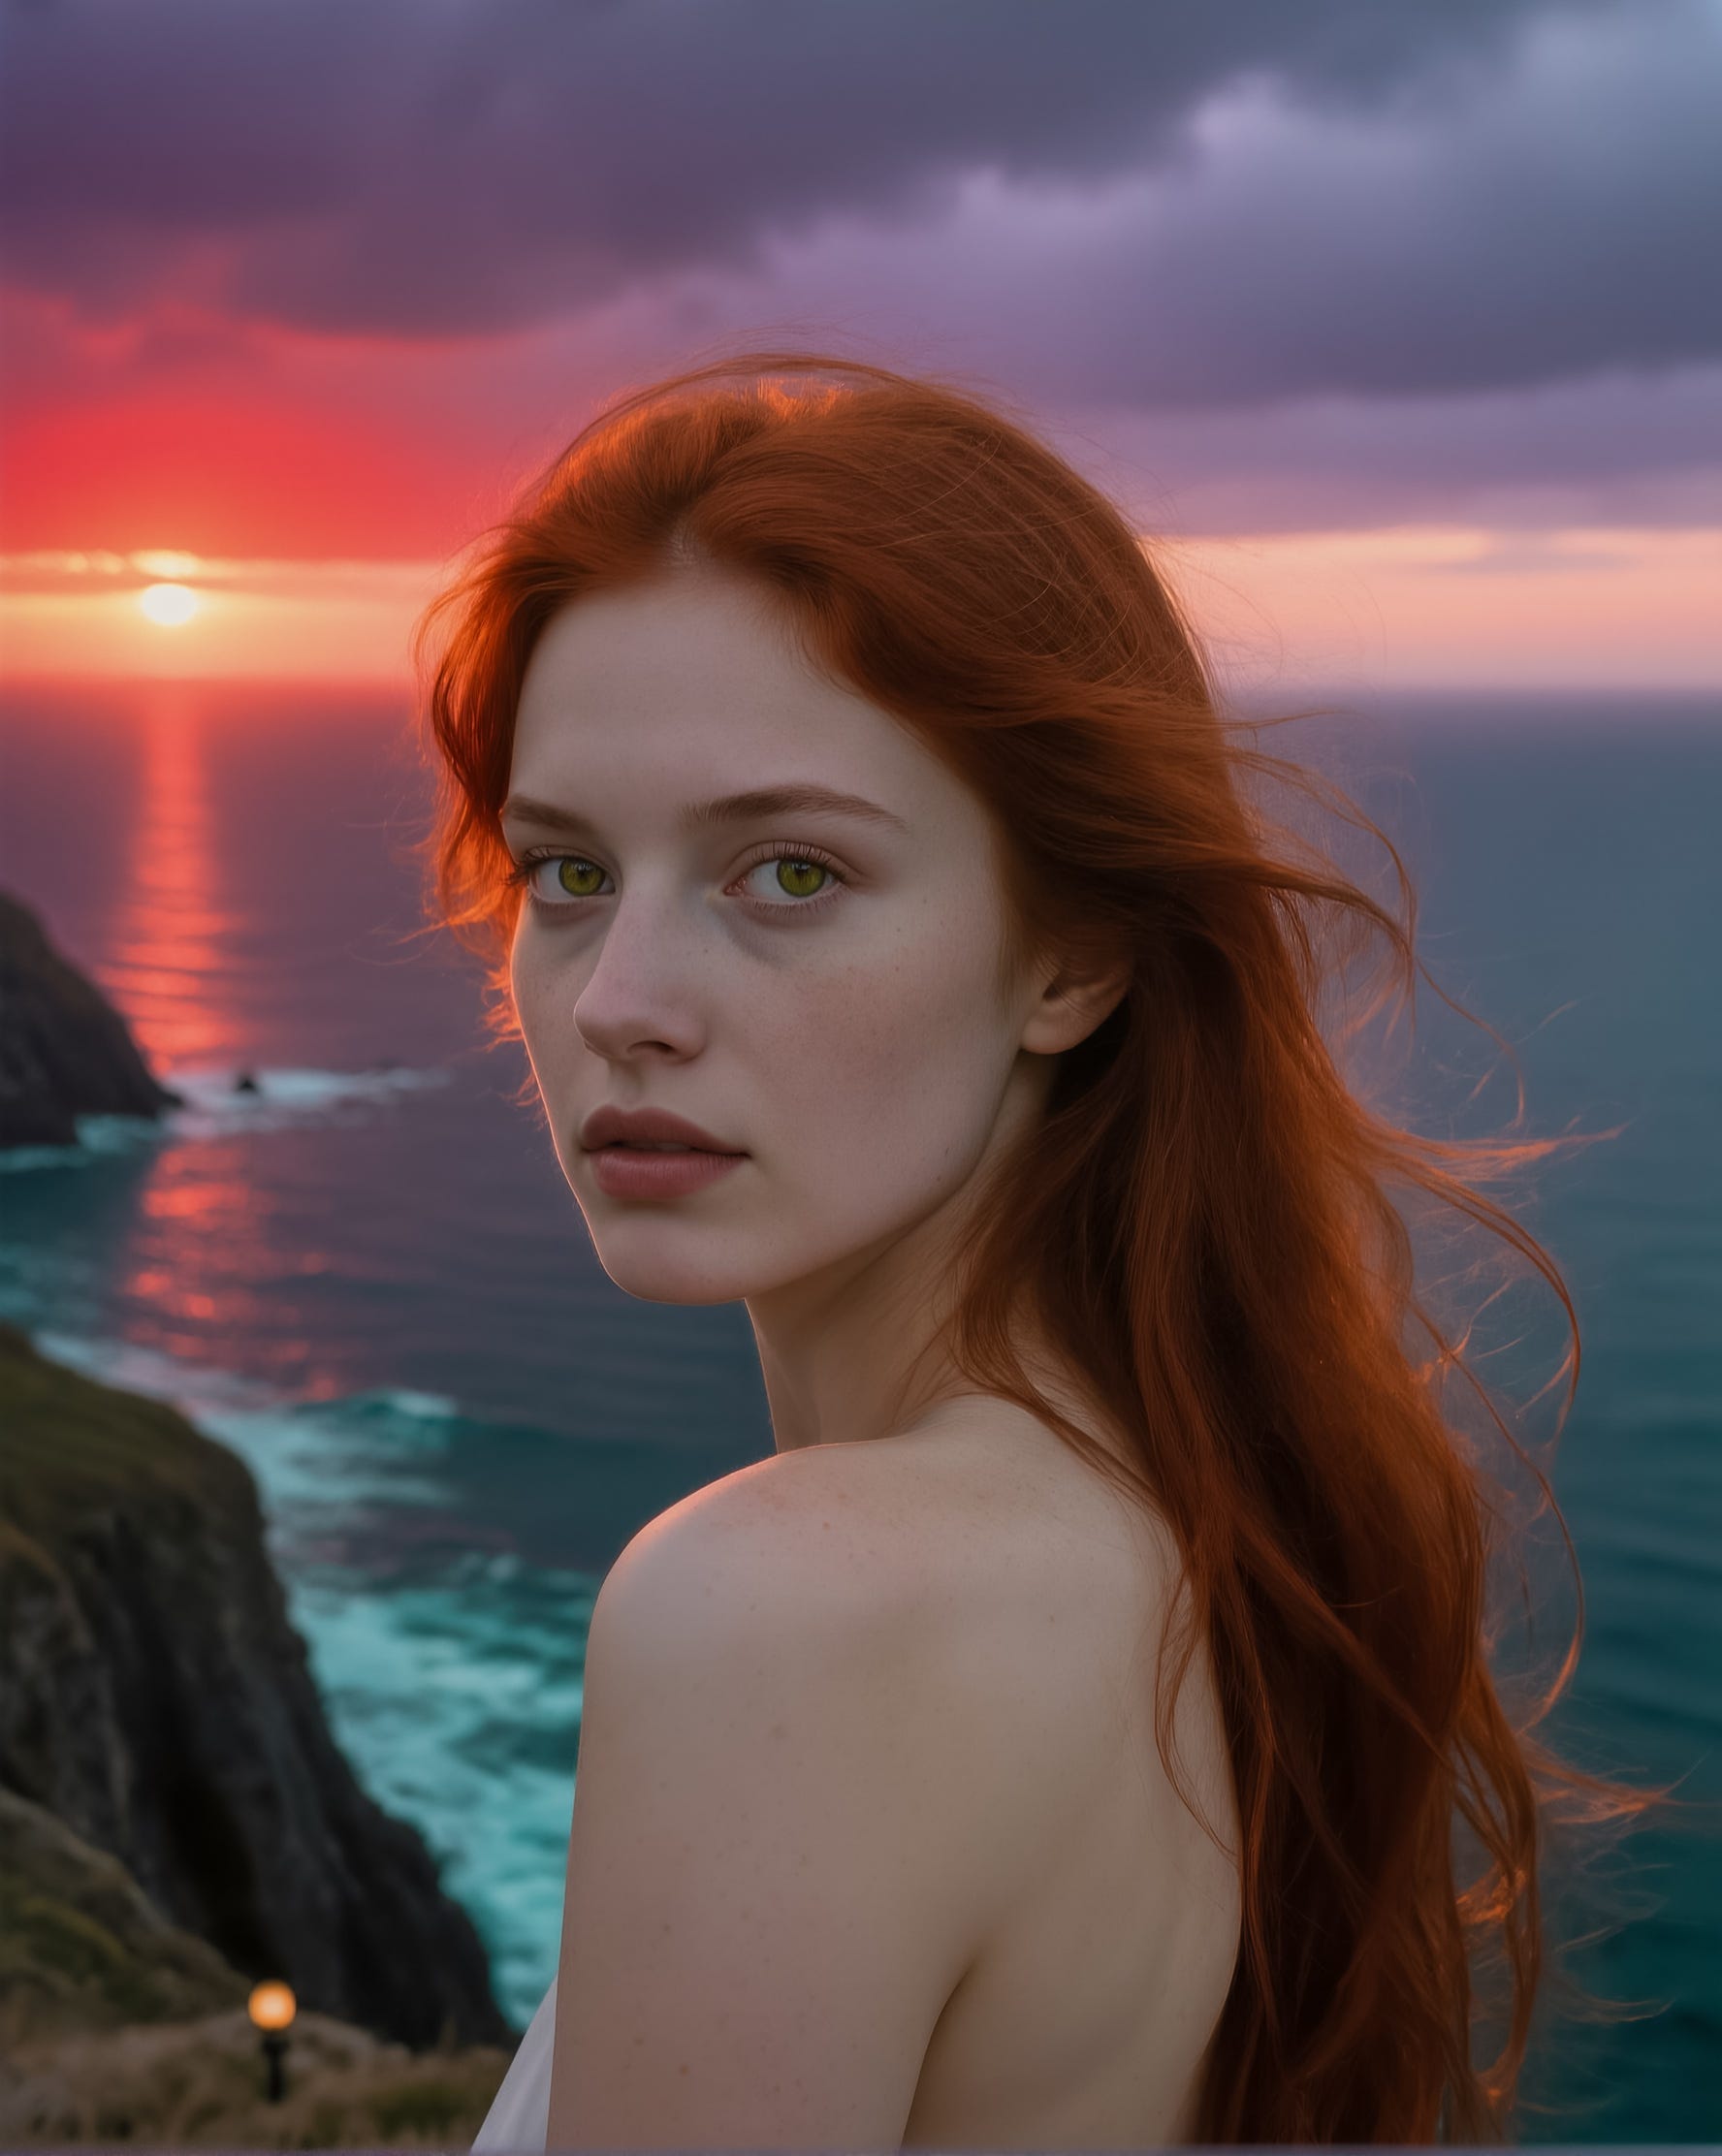
The output is shown below and the depth Diffsynth version has done a similar job to InstantX, although it has taken a more liberal approach to the hair style, particularly on the left side. The hair is showing on the mask so it is interesting that it does not appear on the output. A rather random light has also appeared in the clifftop.
There is also a Diffsynth Model Patch for inpainting but I have not experimented with that yet as that feels more like a Qwen Image Edit comparison rather than a ControNet.
Image Union ControlNet LoRA
The last option is the Qwen Image Union ControlNet LoRA. As the name suggests it is implemented via a LoRA rather than a true ControlNet but it has the same effect. It supports most of the standard ControlNet nodes such as canny, depth, pose, lineart, etc.
As is normal for a LoRA, it is loaded into the model flow straight after the model is loaded, with the main conditioning inserted in the conditioning flow before it is sent to the sampler, one for positive and one for negative. The latent image is also connected to the sampler as shown below.
Starting with a depth ControlNet using the same input and prompt as previously the following output is achieved.
As with the previous examples the structure and pose of the woman is maintained very effectively with just the background changing.
If we now switch to using a canny ControlNet, which focuses on edge detection, the result is a little different.
In this example canny would not be the best approach as it has detected the lights in the original image and carried the outlines forward, this in turn has overridden the sunset from the prompt. The woman also does not look quite right in terms of blending with the background, although the main features have been carried forward correctly.
Next let’s try a pose ControlNet, this should pick up the pose of the woman but allow for more flexibility in terms of overall composition.
In this example the composition is still fairly similar but there are changes to the woman’s eyes, mouth and hair. The changes would be more pronounced if the image was a full body with arms, hands, legs and feet.
In this second example I have added a few more changes. It is worth noting that if using a depth or canny ControlNet the addition of sunglasses and an earring is unlikely to work as the depth mask would conflict but with a pose ControlNet they do work. With a Pose ControlNet it would also be possible to change the hair style. This is were you start to overlap with Qwen Image Edit and inpainting as similar results could be achieved using those approaches too.
ControlNet Settings
The basic use of ControlNets is relatively straightforward, however, there are further settings to tweak how they operate. These settings vary depending on the model and nodes used, some examples include:
Strength - Controls how much influence the ControlNet has on the new image, similar to a LoRA strength. Reducing the strength allows the generation process more scope to deviate from the control image.
Start and End Percentage - Controls at what point in the sampling process the ControlNet starts to influence the new image and at what point it stops. Normally you would start at 0% but you may wish to stop before the end to allow for some variation.
Resolution - Controls the level of resolution used for the image pre-processing. A higher resolution produces more detail but can lead to a level of detail which restricts the model too much.
Low Threshold/High Threshold - Primarily seen with Canny/Edge, this sets the low threshold at which a detected edge is included, and the high threshold above which a detected edge is ignored. Increasing the low threshold reduces the number of small edges included which helps on some images where too many edges would impact the quality of the output.
There are no hard and fast rules on these settings, it’s more a case of trial and error.
Summary
The arrival of ControlNets for Qwen Image is a great addition to the already powerful model. There is perhaps some overlap with Qwen Image Edit, depending on what you are trying to achieve, but ControlNets expand the options available.
My starting point would be if you are trying to change smaller details of an existing image, or the pose of someone, then Qwen Image Edit is likely to be better. ControlNets shine where you are trying to create new images influenced by an existing image, often delivering a better result than an image edit because it fully creates a new image rather than modifying an existing one. In a previous post I compared Qwen Image Edit with Flux.1 Kontext and Nano Banana and highlighted some of these issues when image editing tries to infill or change details.
I have only briefly covered a few ControlNet options here, there are plenty more to add creative flair to images. With Qwen Image all three ControlNet approaches seem to work well, although I did have trouble with the depth Diffsynth model patch using Lotus Depth as it kept outputting a somewhat surreal blended image so I switched to using DepthAnythingV2.
I like the output of both the InstantX and Image Union LoRA depth models, but as the Image Union LoRA approach supports a wide range of ControlNets it is probably my preferred all-rounder.