
Z-Image Turbo: Fast and Functional Photorealism
A Model Bucking the Current Trend

The last few weeks has seen the release of several new models and in nearly all cases the trend has been more parameters, higher VRAM requirements and larger model sizes. Flux.2 Dev is a mind-blowing 32 billion parameter model with an additional 24 billion parameters in the text encoder, leading to the full model requiring 96GB of VRAM!
I’ll cover Flux.2 Dev in a separate post as it is a complex beast which seems to be aimed at detailed control, with an extensive and powerful prompting approach which is perhaps moving in a specific direction to support marketing and product development and other more commercial aspects.
Z-Image Turbo stands out as it goes the other way - just 6 billion parameters and small enough to run effectively in 16GB of VRAM. It isn’t trying to cover everything, it is a model mainly focused on realistic images, generated quickly, with less of the artistic nature or broad span of other models.
Plenty of people have already posted comparisons to other models and written some very in-depth reviews so I’m not going to replicate, this post is going to cover how I have found it to use and some particular aspects such as sampler selection as in my experience the default workflow template and sampler selection within ComfyUI did not fully showcase what the model is capable of.
The Basics
The core BF16 model is just over 12GB in size, loading comfortably into a 16GB VRAM GPU, a key factor for the performance of this model. Alongside this it uses the Qwen3 4B (the 4B stands for 4 billion parameters) text encoder which is 7GB and the common VAE which is used by Flux and other models.
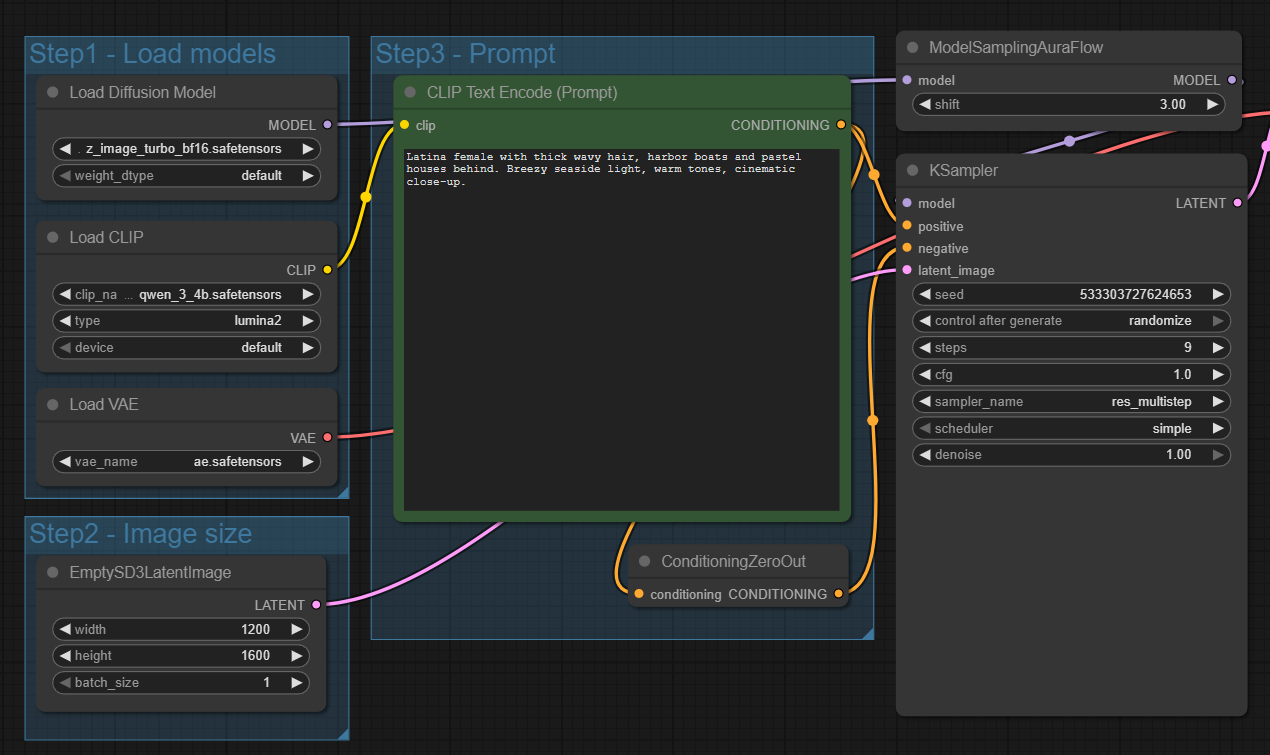
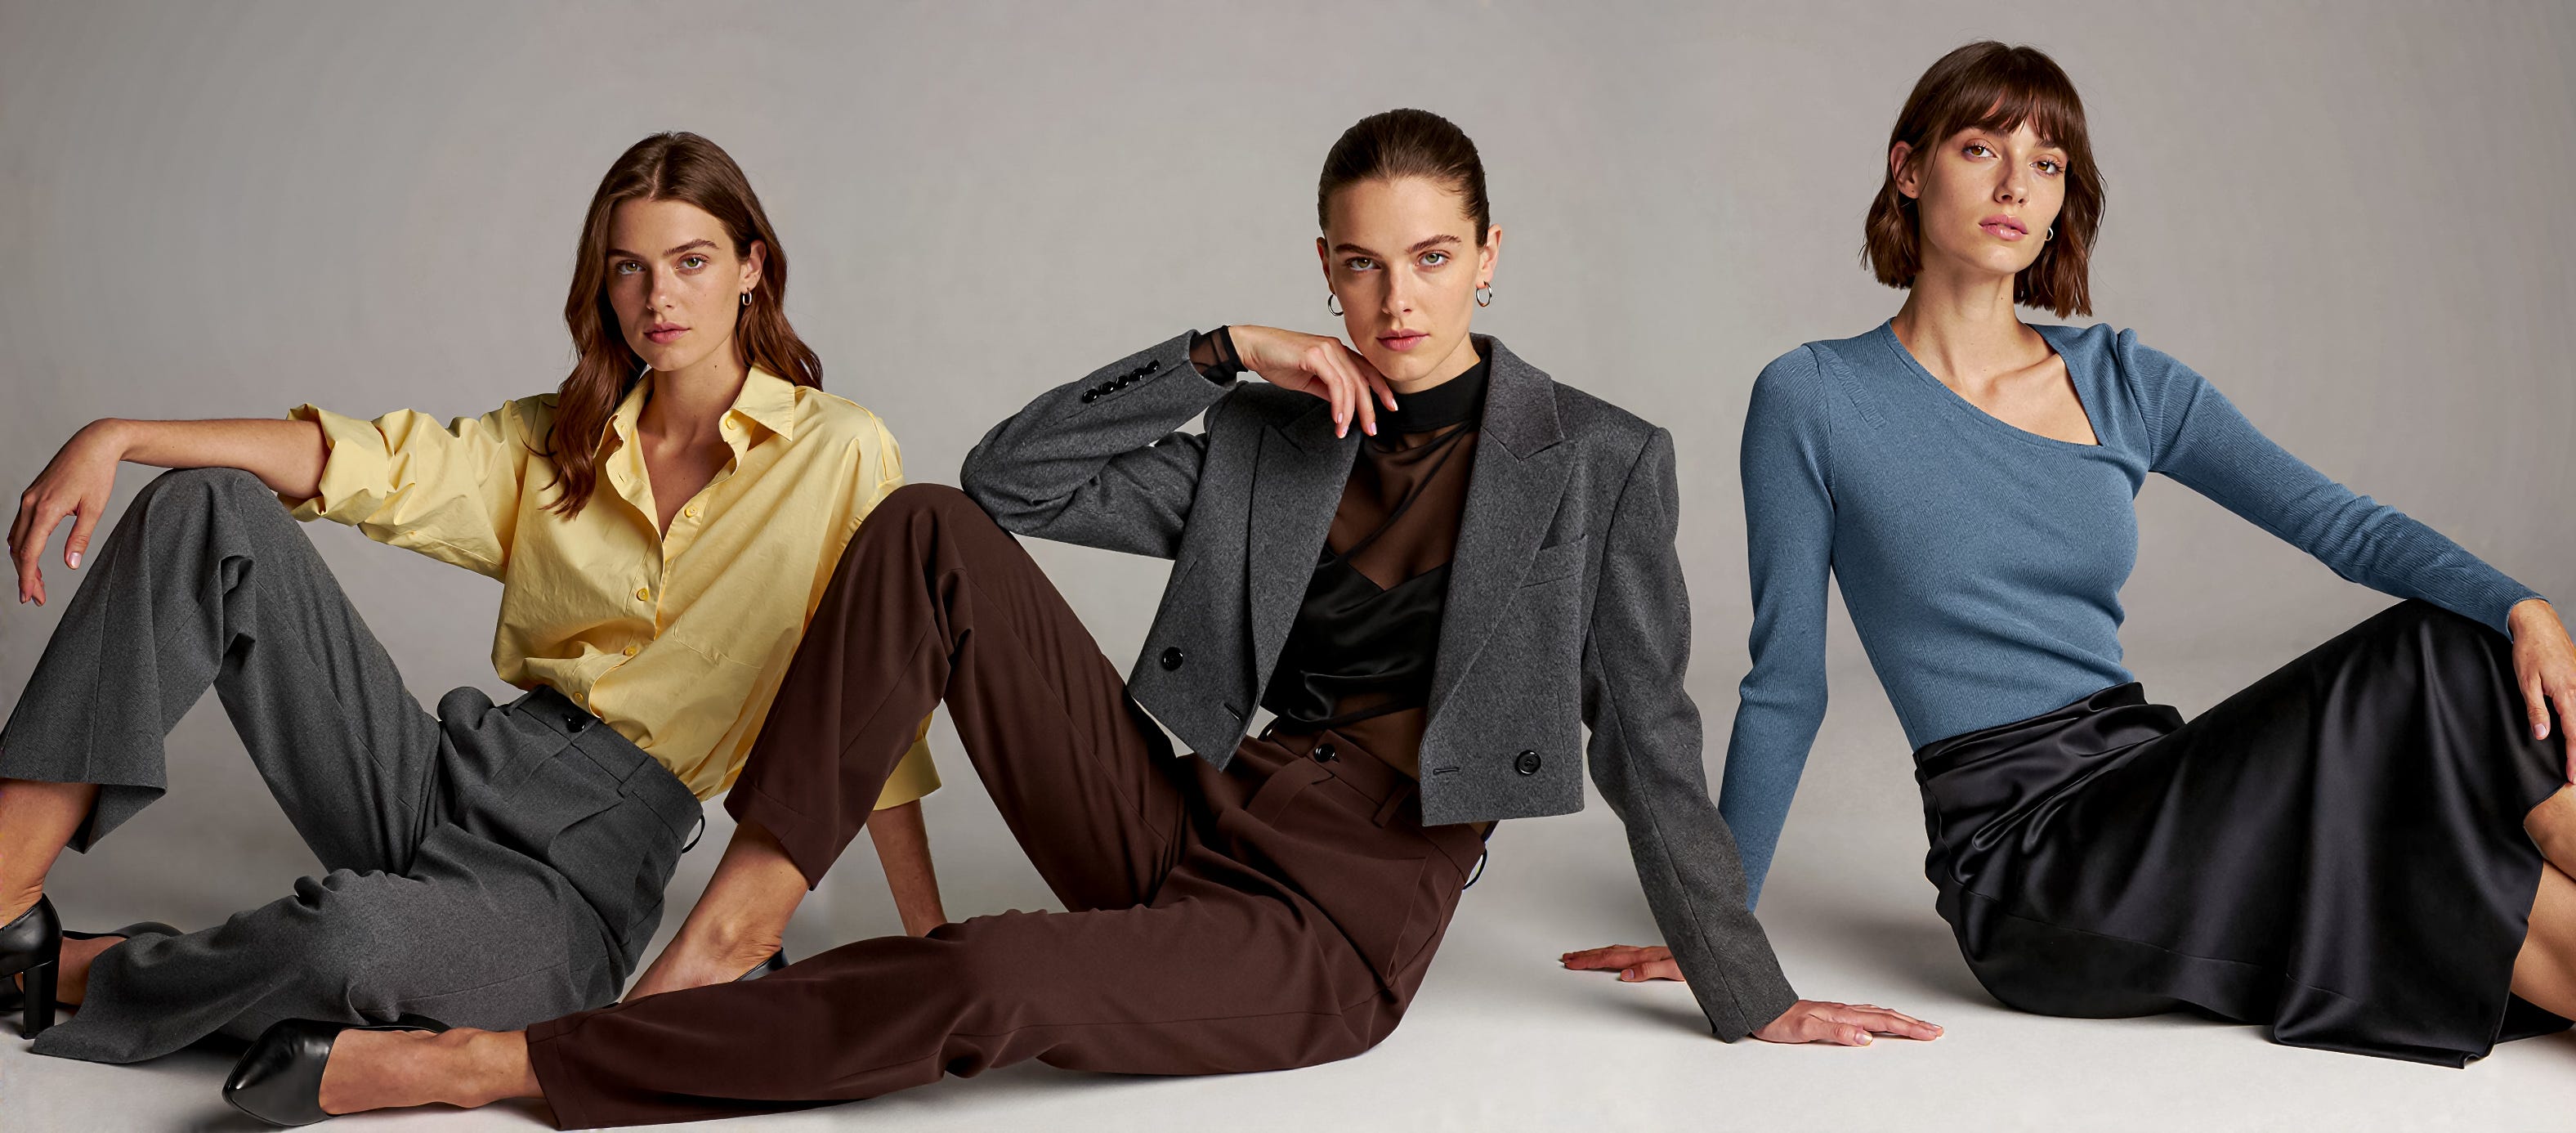
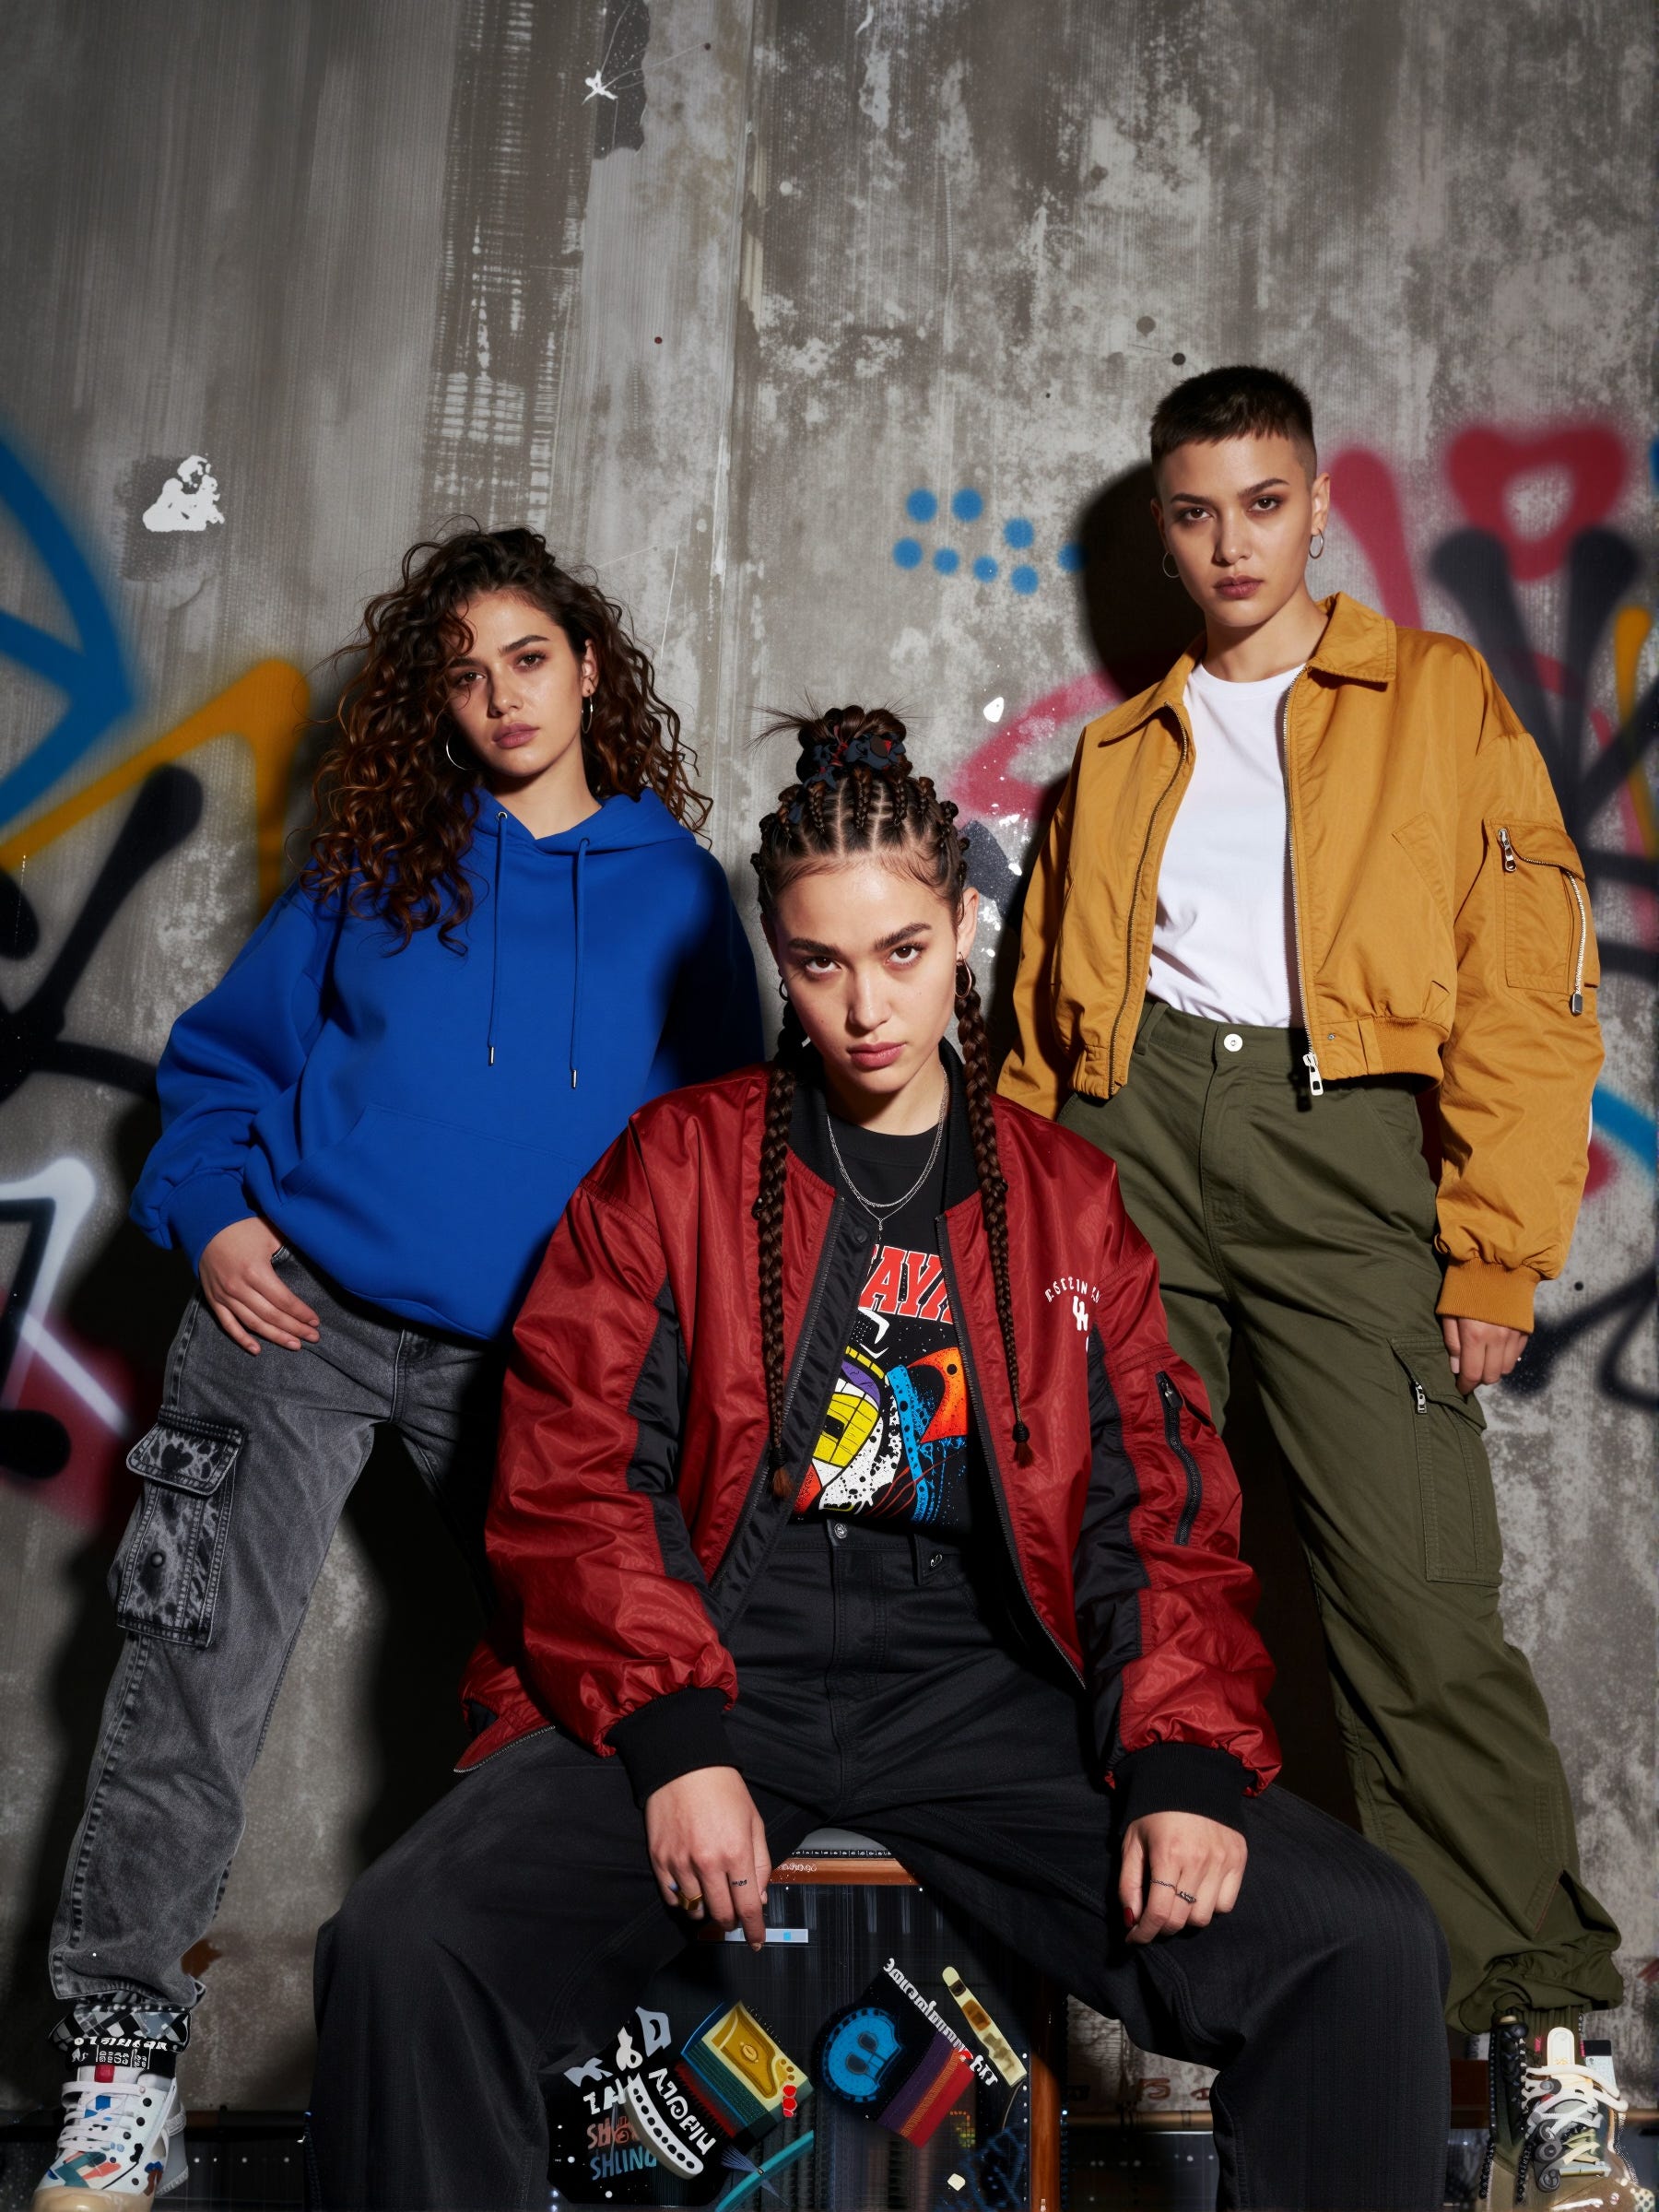
The standard workflow in the ComfyUI templates is very straightforward - a positive prompt and a single KSampler with 9 steps using res_multistep as a sampler with a simple scheduler.
This basic workflow is fast and can produce some surprising good results for so few steps, but not in all cases. I did become frustrated that some generations were poor in quality, washed out and had some weird anomalies.
In theory you can run generations up to 4MP, although most people seem to view closer to 2MP as the sweet spot. I have run 1200 x 1600 with no issues and even 1500 x 1500. Above that I have seen anomalies but that may just be occasional quirks.
Different Samplers/Schedulers
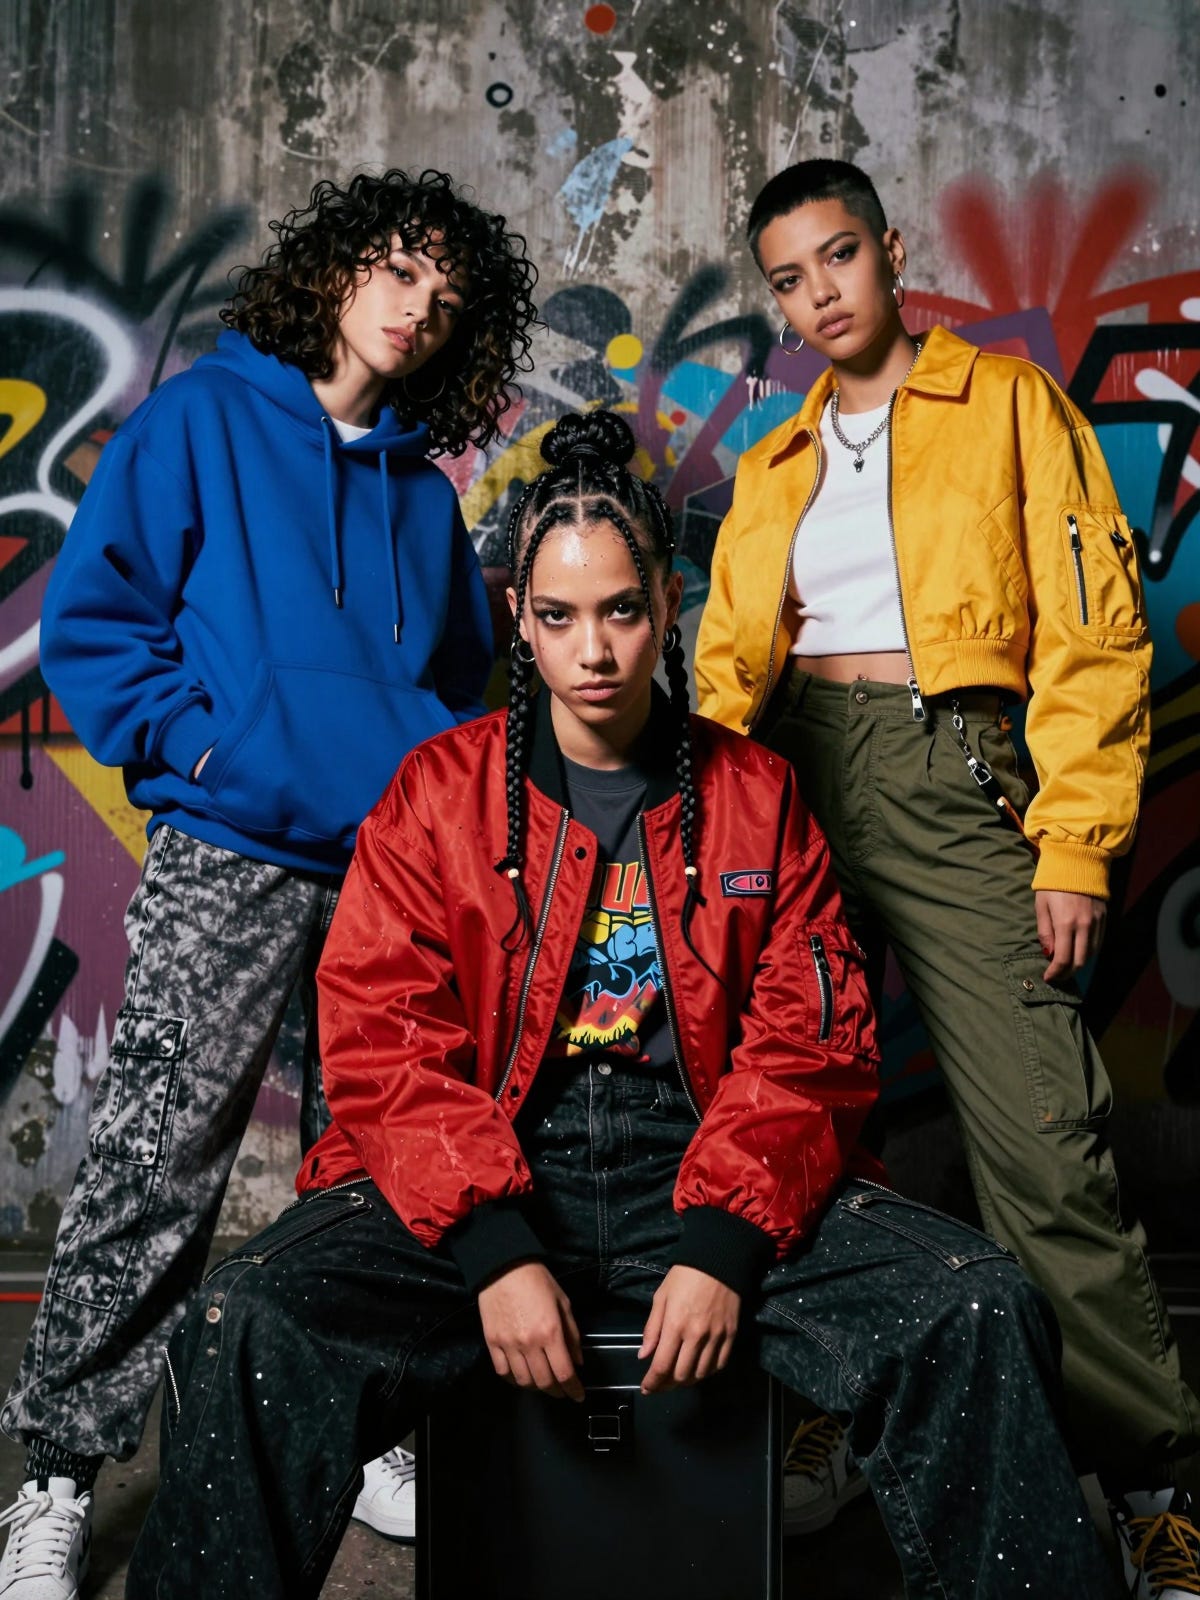
There is plenty of discussion online about the samplers and schedulers to use with Z-Image with DPM++ SDE coupled with DDIM Uniform often coming up as a good combination.
Views on output images in relation to samplers is highly subjective and often down to personal tastes but in general I have had good results with DPM++ SDE/DDIM Uniform with a slightly more natural appearance and better detail. It has certainly been more consistent.
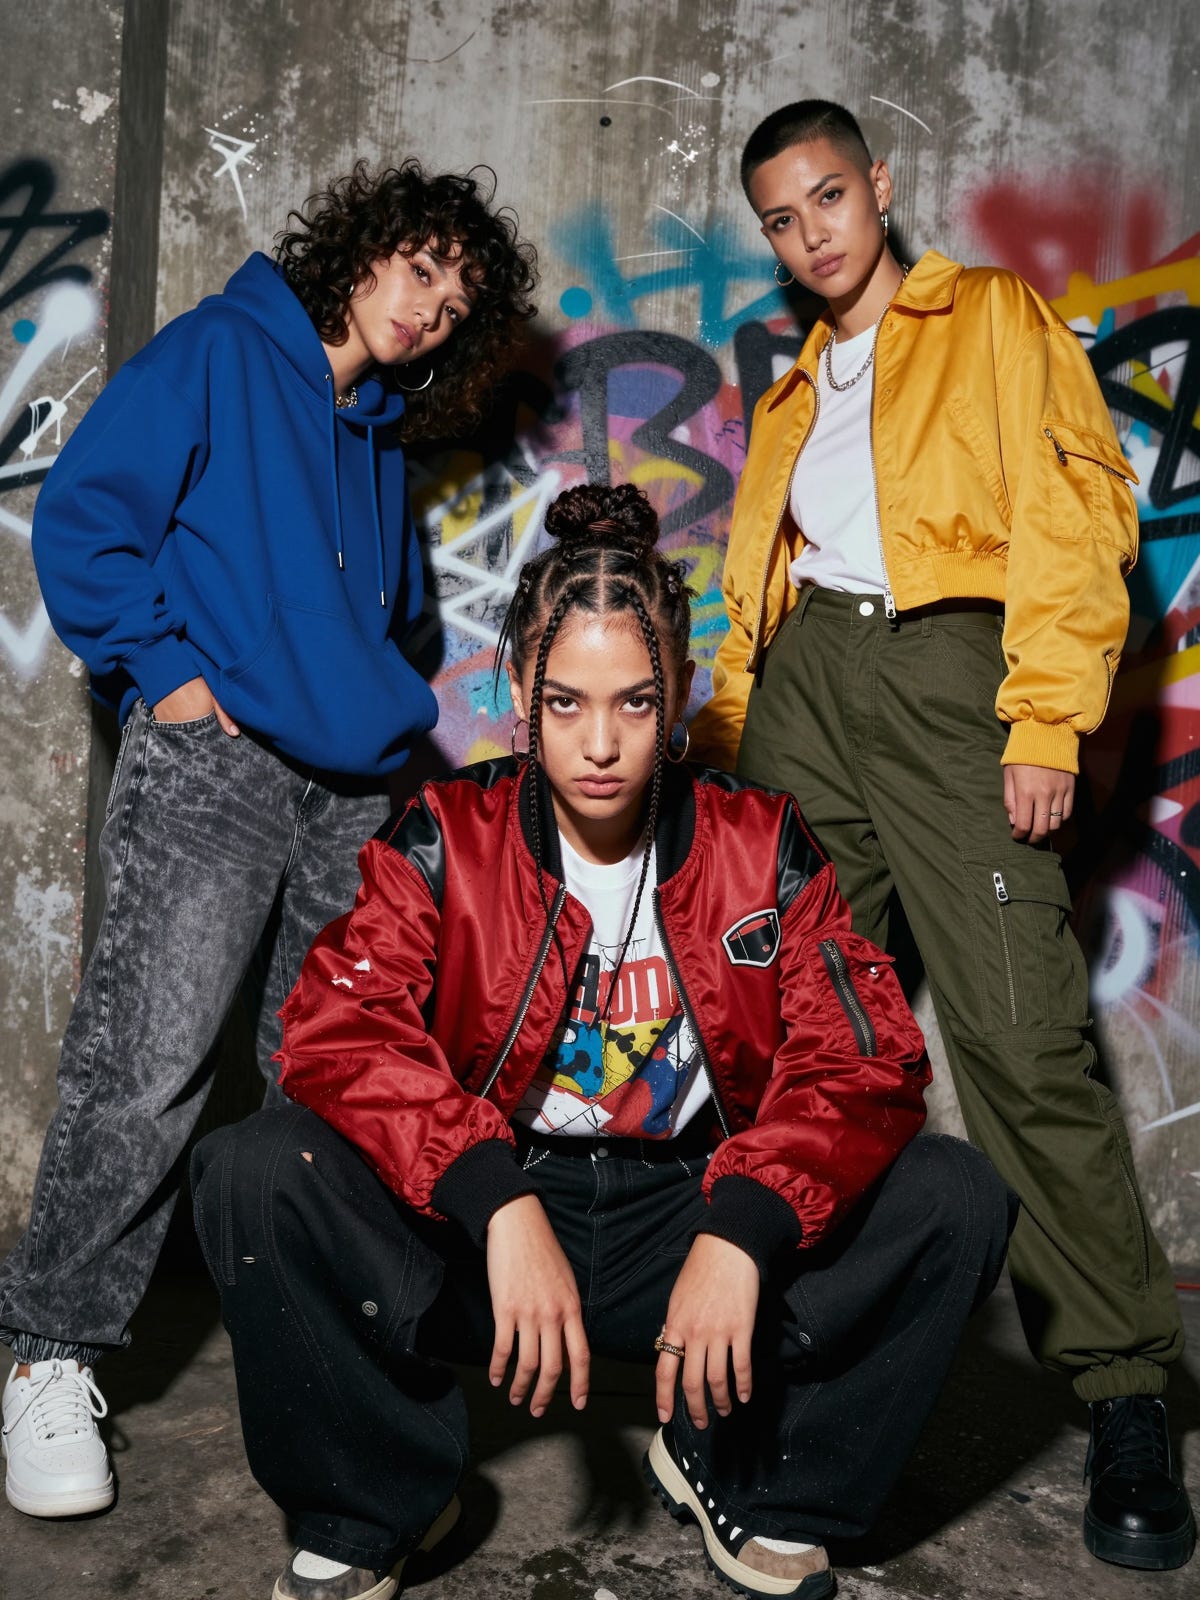
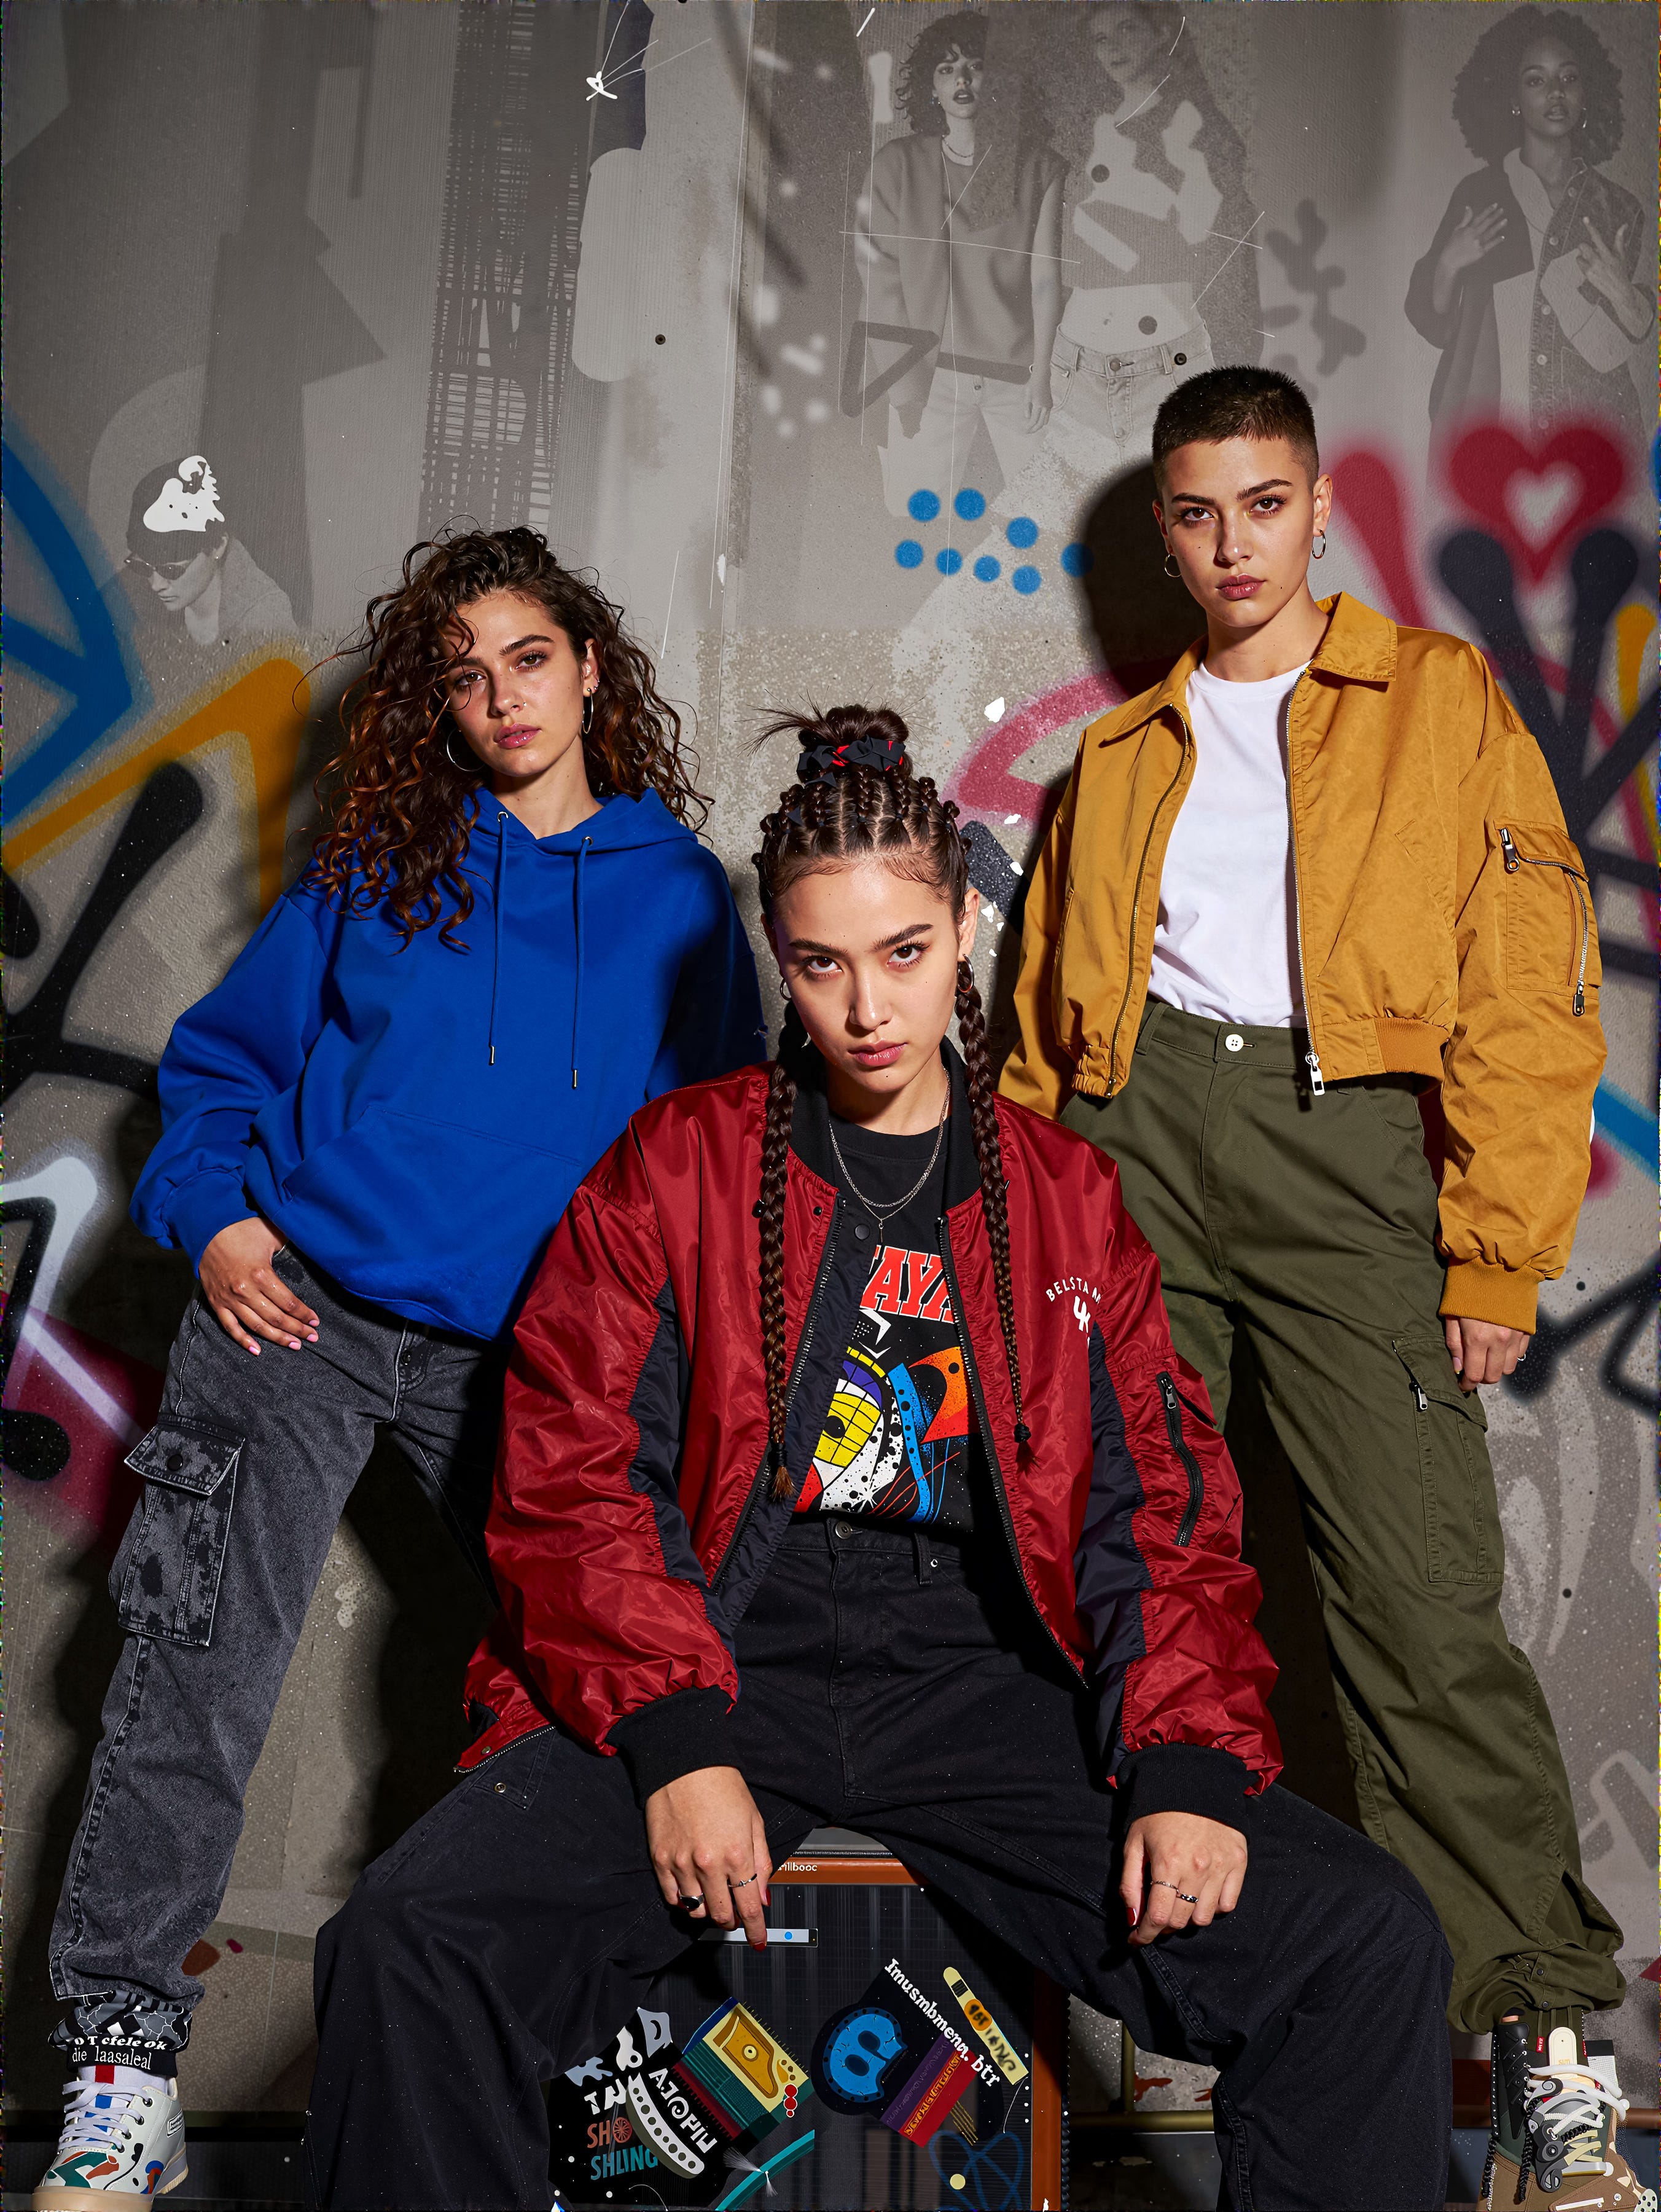
Given the popularity of Euler, the final image in this section is Euler/Simple

Still a good image but in my view not as natural or quite as detailed as the DPM++SDE/DDIM Uniform version.
I’m not saying any one is better than any of the others but what I have found with Z-Image is that I swap samplers/schedulers far more frequently than I have done with other models.
Dual Samplers & Upscaling
The next step was to add in some upscaling and move to using two samplers, one to create the initial image and then a second sampler after the upscaling to refine the image.
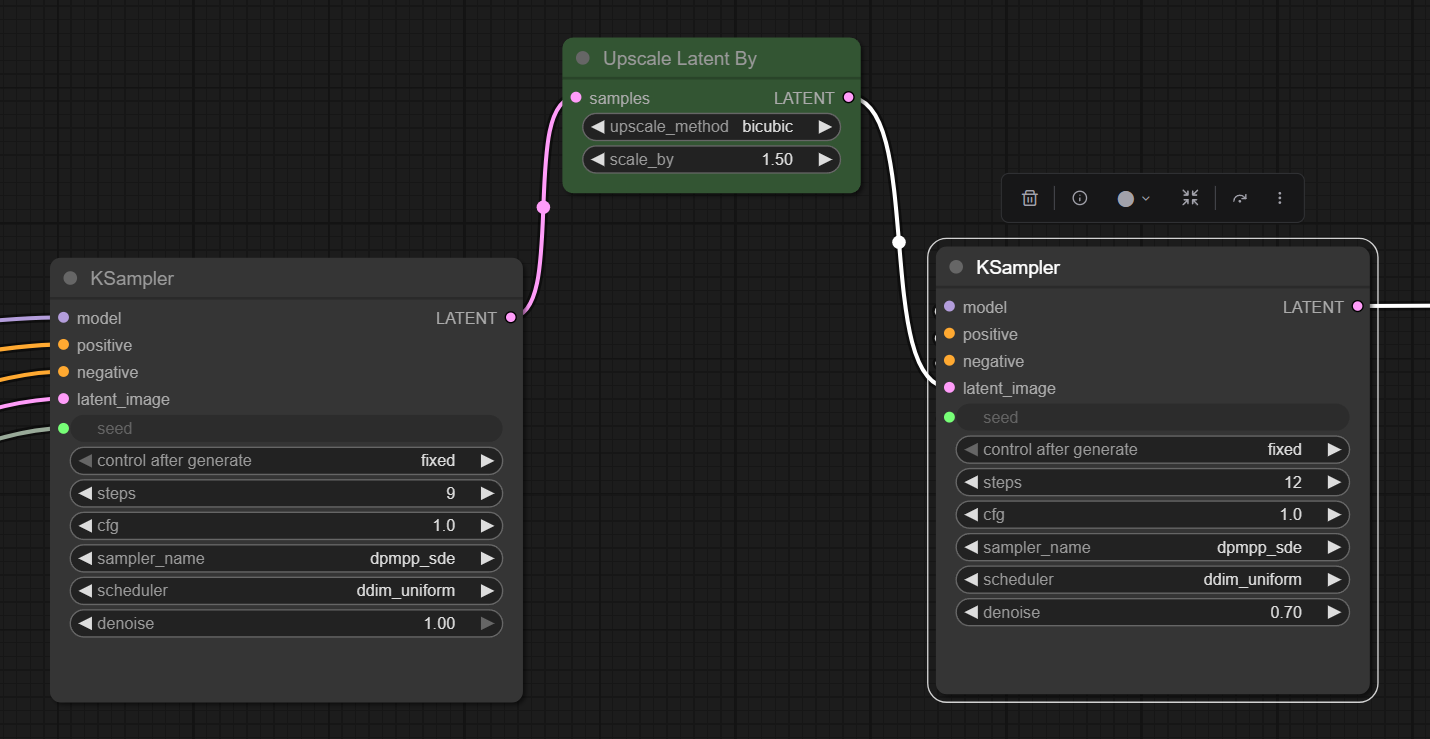
In this case I have used a straight forward latent upscale but you could drop out to pixel space and use UltimateSD or similar but that is a much slower process and I have found the latent upscale when being followed by another sample step works fine.
Note: I did try using a latent upscale using an upscale model but this frequently created issues with the second stage. I will revisit this at some point.
Using this approach is doubling the generation time but when using the latent upscale I think it is still faster than a single stage with an UltimateSD upscale afterwards.
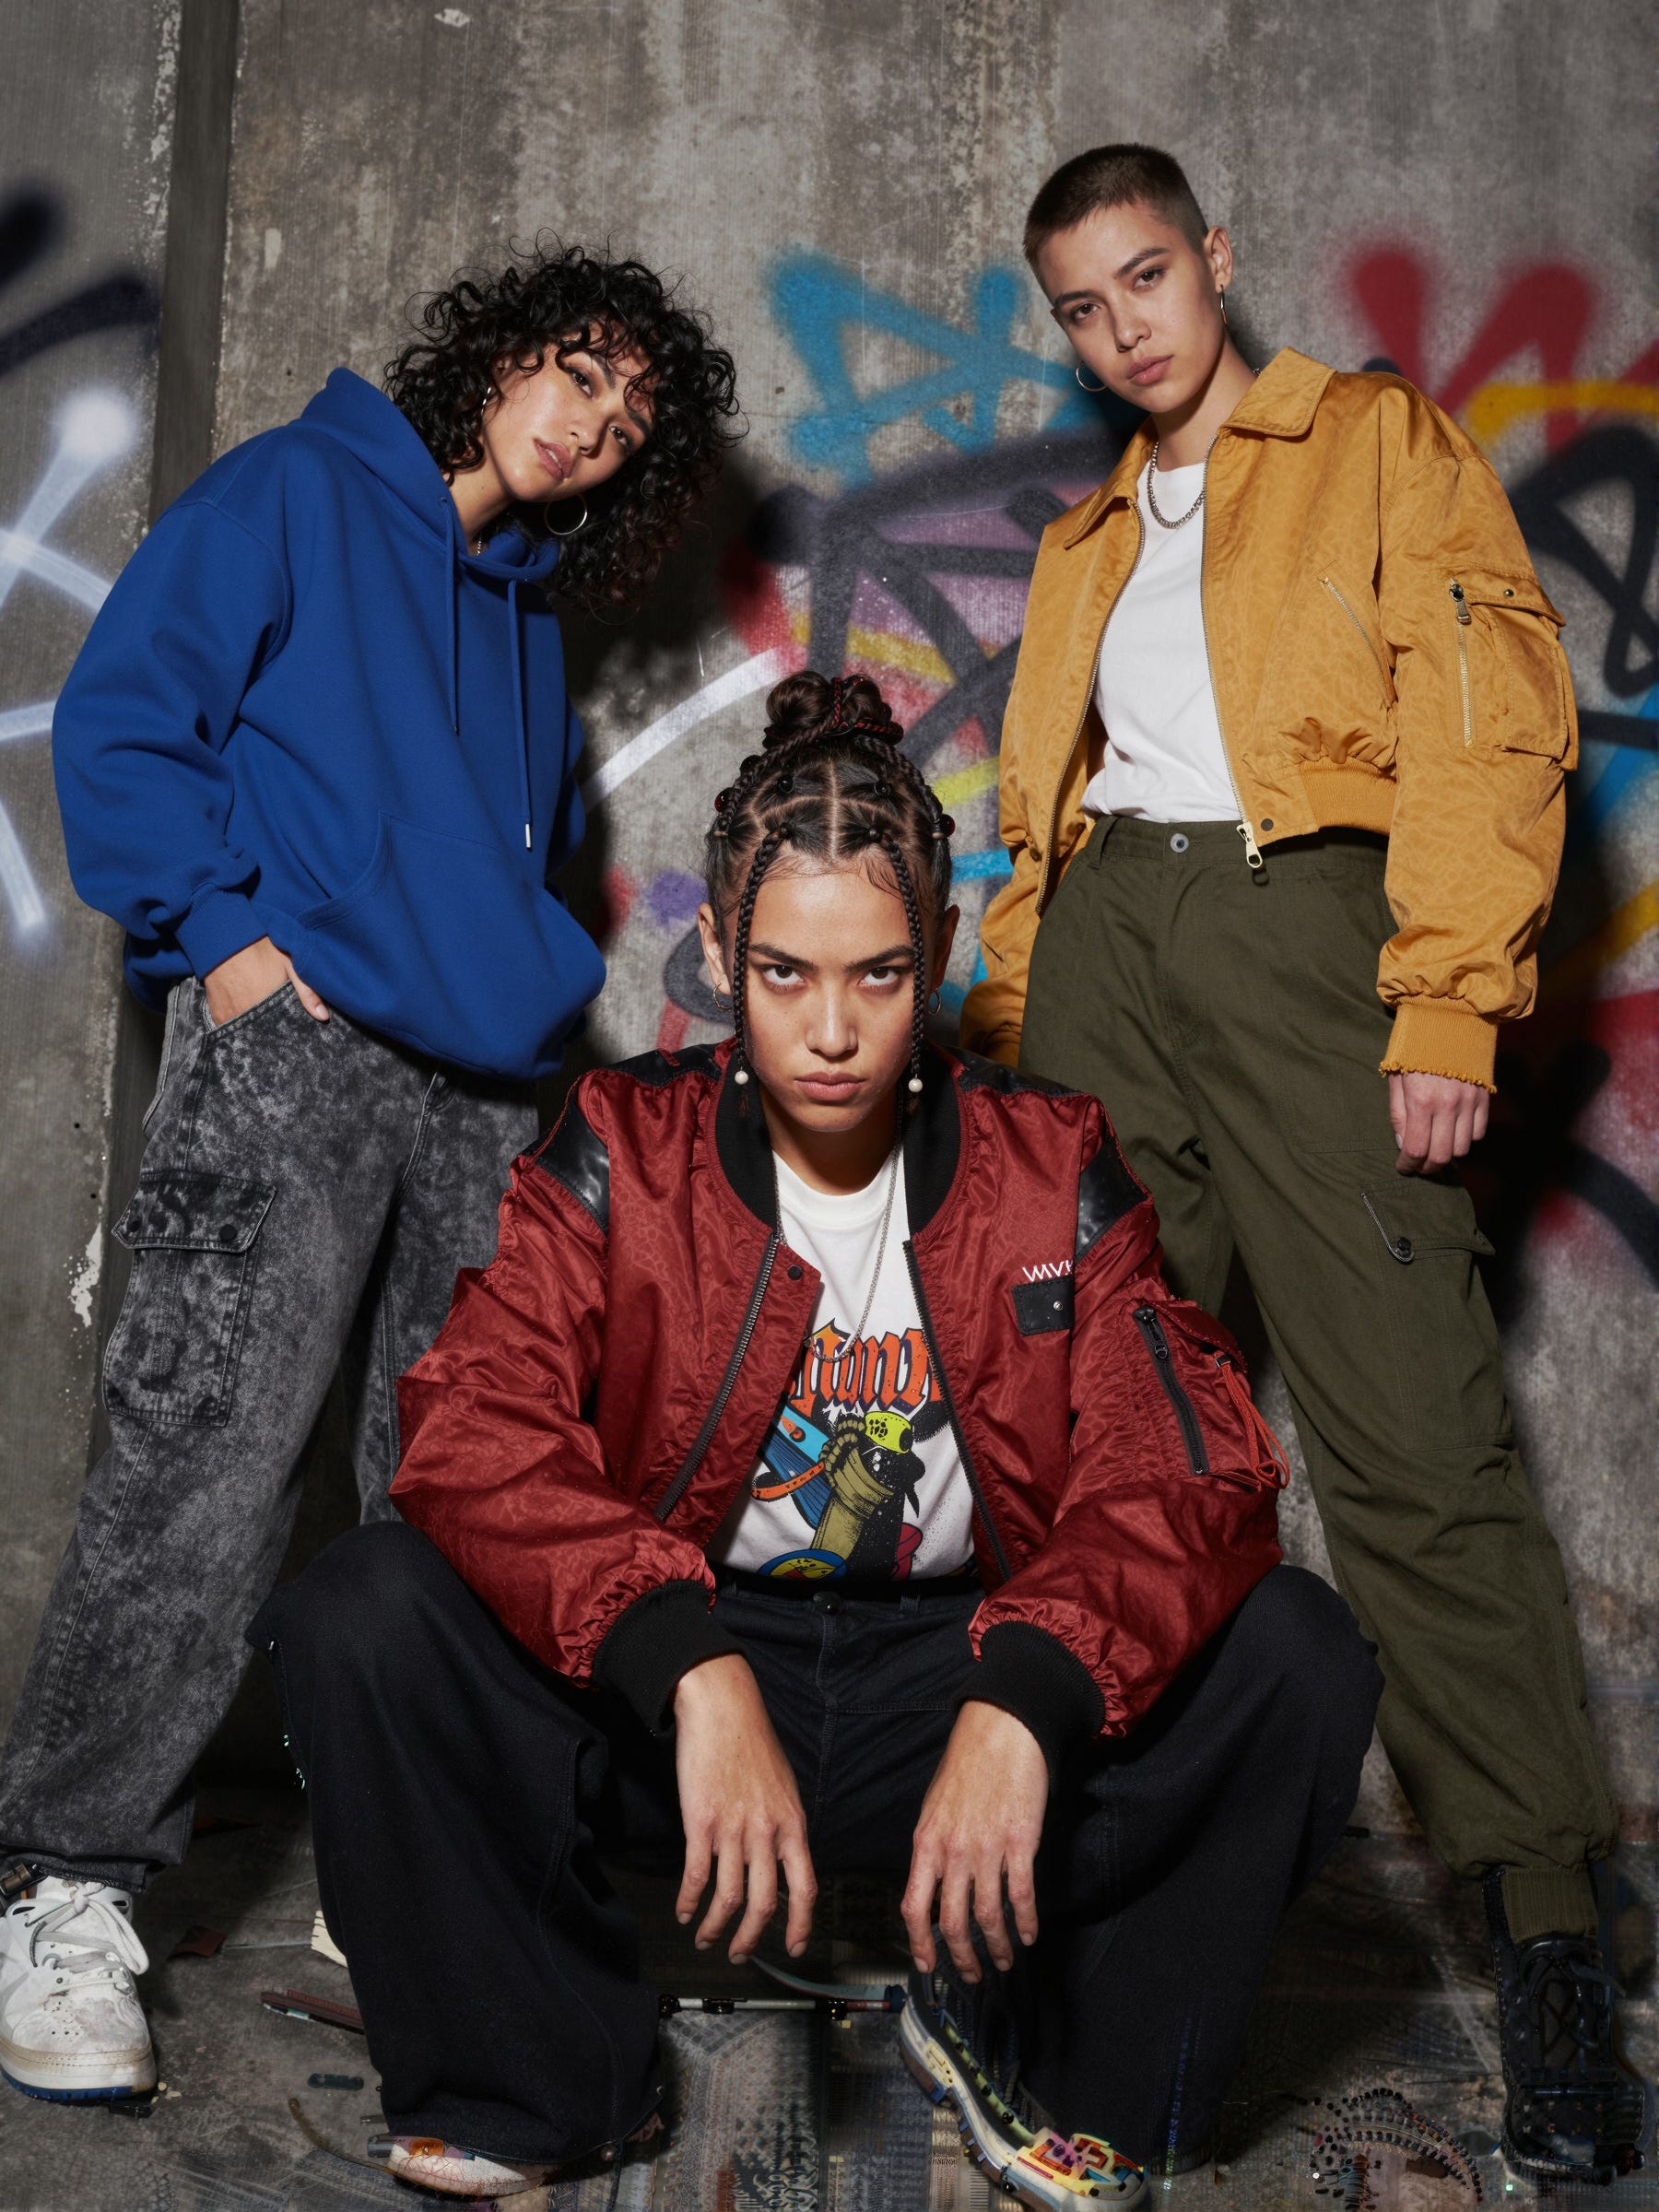
The output image in this case is now 1800x2400 and when zoomed you can see the skin detail which is more realistic than the single sample version. I think the styling and colours also look more natural.
As with the single sampler not all generations work well first time so some switching of samplers and changing of the number of steps and in some cases the denoise value of the second stage is also required.
Clown Shark Sampler
The Clown Shark Batwing RES4LYF sampler collection, which can be installed as an add-on to ComfyUI, garners praise from many as providing a better level of control and delivering high quality output with its ‘bong math’ and additional sampler options.
I am a fan of the Clown Shark samplers and often use them with Flux and Qwen, however, my experience with Z-Image has been a bit mixed, with some disappointing output so I had to try several different options to find a sampler/scheduler combination which worked well.
The flow is similar to the normal KSampler, in this case with the addition of the ClownOptions Detail Boost node.
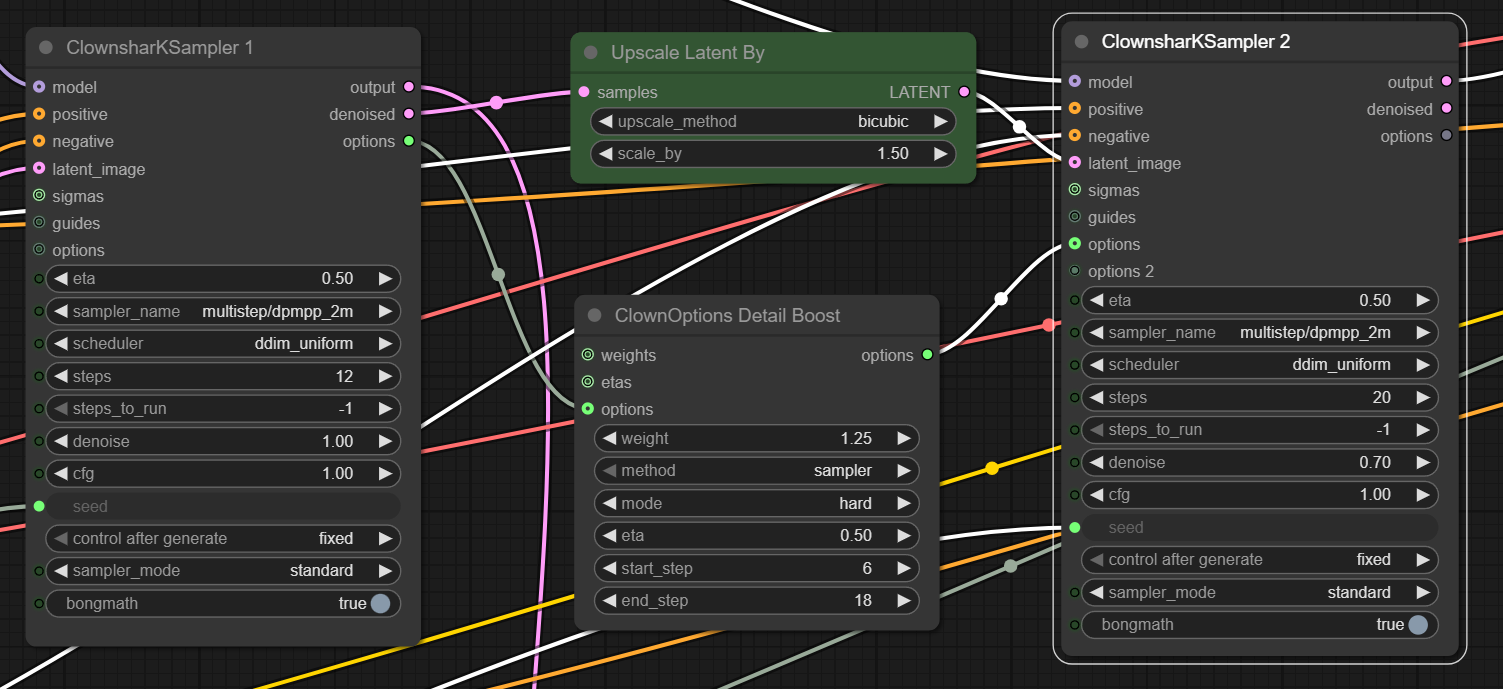
Processing time may be longer than the original KSampler but not in all cases as some of the samplers with Clown Shark require fewer steps.
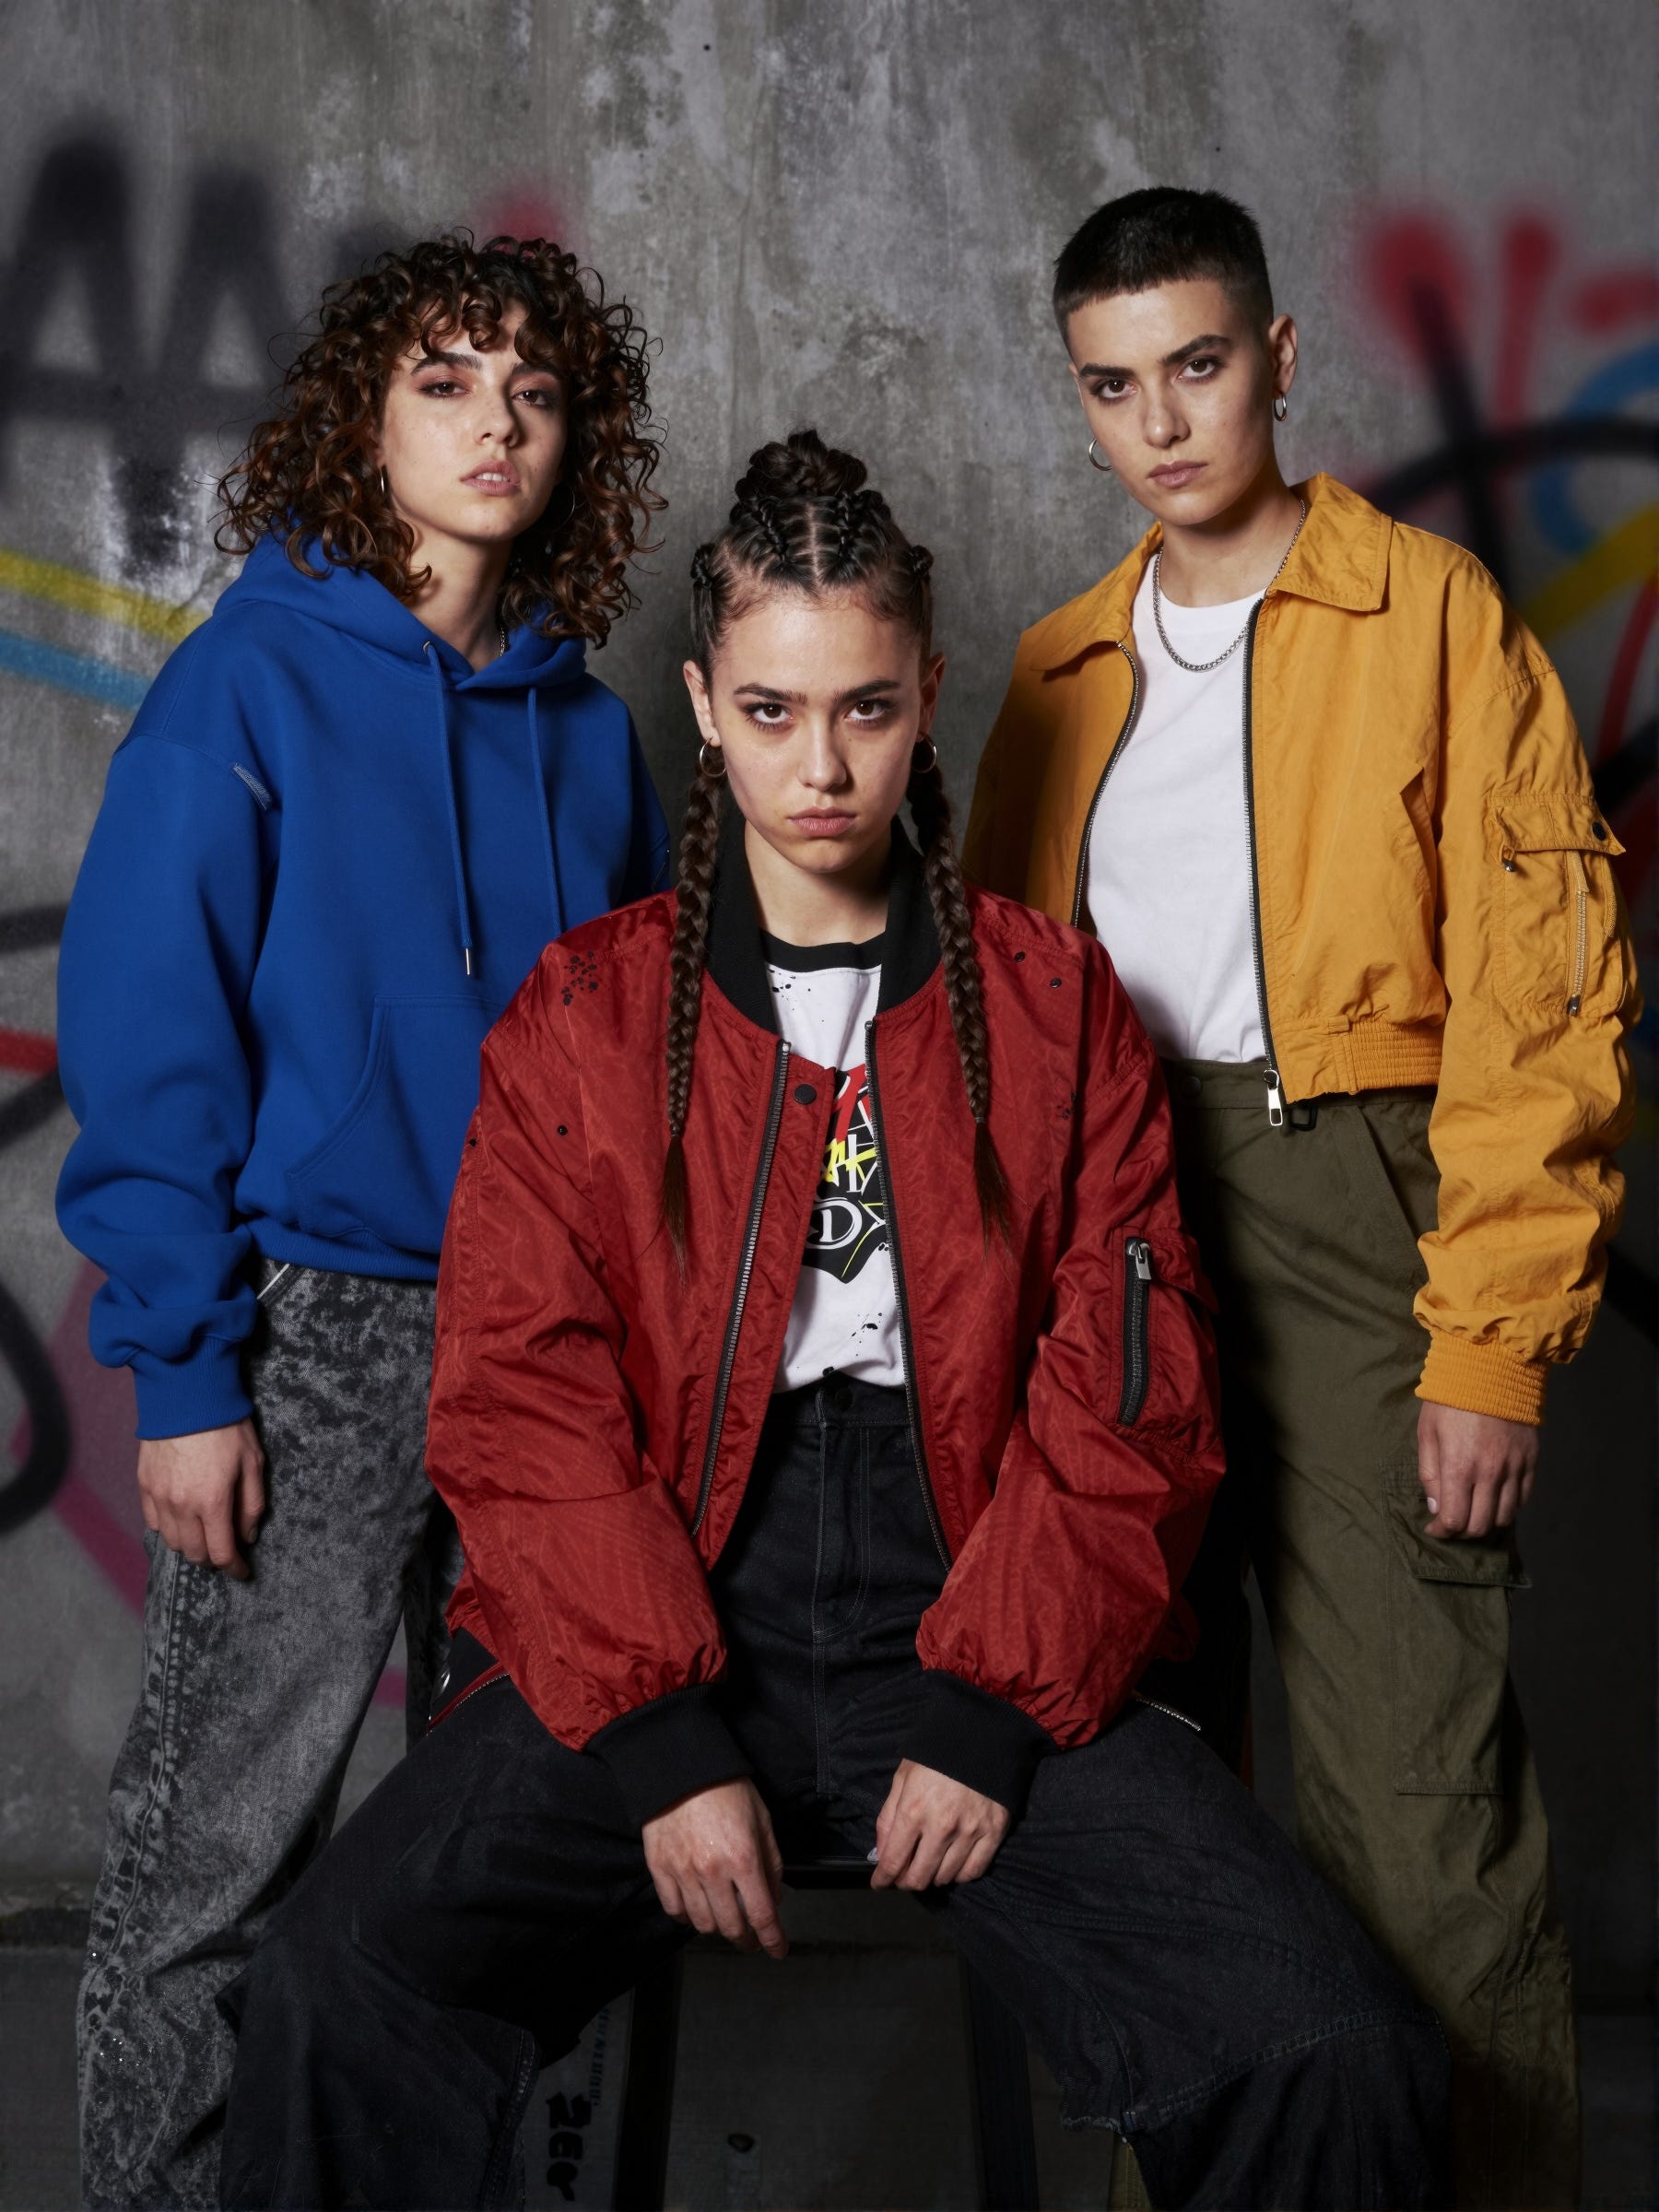
The differences with the Clown Shark KSampler are subtle (more obvious when zoomed in) with better skin detail and a more realistic look.
The image below switches to using DDIM Uniform and a lower number of steps, it is my favourite of the bunch as it has a very natural, real feel and when zoomed in has a lot of detail.
Further Upscaling
Everything so far has just used latent upscaling and dual-sampling, for completeness I have included a new version of the image above after passing it through UltimateSD as a final stage to take the output to 10MP.
Interesting to note the additional detailing on the background that UltimateSD has added, and also to comment the upscale in this case was painfully slow!
Model Sampling Aura Flow
The Model Sampling Aura Flow node used int he Z-Image workflow dynamically adjusts sampling steps (the ‘shift’) for better composition during early steps versus detail in later steps. For Z-Image it defaults to 3 but can be adjusted. Some have suggested pushing it to a higher value, as high as 7, allows for more creativity.
My experience so far is that increasing the value does indeed change things but it also seems to have a negative impact on image quality in some cases as the value goes up. The two images below use the exact same workflow, settings and seed, the only difference being the Aura Flow shift. In the first case it is set to 7, in the second image it is set to the default value of 3.
The higher value has led to an image that is somewhat washed out with limited skin detail, perhaps a result of the composition steps being given too much focus due to the shift. Requires more experimentation but my comment so far is use with caution.


LoRAs and FineTunes
Given the relatively small size of Z-Image Turbo the ability to train LoRAs and create finetunes is far more practical than with the larger models. The Ostris AI Toolkit already includes options for Z-Image Turbo, with LoRAs and finetunes already appearing. I am intending to look at creating some experimental LoRAs using Ostris’s AI Tookit on Runpod when time allows.
Bonus: Intel Arc GPU
A nice feature of the Z-Image model given its size, is that it can run on ComfyUI with an Intel Arc GPU such as a laptop. I’ve experimented with ComfyUI on Intel GPUs previously with little success but with Z-Image I am seeing around 9 seconds per step using the standard simple workflow. For the multi-sampler workflow approach it rises to about 25 seconds per step for the second stage due to the increased image size. Using different samplers will affect these timings, but it is usable.
Obviously I would not use it as a primary generation platform but it is useful to know that you can create some images on the move.
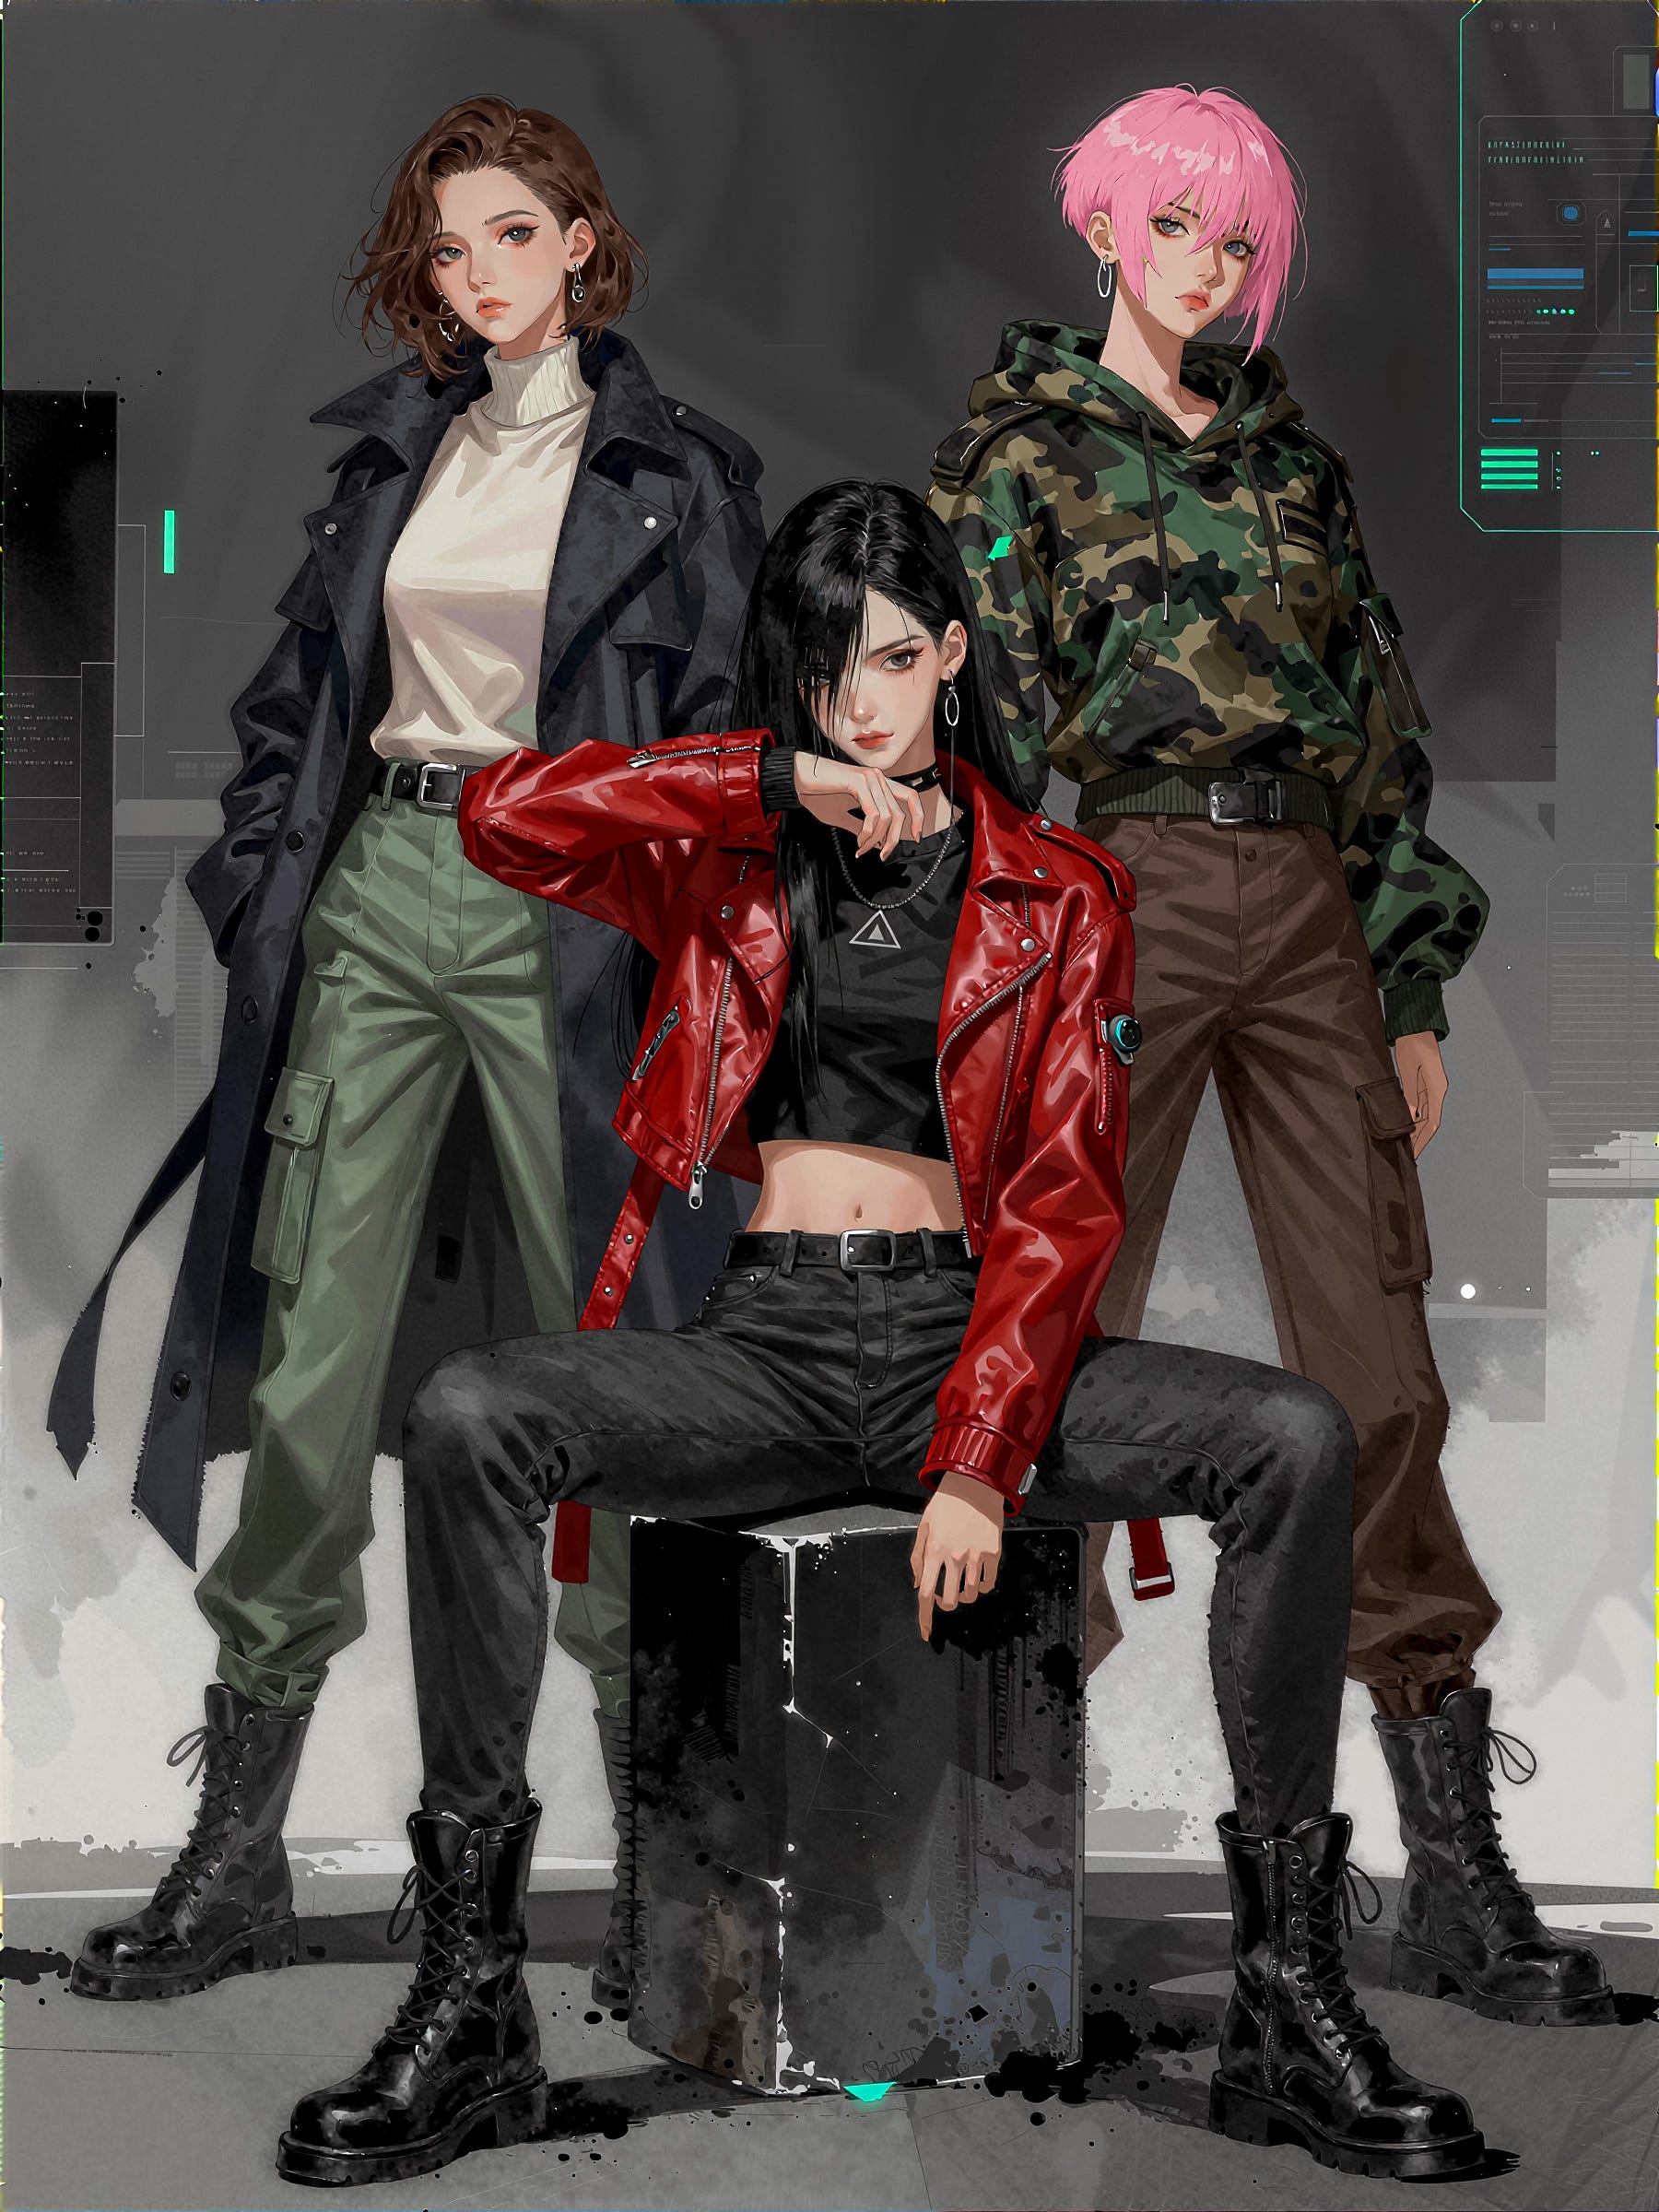
More than Photorealistic?
The main noise around Z-Image Turbo has been photorealism but that doesn’t mean it cannot be used for other styles. The following two examples of anime and watercolour do not use LoRAs or finetunes, they were created using the base model.
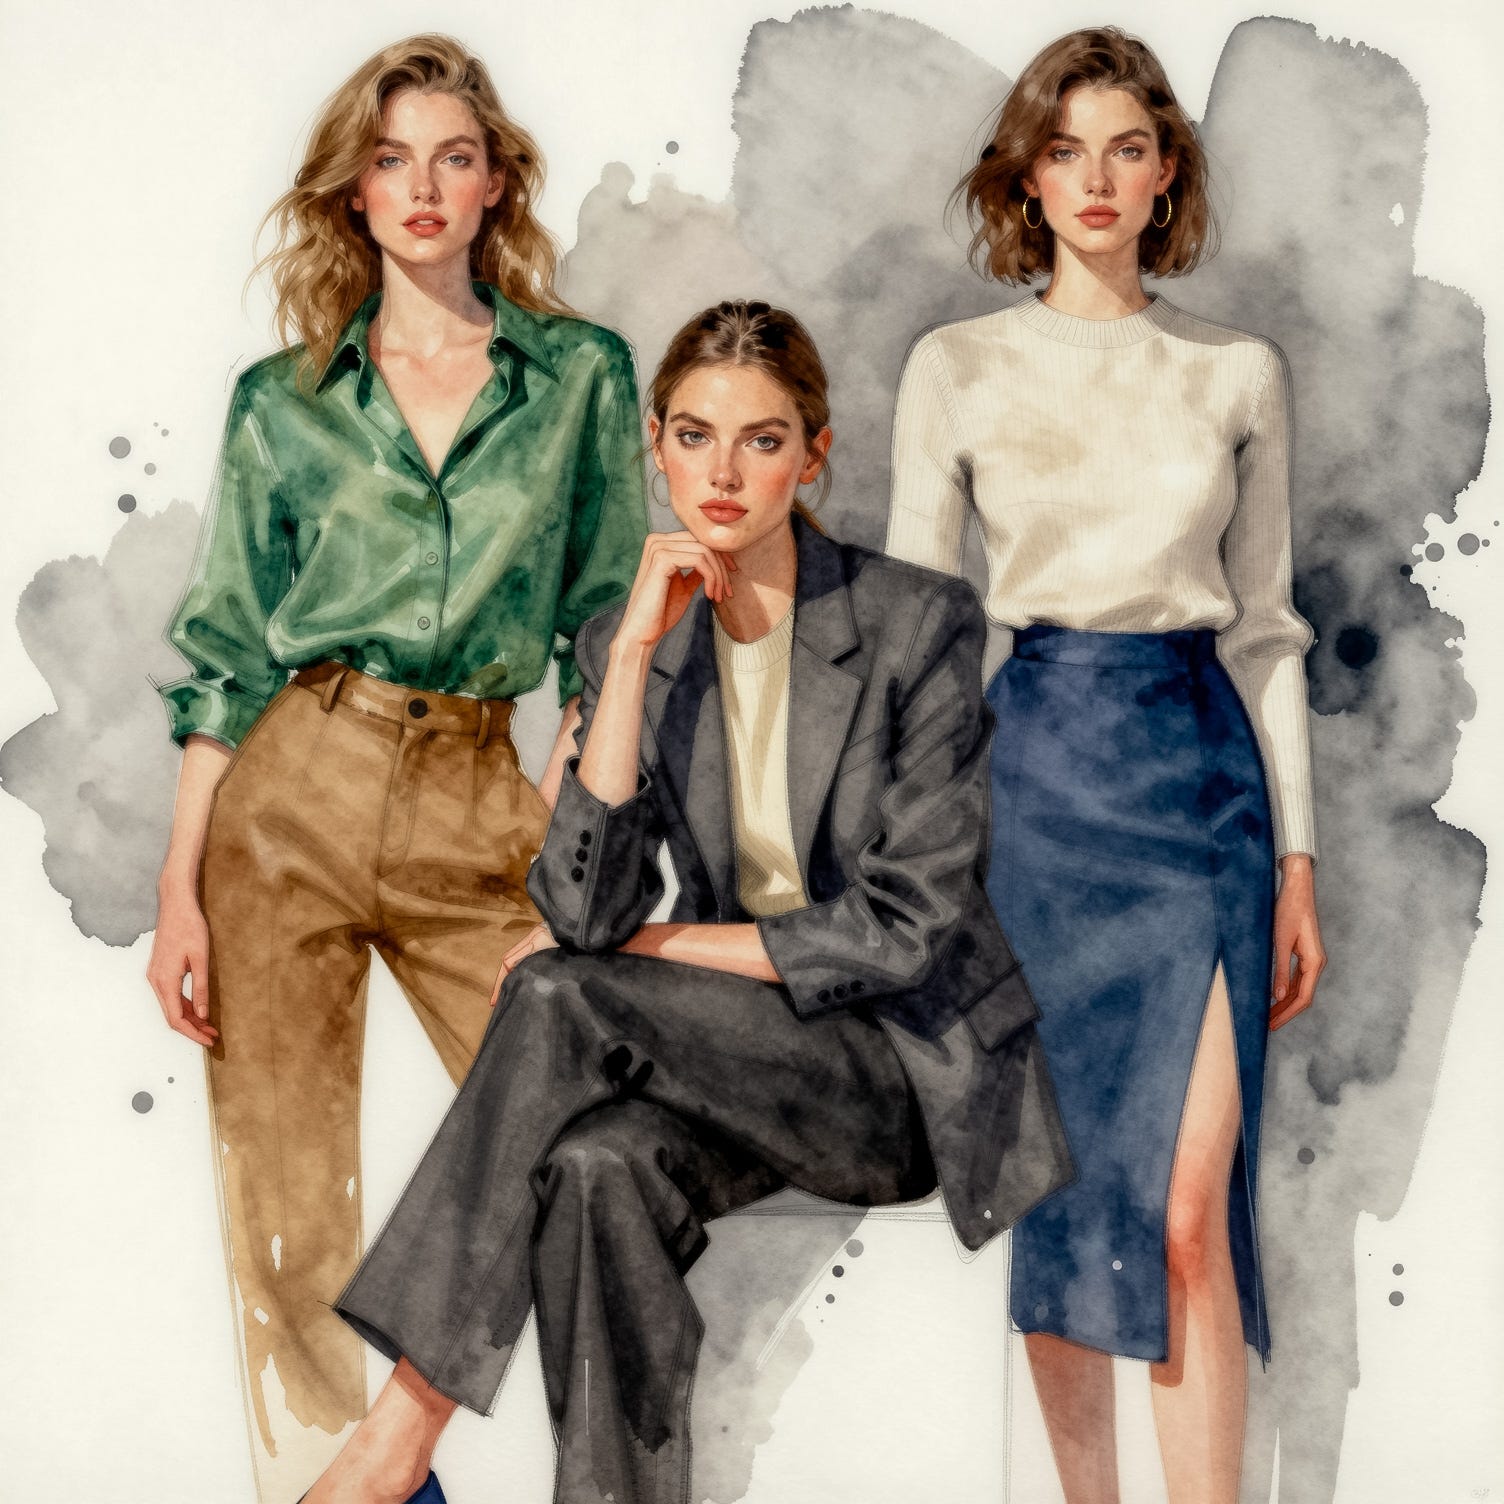
I have done less testing with water colour and haven’t yet found the ideal multi-sampler or Clown Sampler approach.
Final Thoughts
When Z-Image Turbo first appeared I tried a few initial generations and got disappointing results, to the extent I almost discarded it. I am glad I didn’t. After some perseverance, better workflows and switching samplers I found it could generate some very impressive results.
It does have its quirks, sometimes the prompt adherence goes astray and it does seem to be less tolerant of samplers and schedulers with poor results on some generations.
Even when using multi-stage sampling it is still much faster than Qwen Image or Flux.2 Dev, yet produces comparable, if not better, results in its core areas of strength.
Just when it looked like the new models were moving out of the practical (affordable!) reach of many consumer GPUs, Z-Image Turbo has pulled off a small miracle and as more finetunes and LoRAs appear I suspect it will gain further popularity.